
Host Your Stuff - Part IV


How do you do, fellow self-hosting enthusiasts? Today we are doing some actual self-hosting. We'll do it two ways: locally, and remotely. Let's start with the former because all you need for that is a computer in front of you. Windows, macOS, or Linux. No Z/OS from me today, sorry.
I know you hate this, but we need to start with some theoretical background, so let's get that out of the way. For this exercise, we'll use containers. These, well, contain everything you need to run a given thing. You don't have to worry about a bunch of details with containers, like the bane of many a system administrator's existence: dependencies. So, instead of having to install a bunch of things by hand, you download a container from a repository, and let it rip. The container should take care of everything you need.
There are different containerization mechanisms, but we're going to focus on Docker and Podman. Well, technically, we're going to focus on things that can run OCI (Open Container Initiative) images, but, as they say, that's not important right now.

For the sake of simplicity, let's go with Podman. If you're familiar with Docker, and/or already have it installed, you should be good to go, too. Cool? Okay! Head to podman.io and download the version for your operating systems. In my case that's macOS, but it should be a similar process for Windows and Linux.


Podman installation and setup screens.
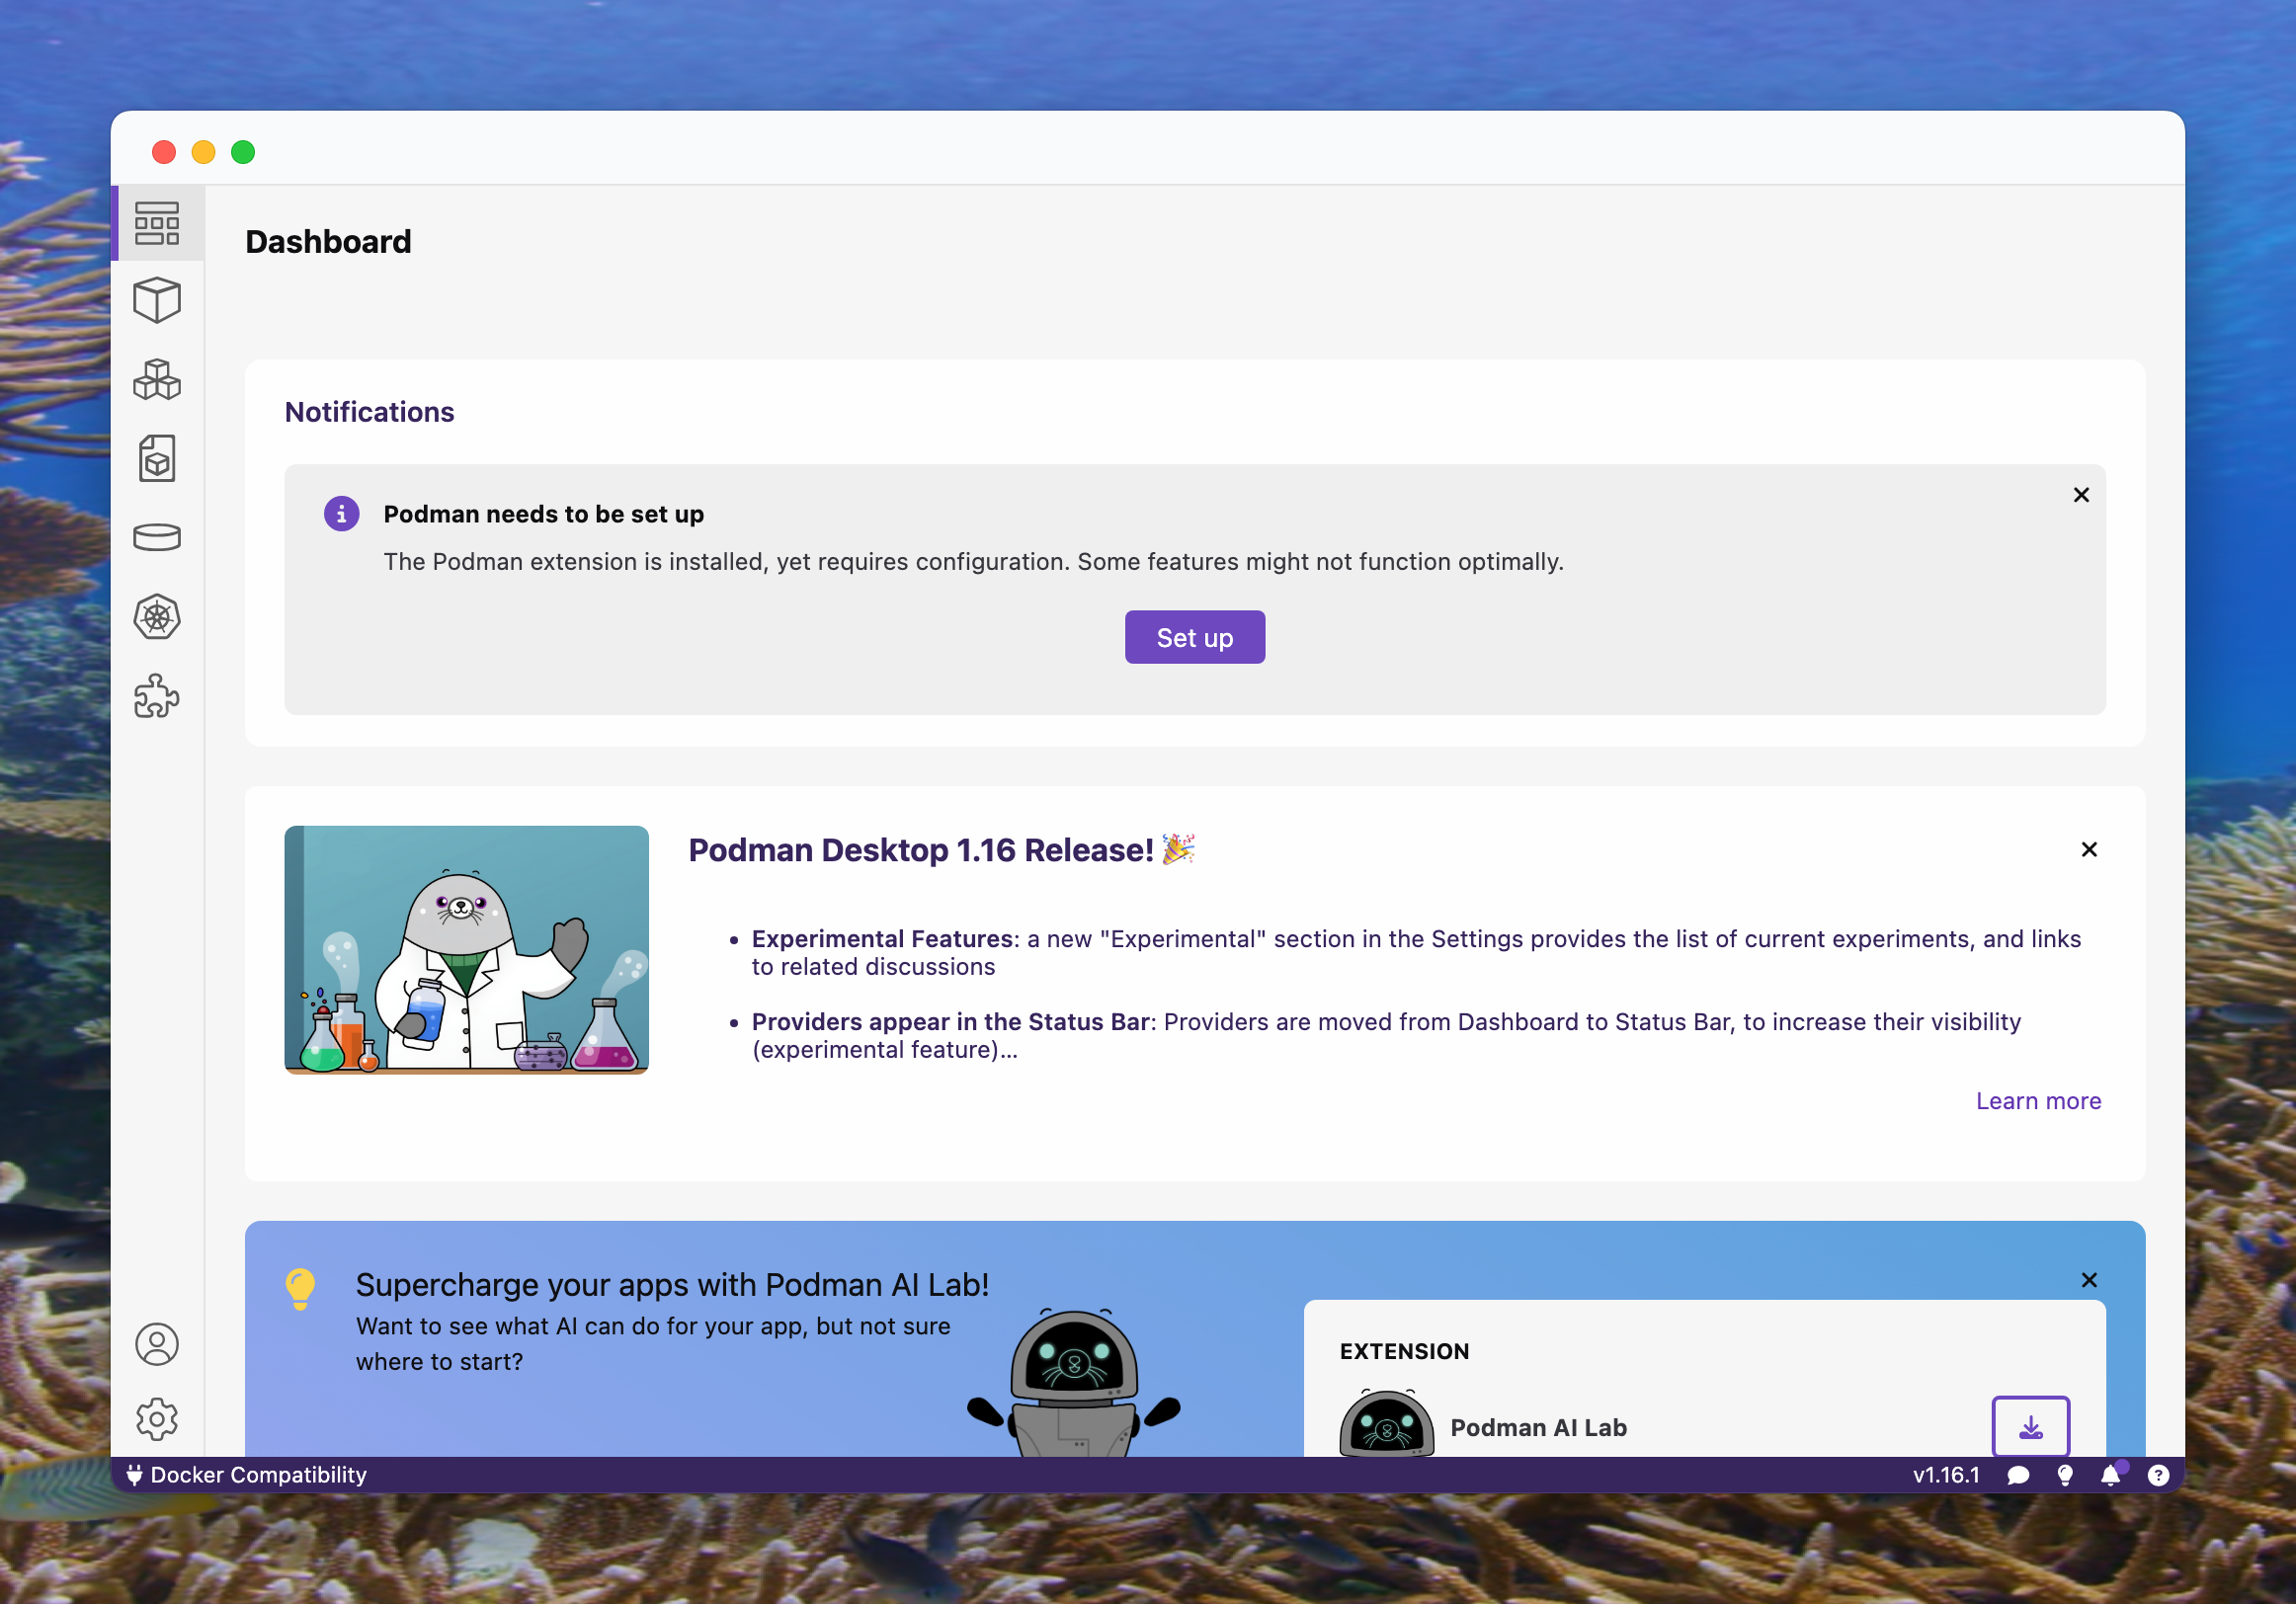
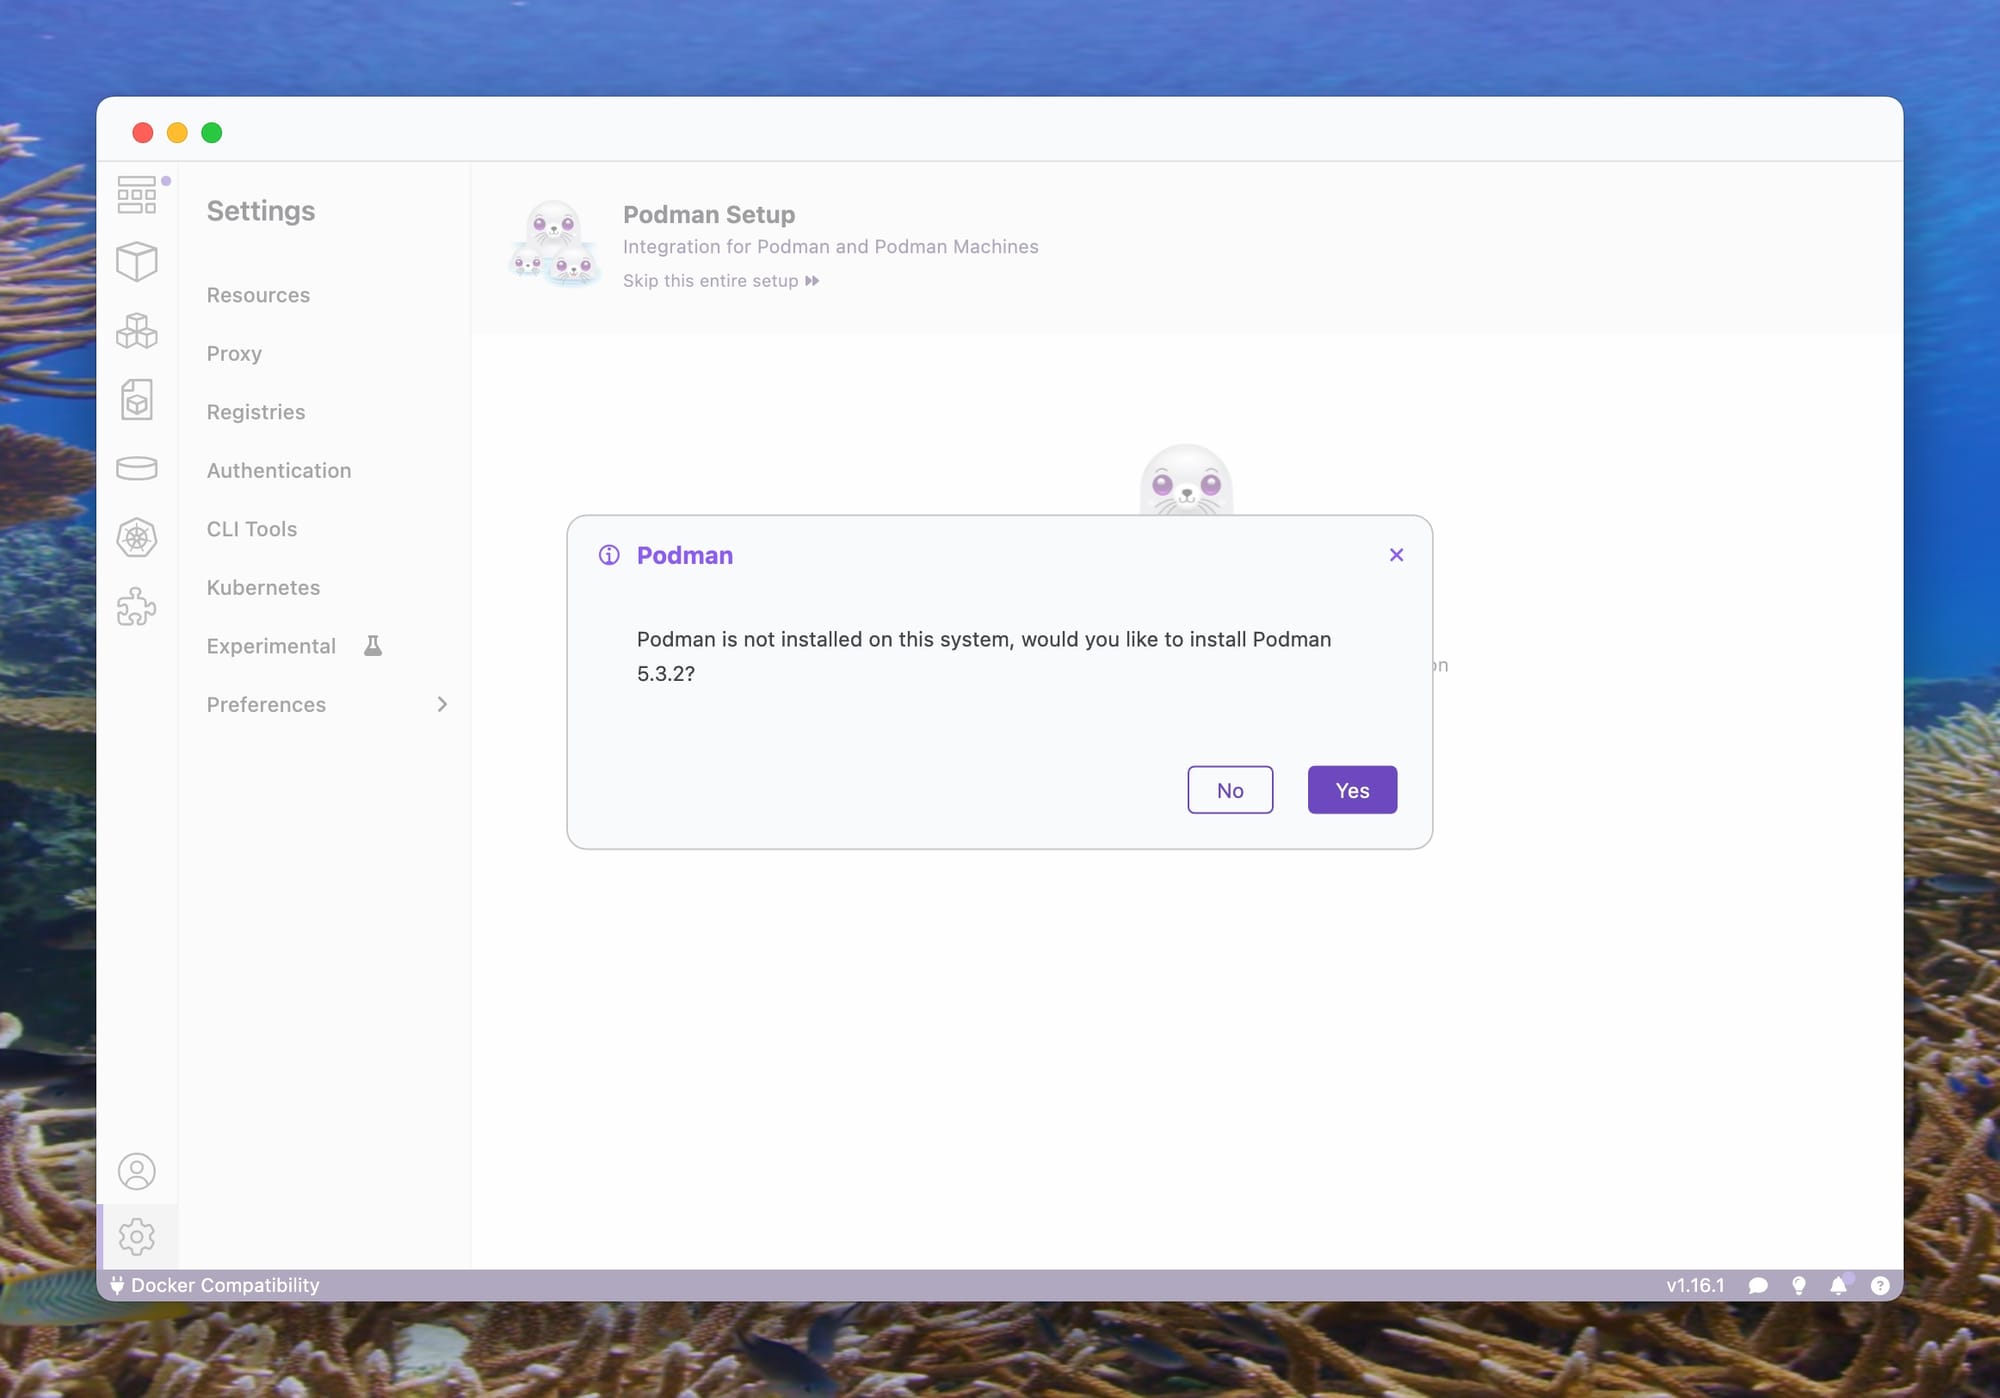
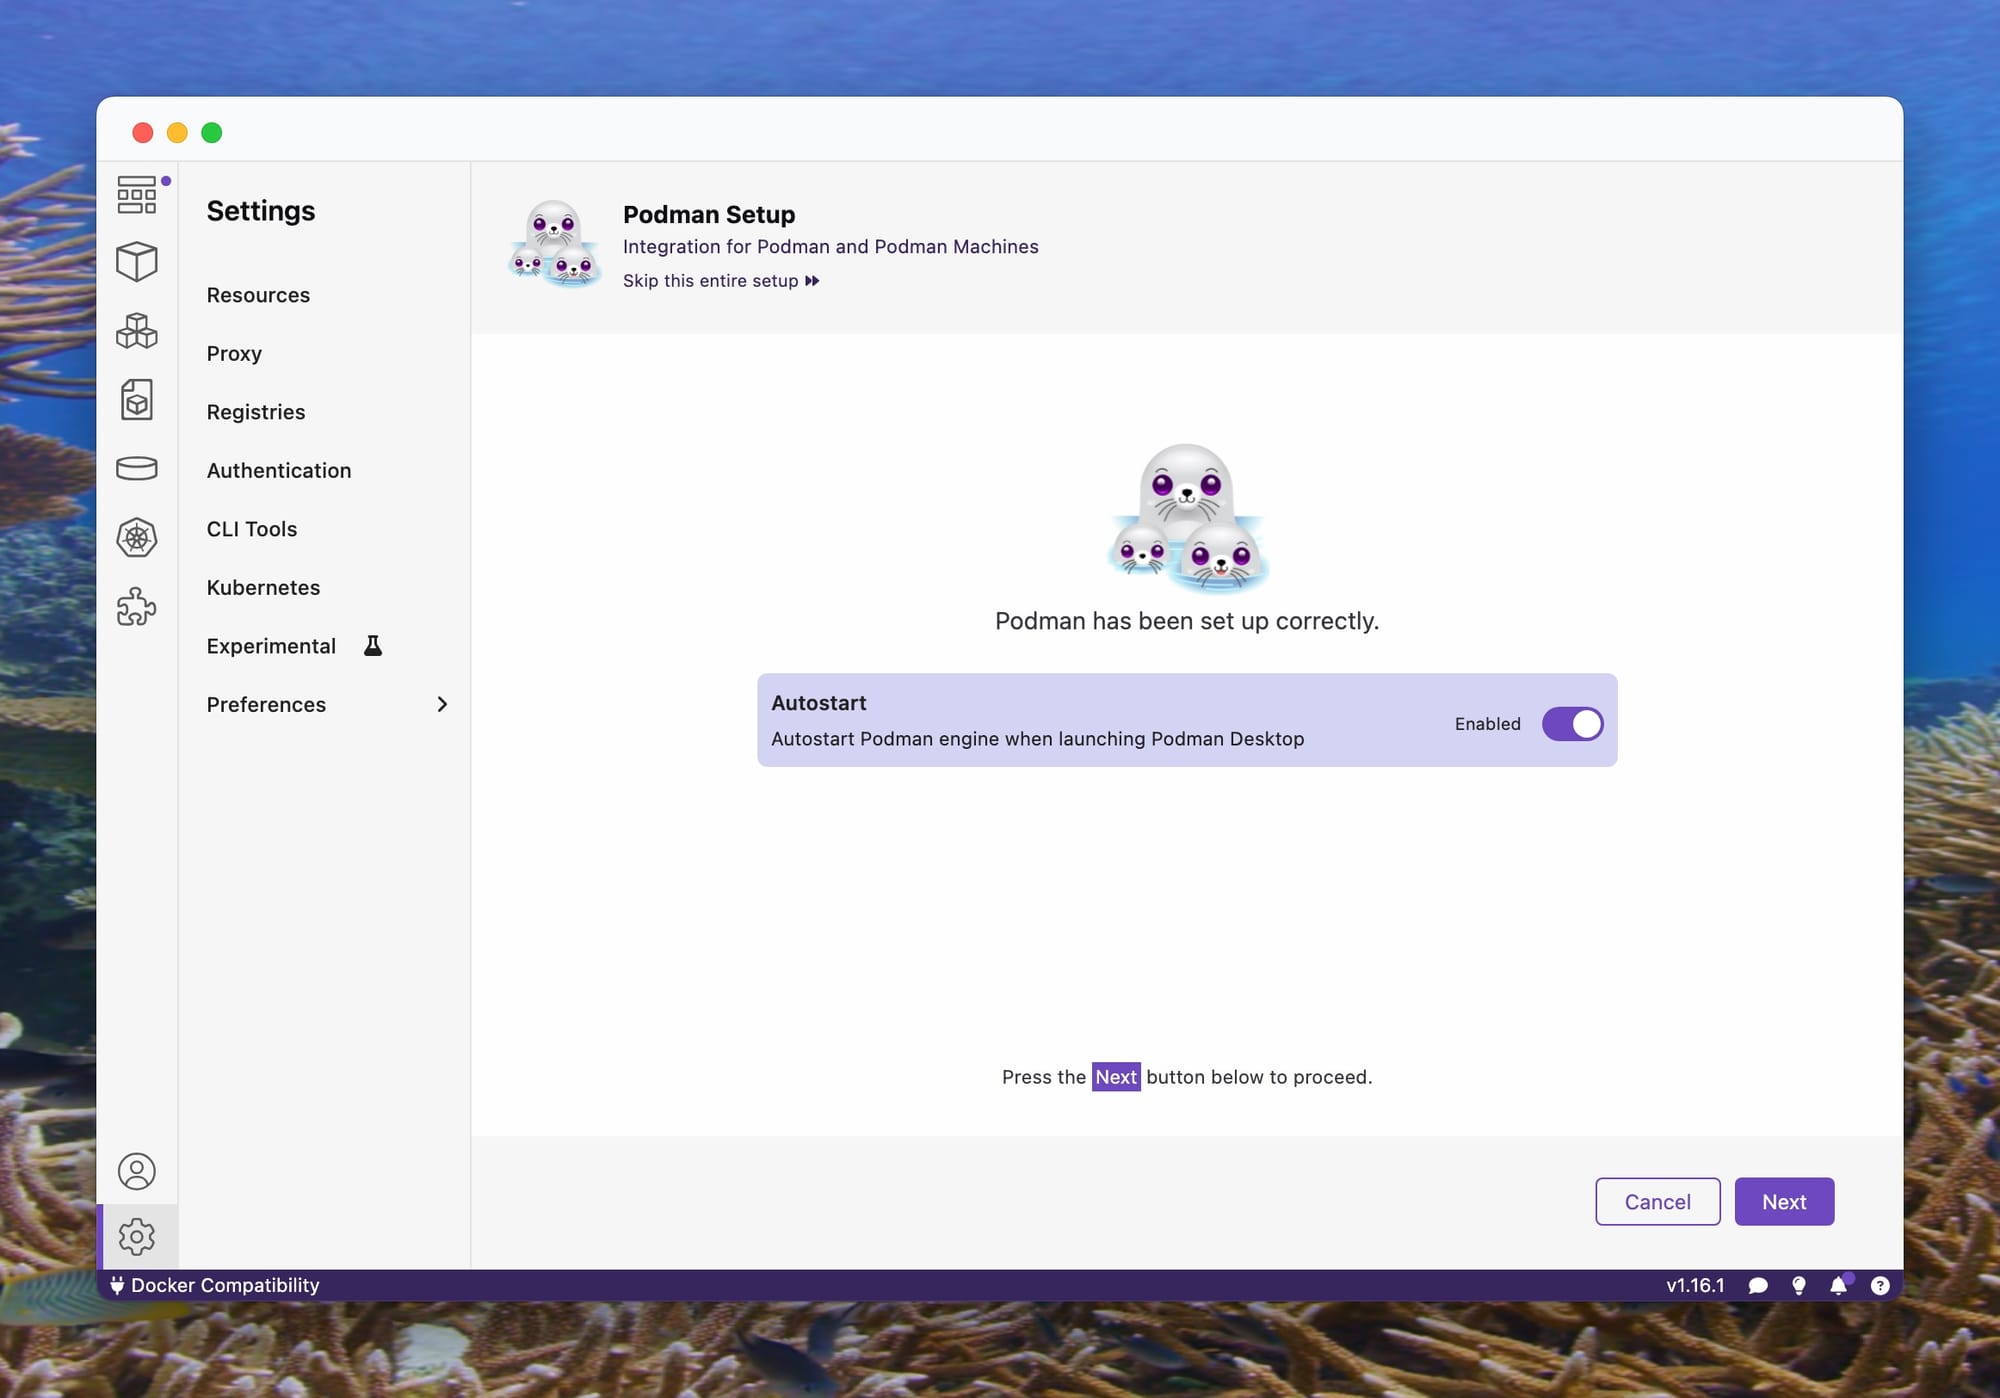
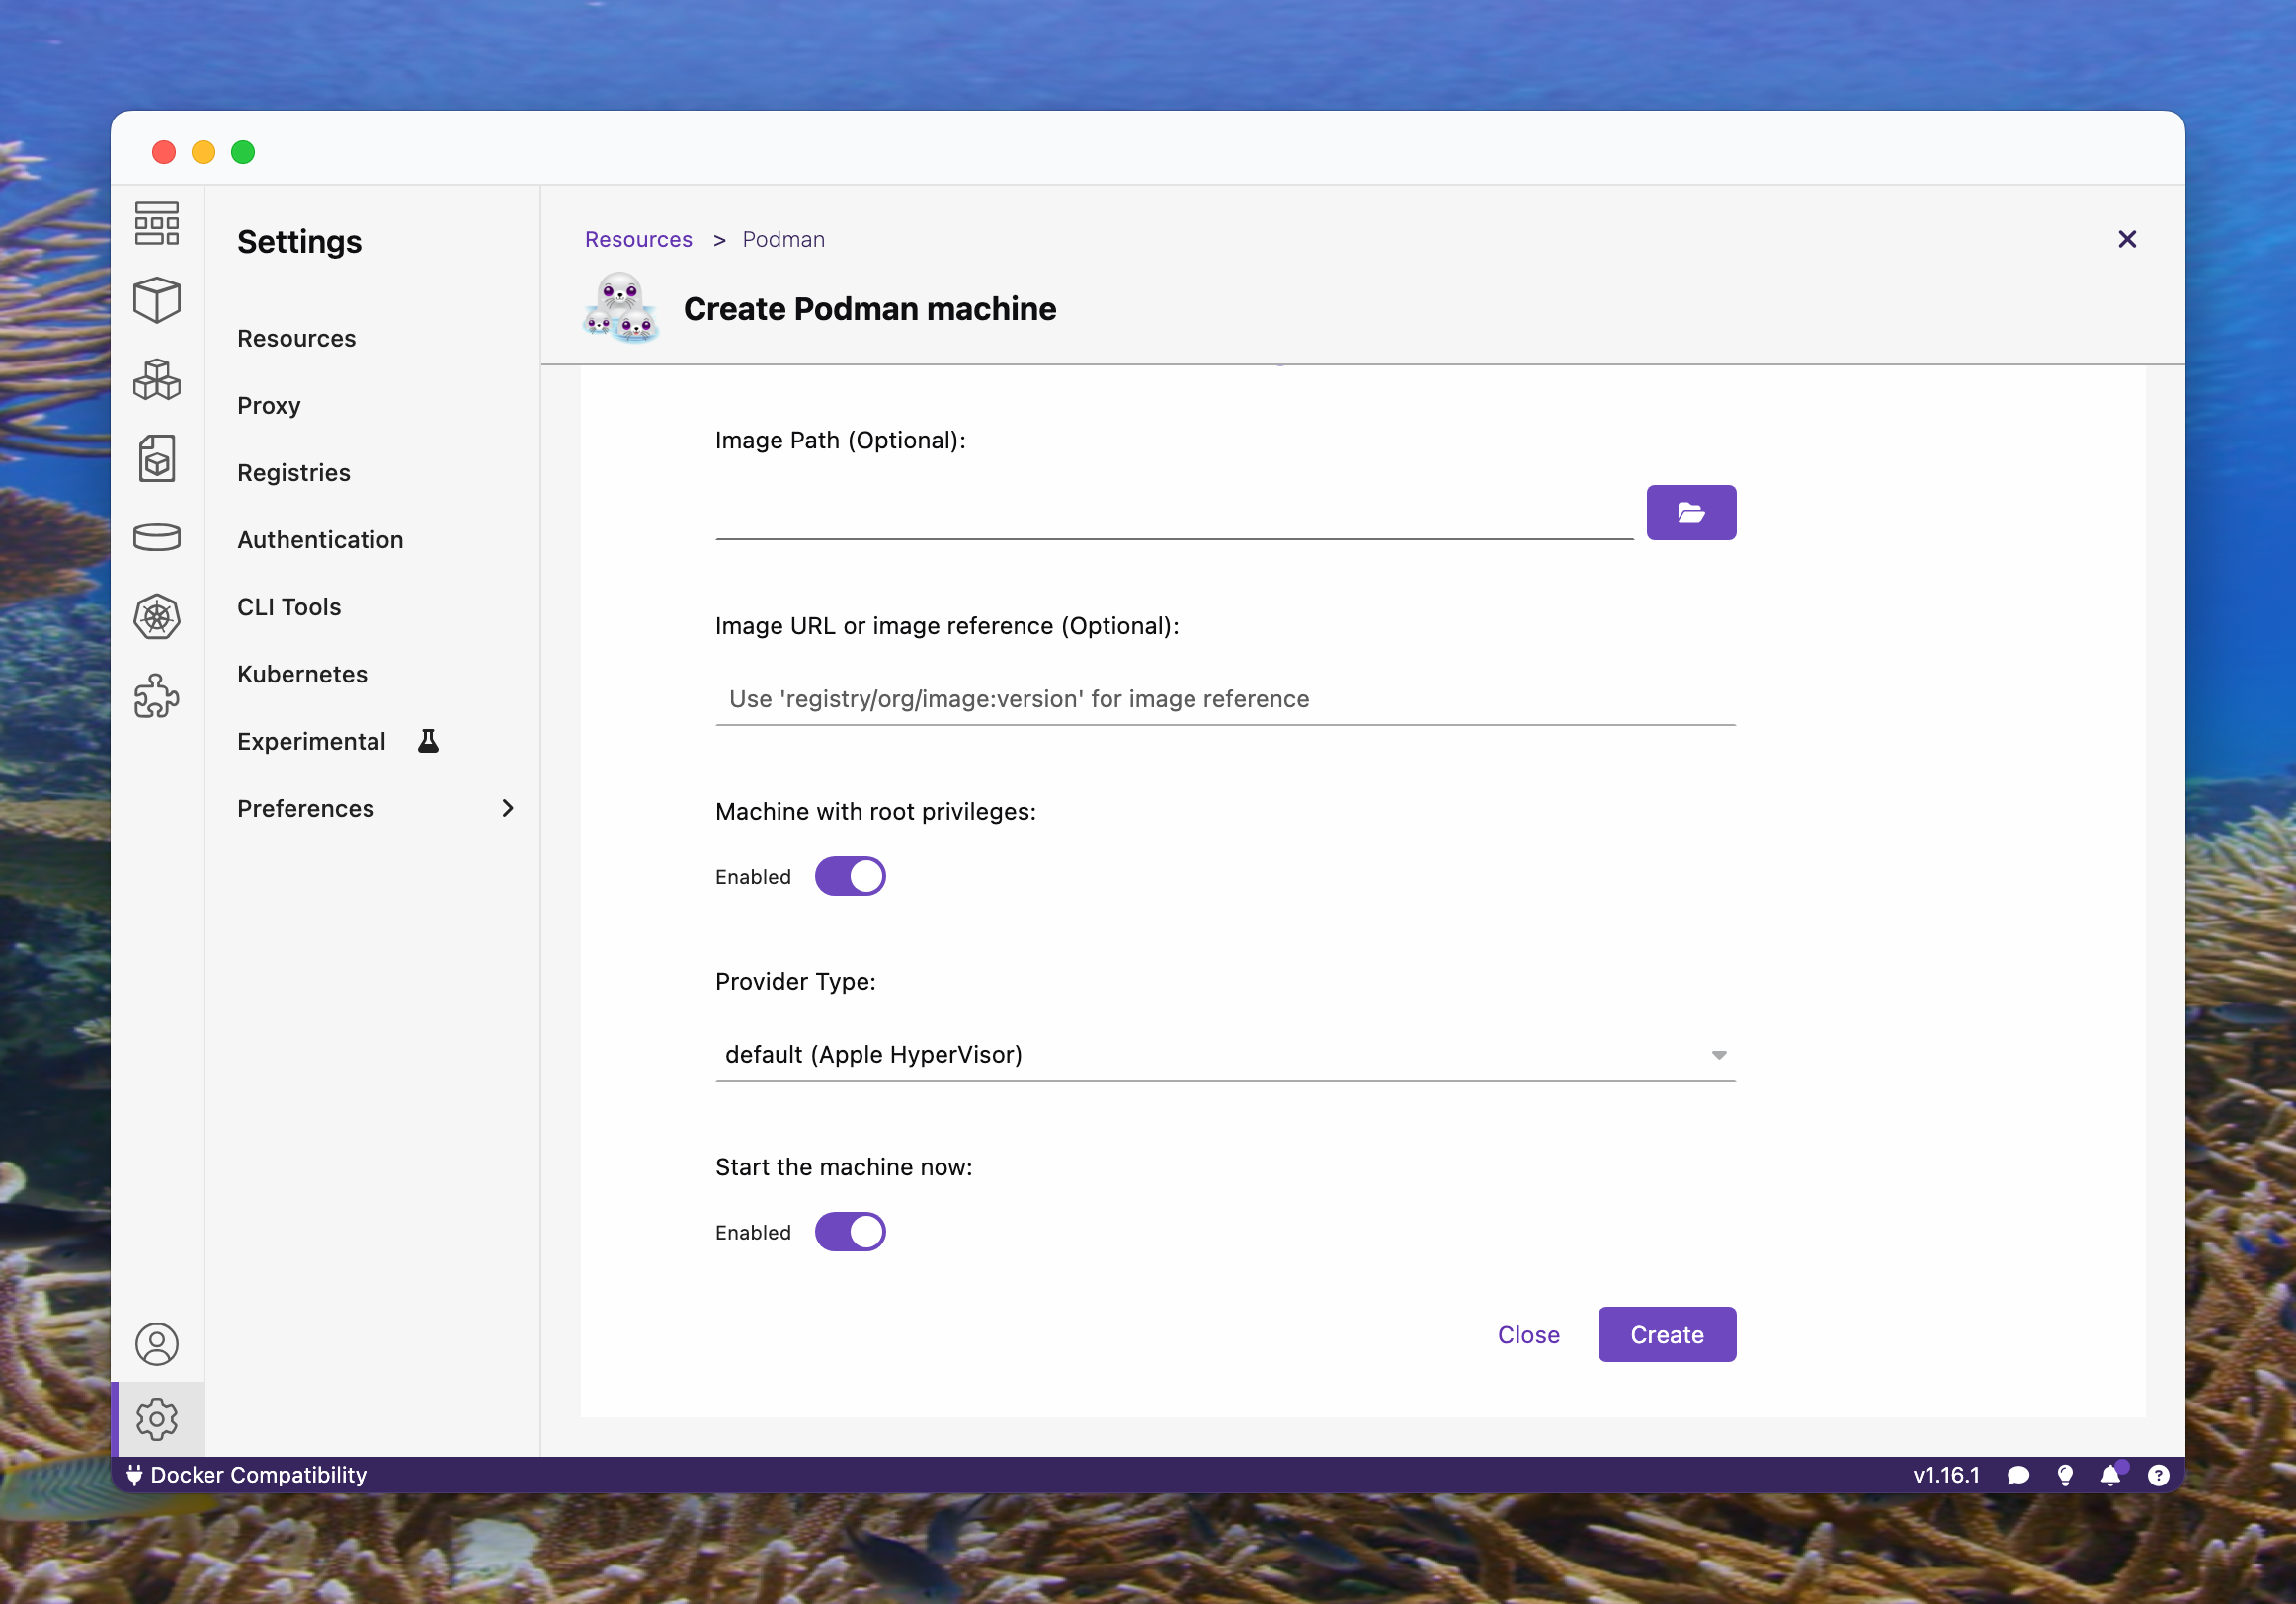
Follow the setup instructions, no need to mess with the defaults. The last step is to create a Podman machine, so do that. When you're done, you should see the dashboard. If not, it's the very first icon:

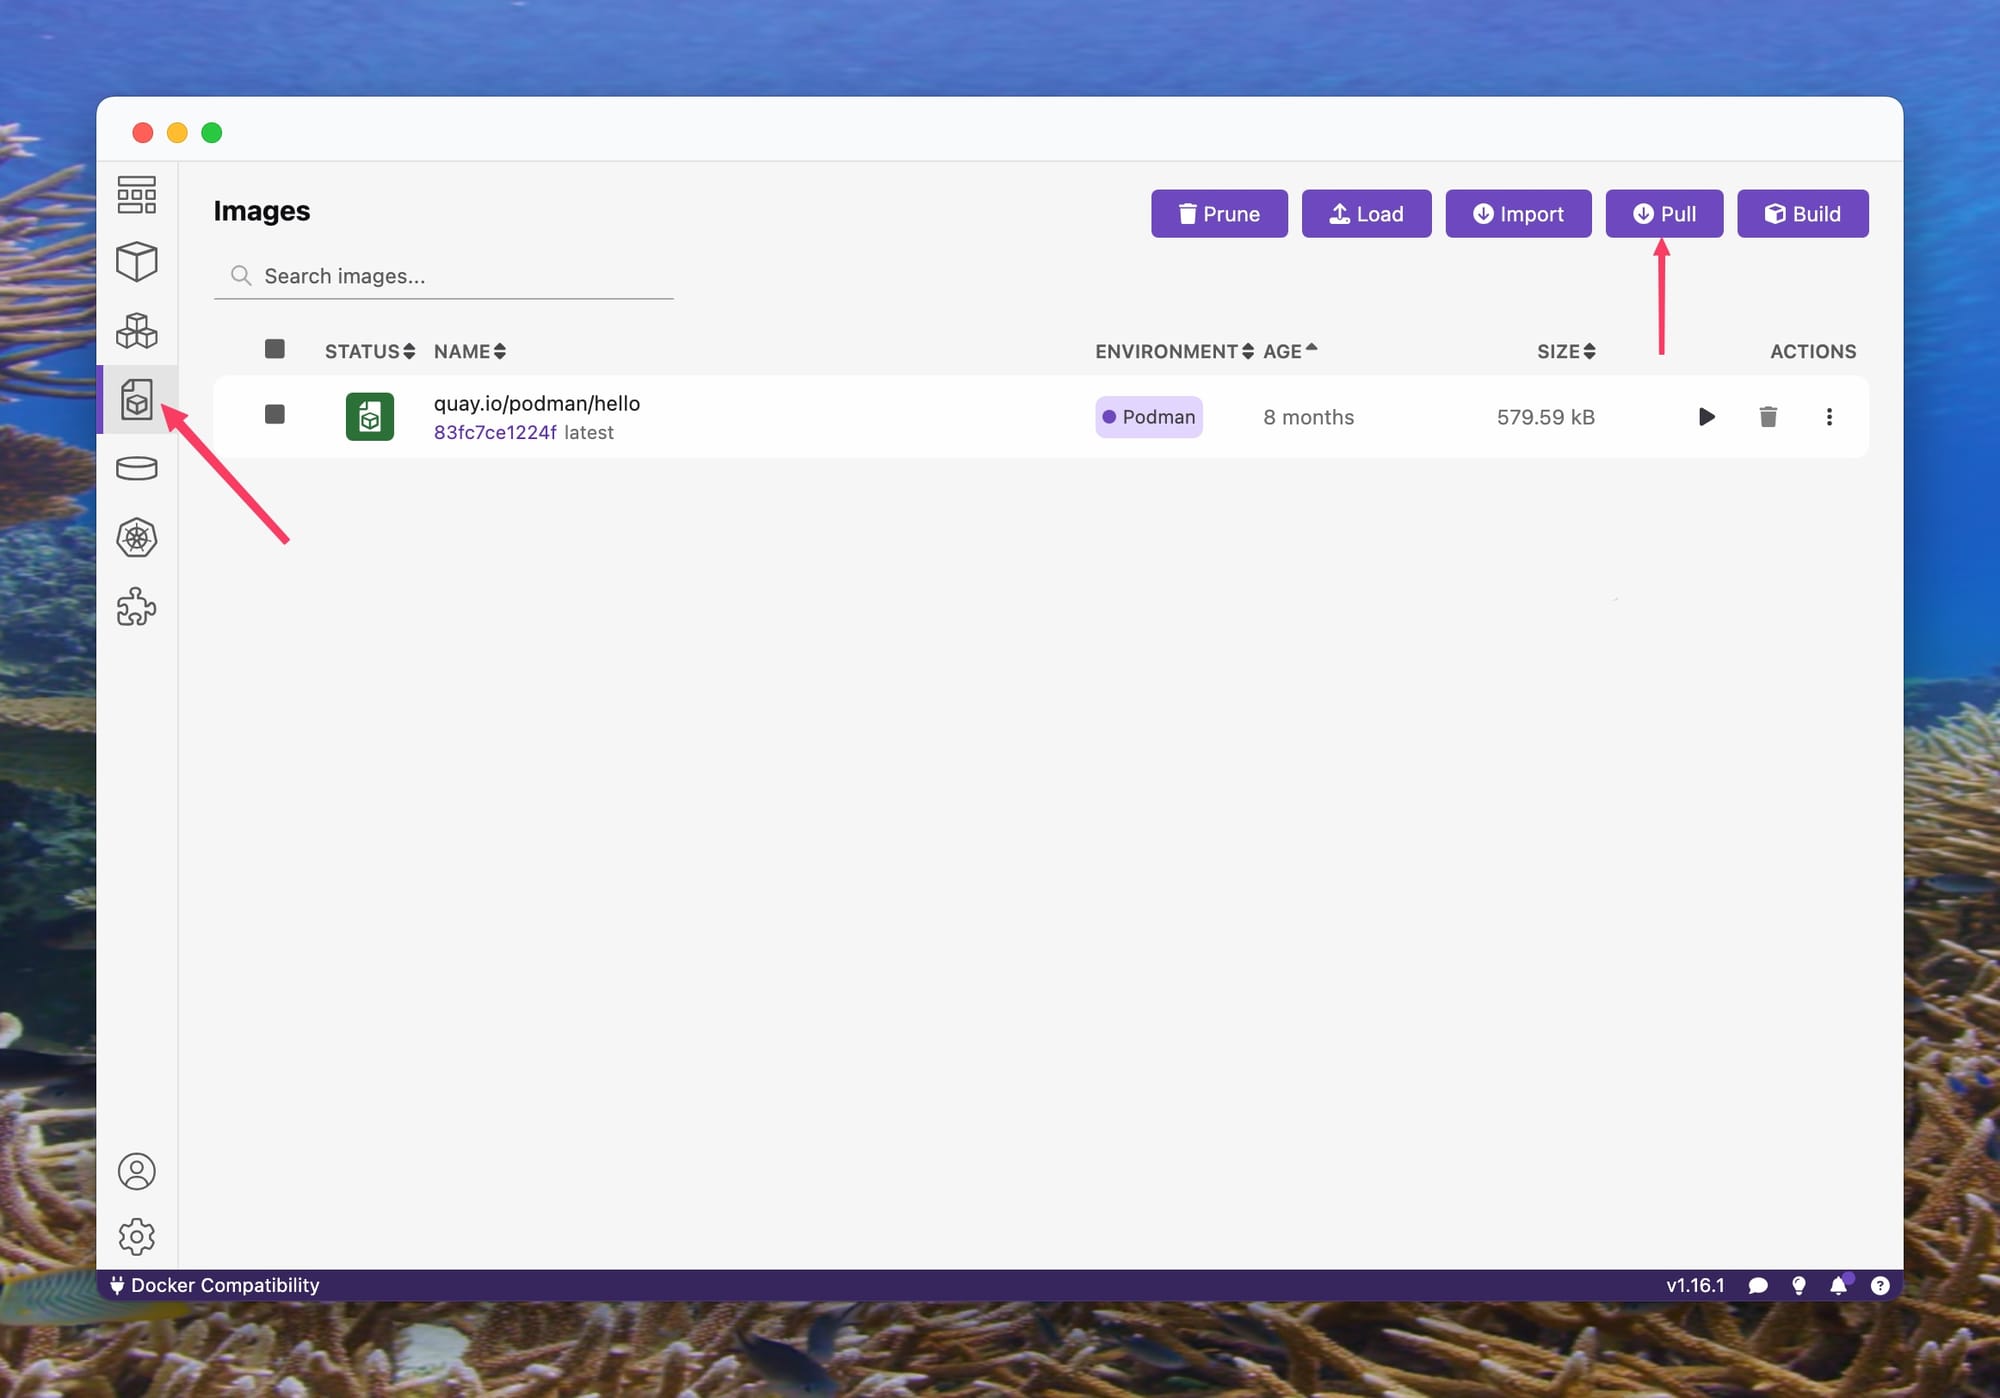
Looks good to me! Let's download an image and run a container now! Yay! Click the "Images" icon on the left, and hit "Pull", thusly:
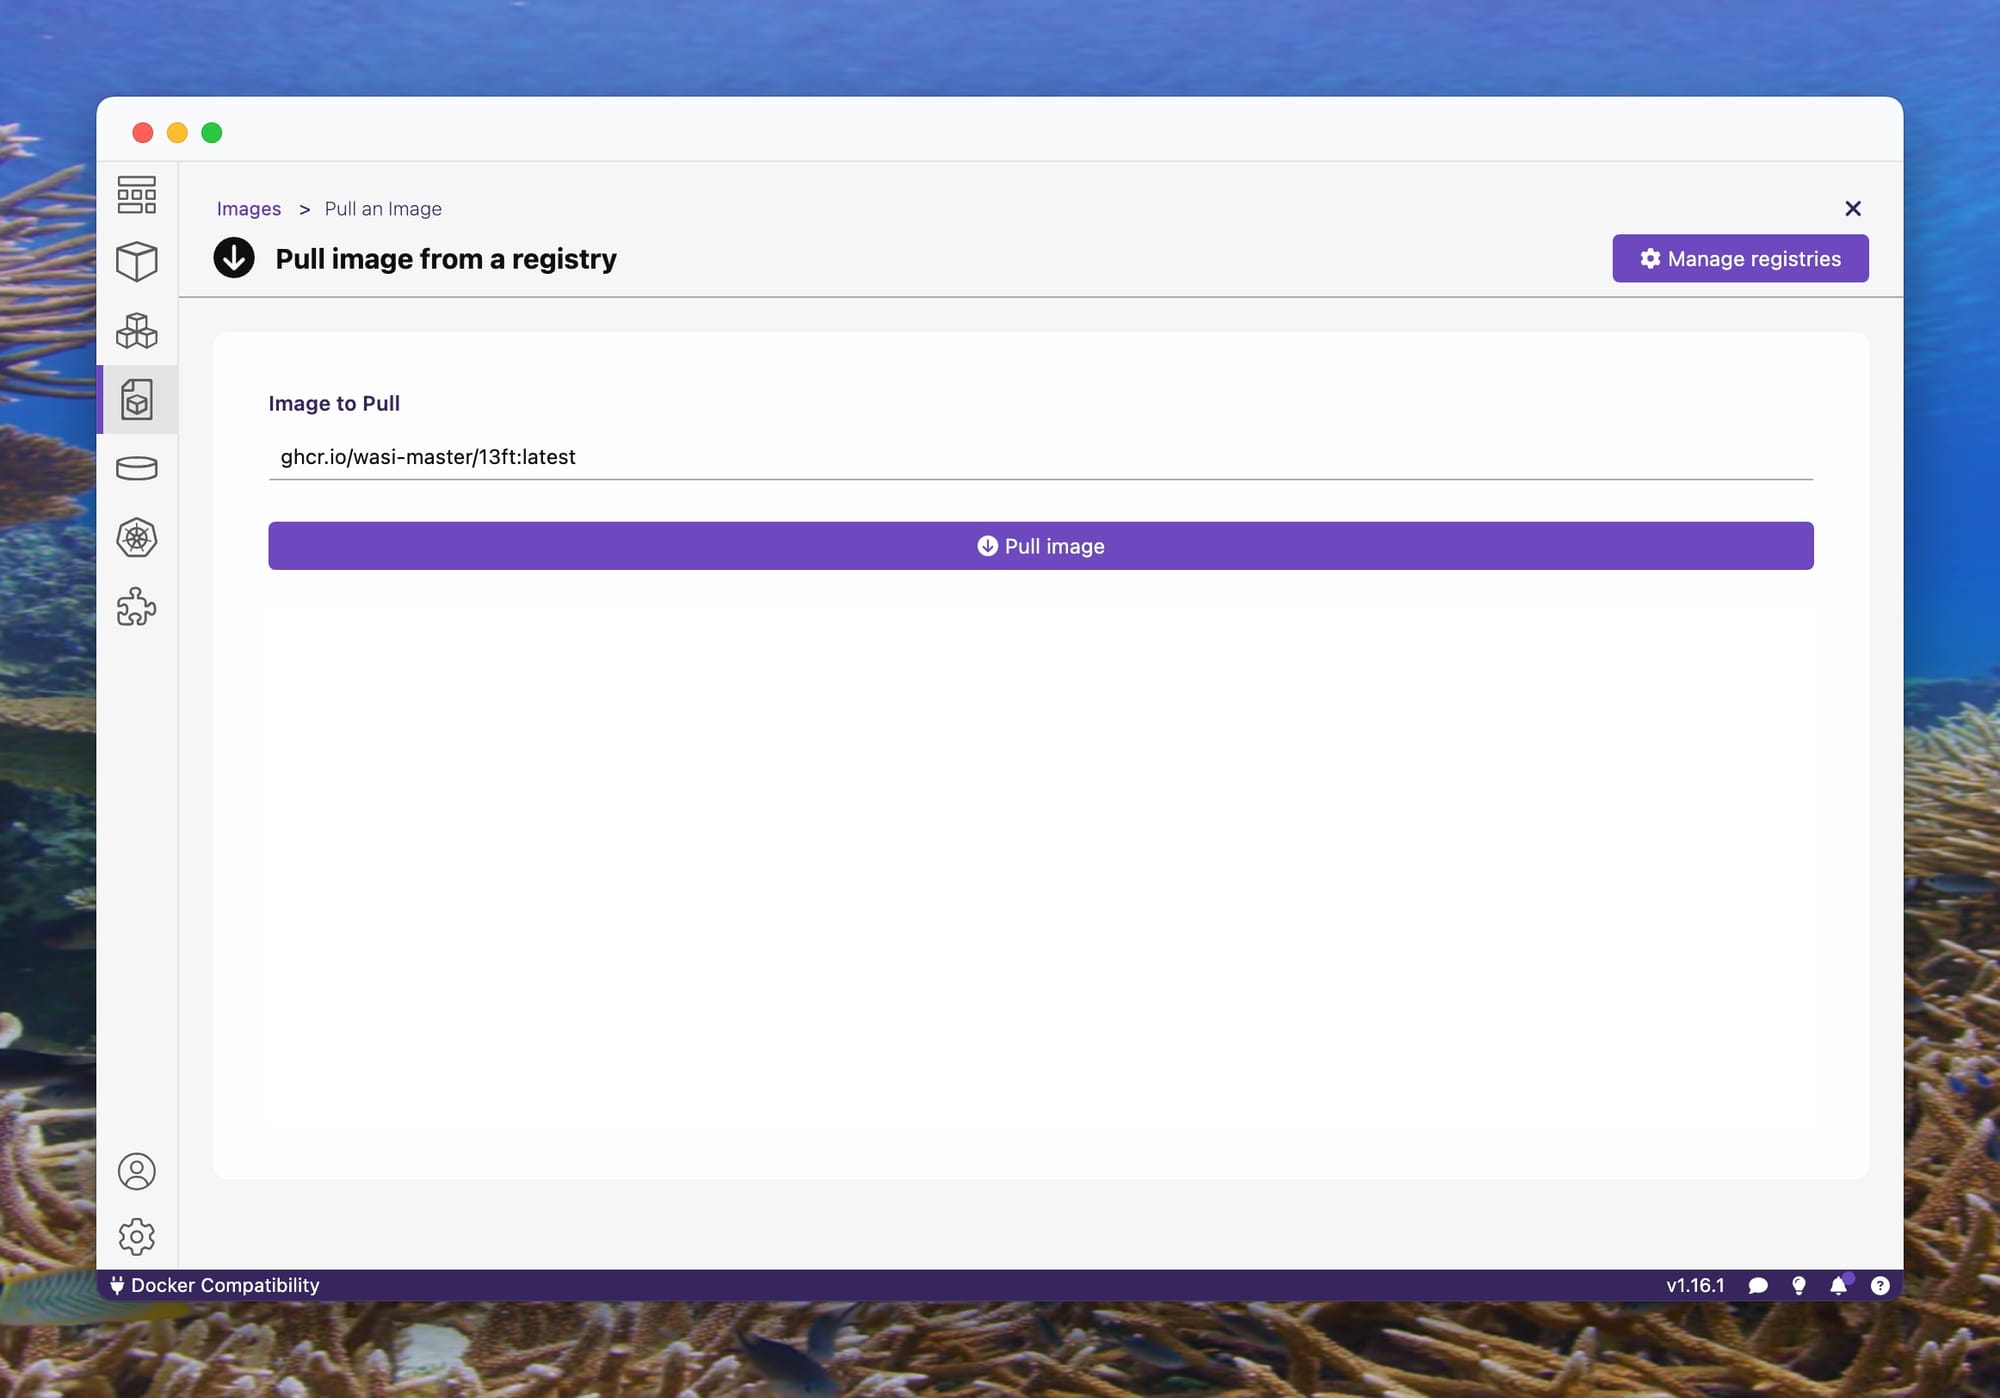
Under "Image to Pull" type ghcr.io/wasi-master/13ft:latest , and click "Pull image":
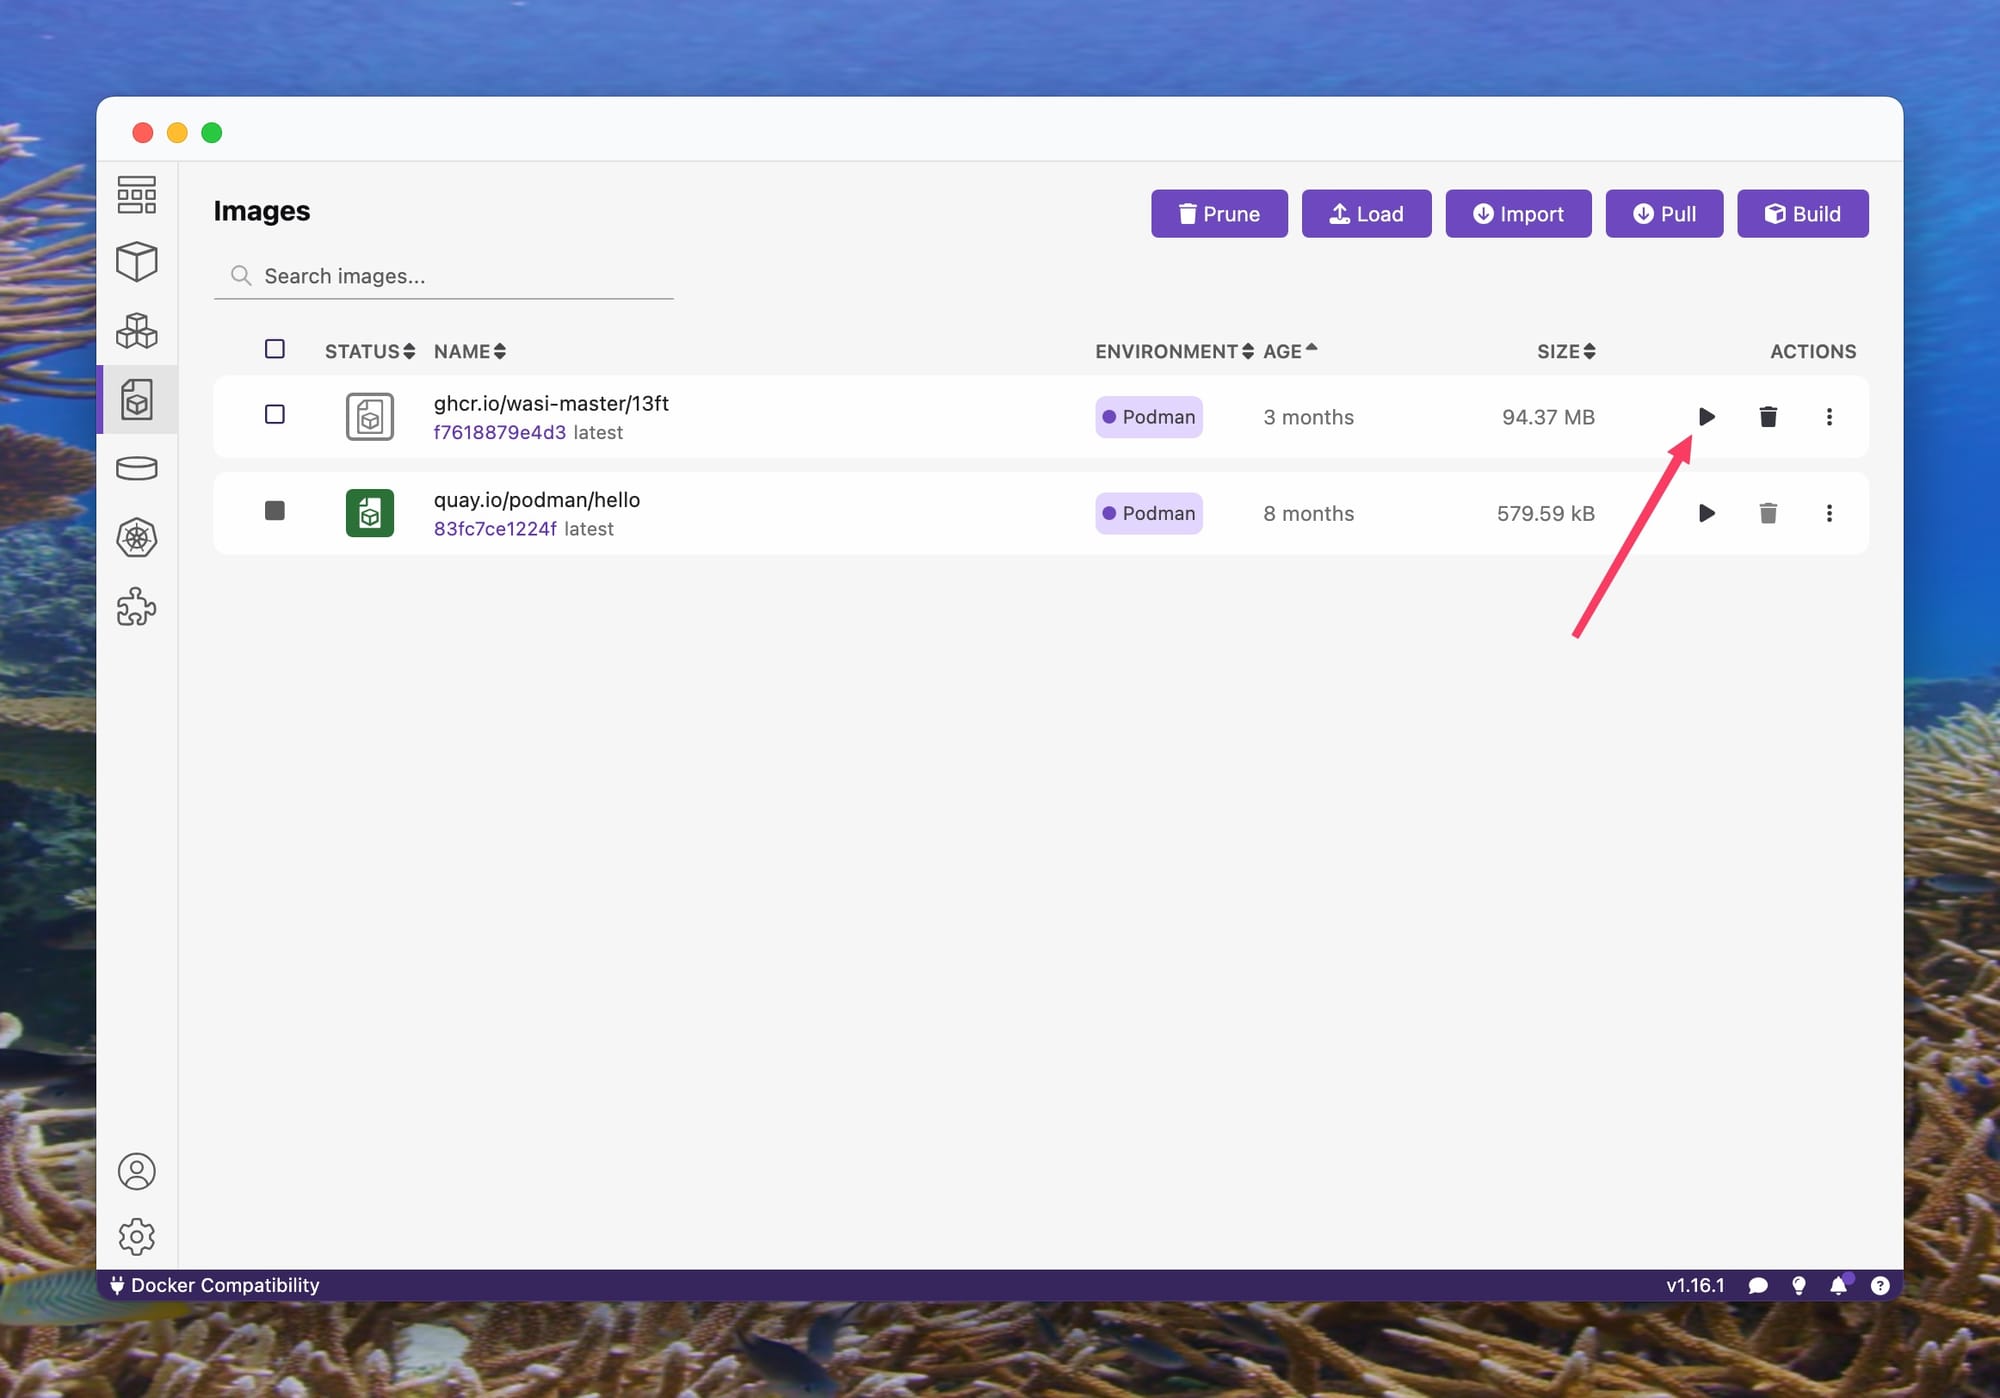
Click "Done", and hit that "Play" button!
Leave everything as is for now. Just hit the "Start Container" button:

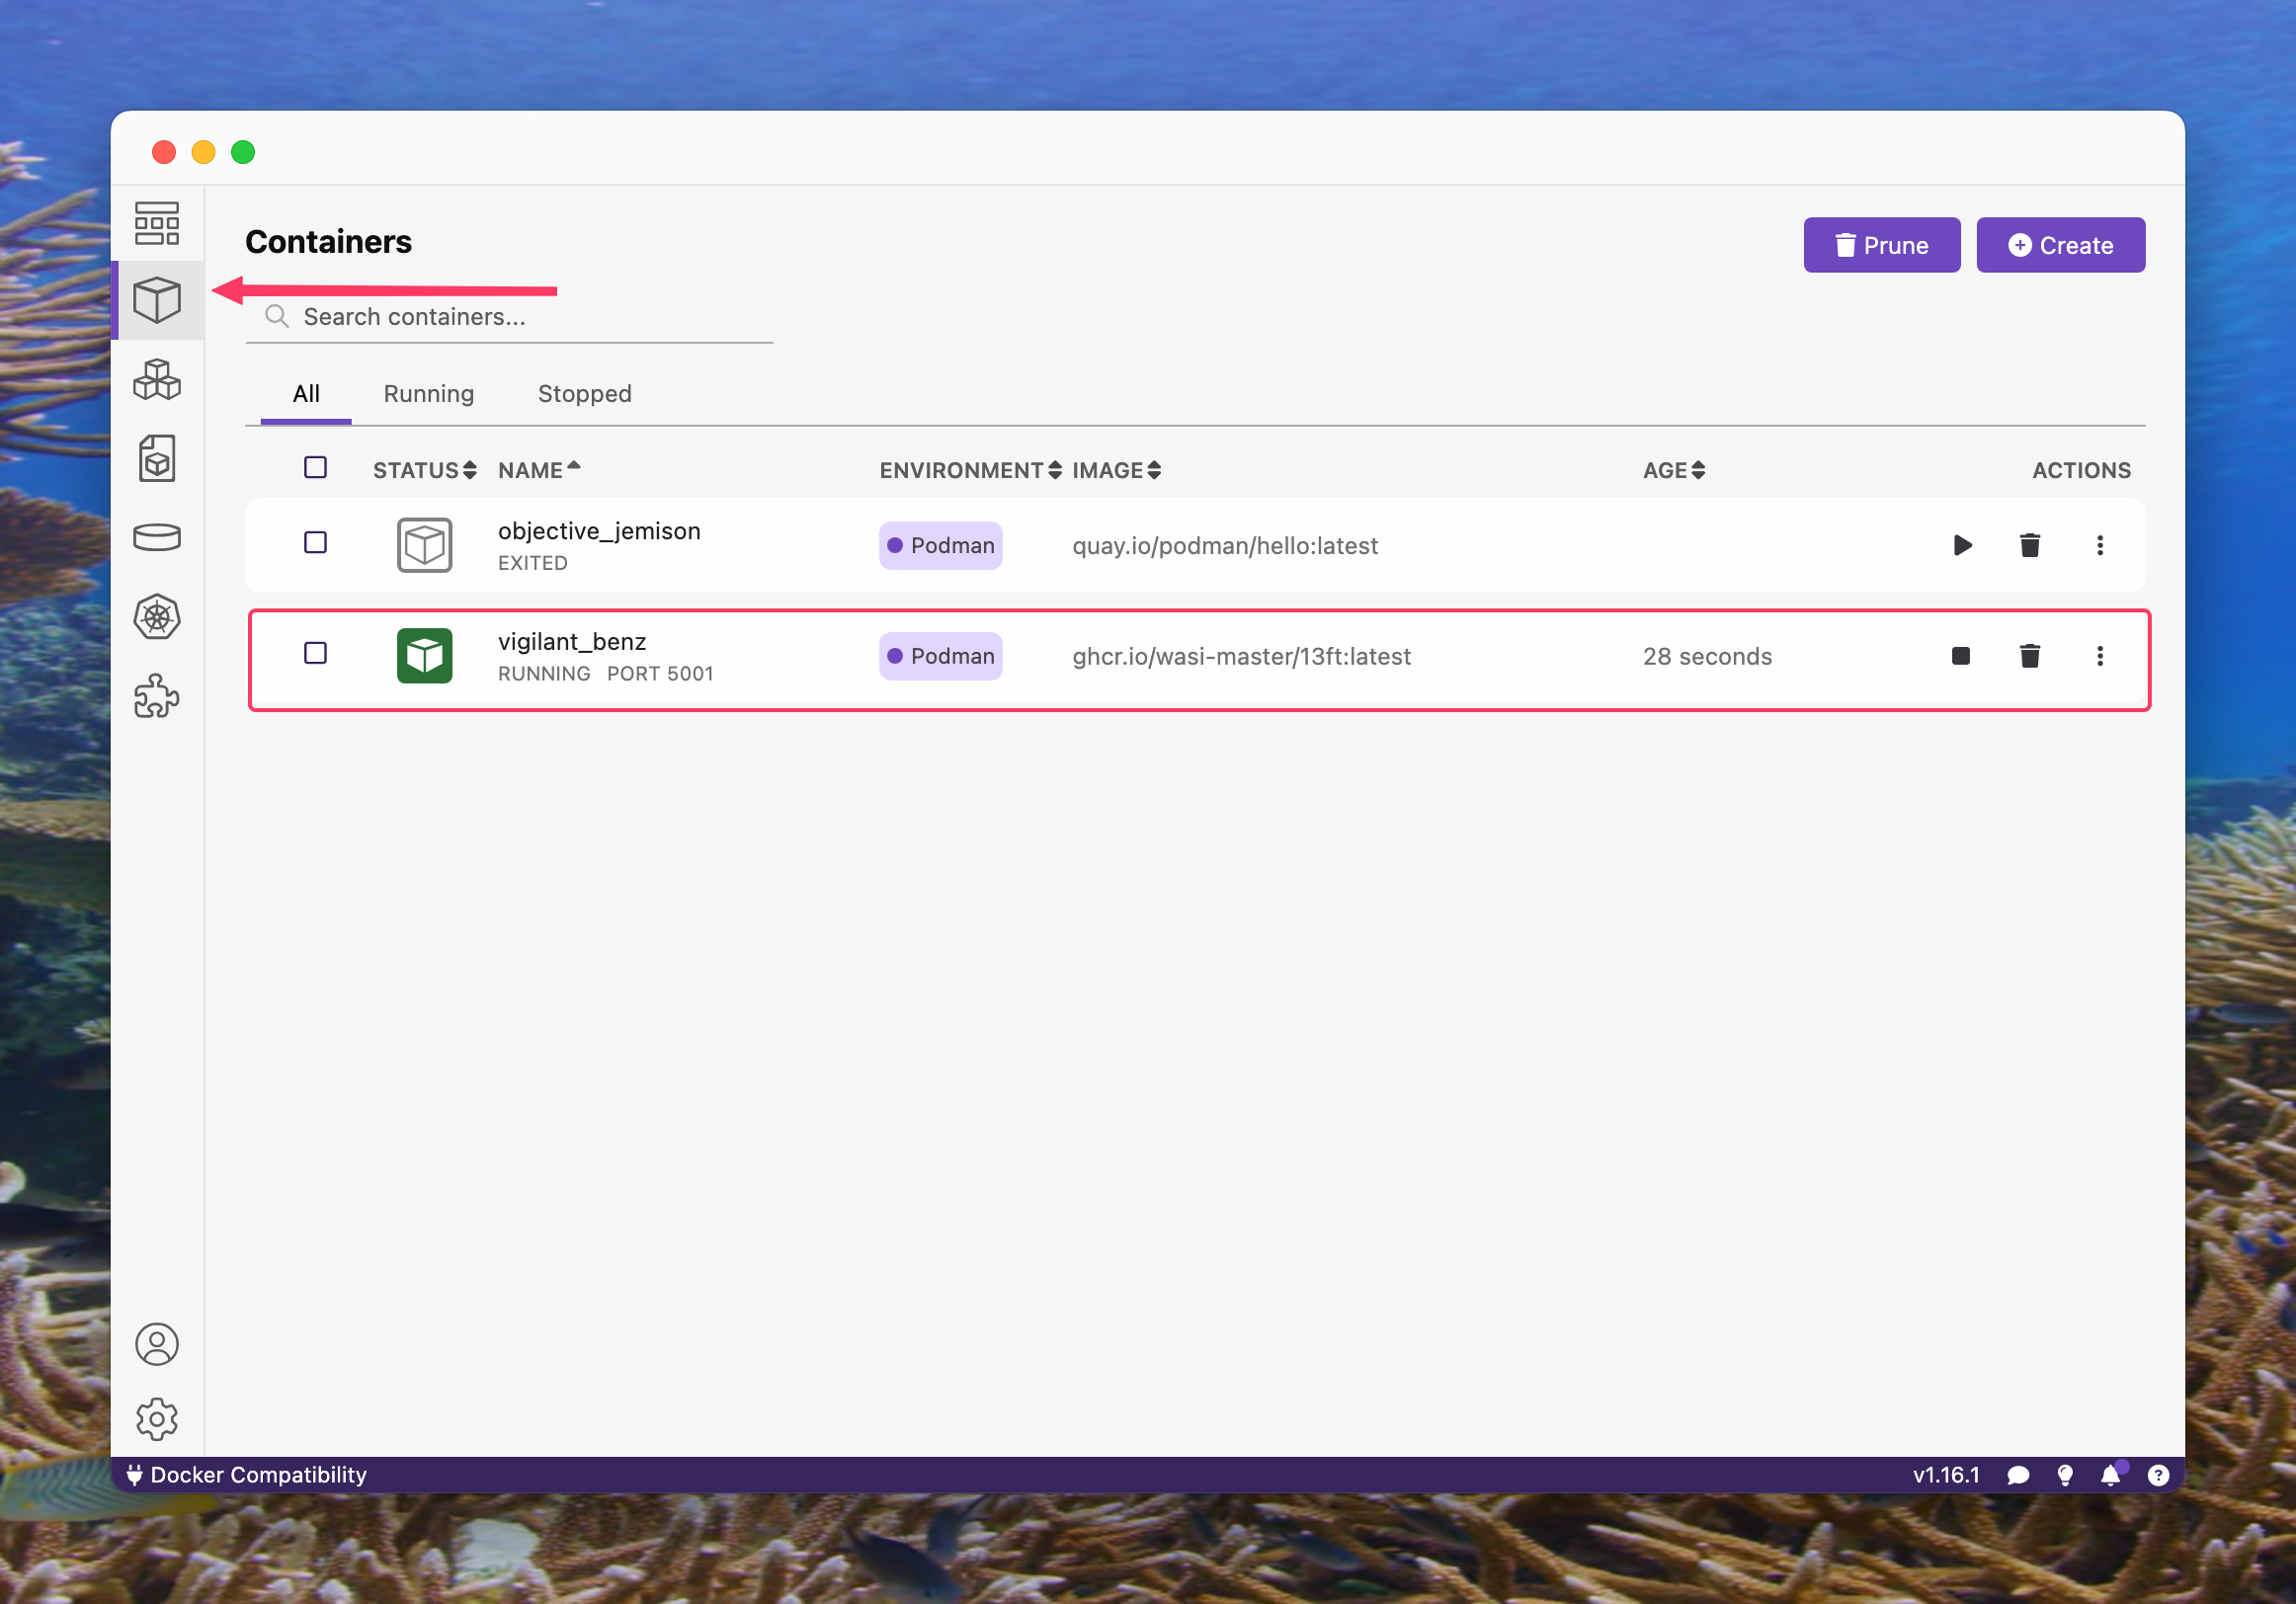
Go to the "Containers" tab, and you'll see your brand new container running. Don't worry about the name, these are generated by Podman automatically if you didn't give your container a name. Congratulations! You are officially hosting a service!
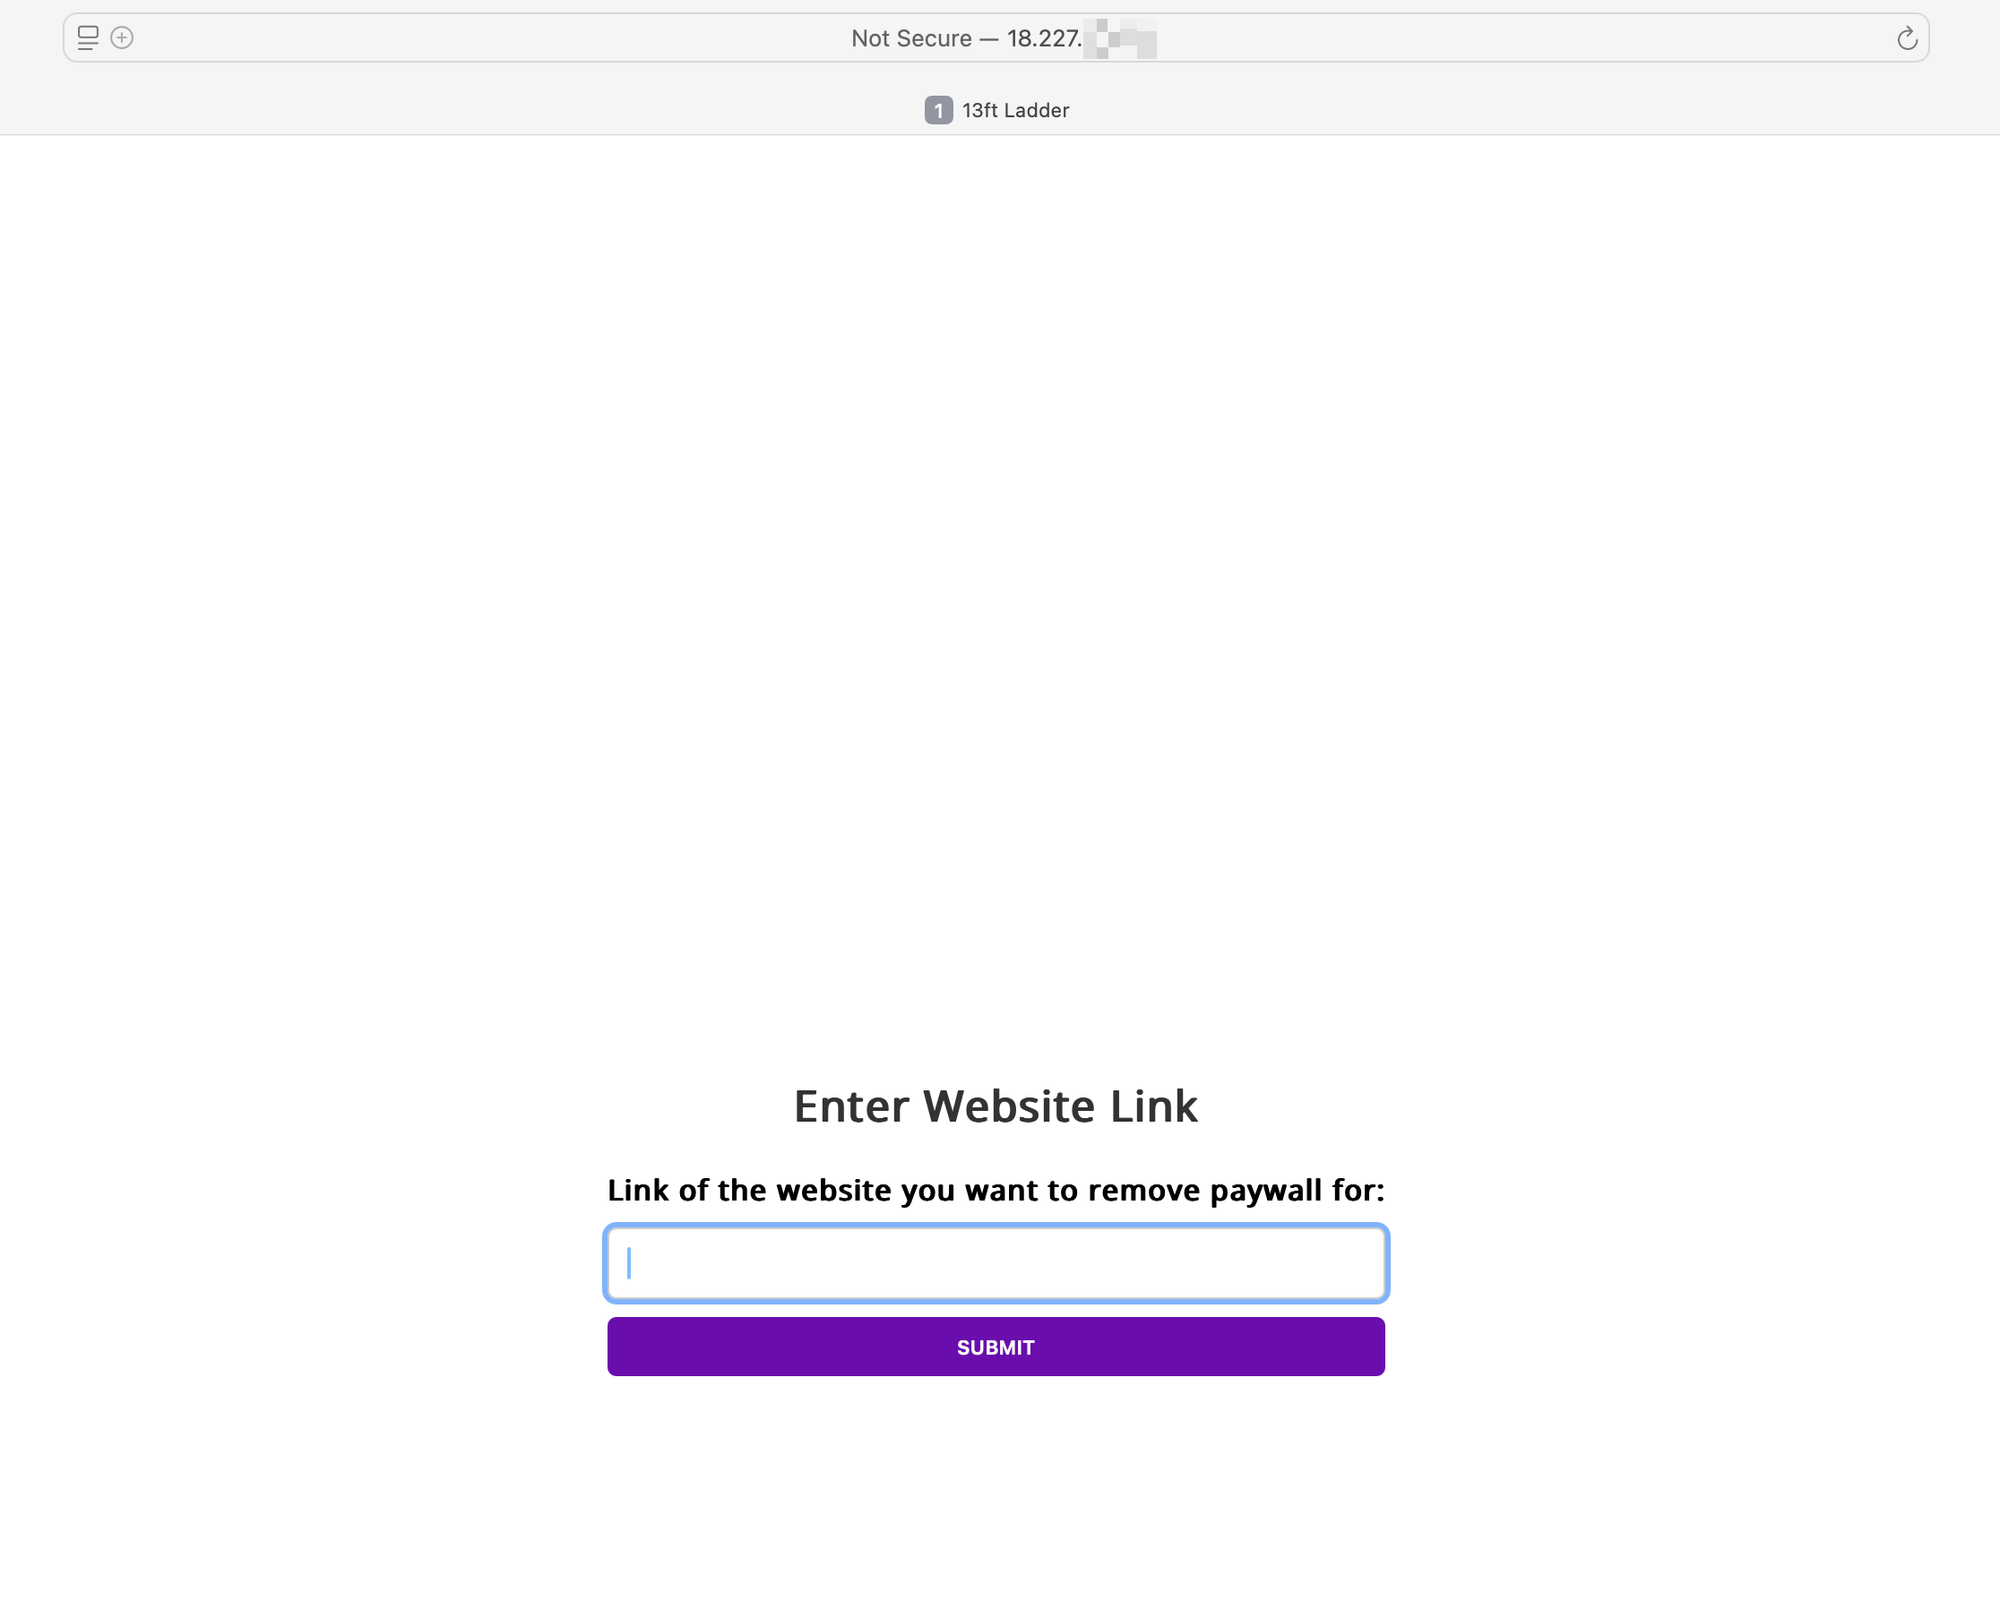
Open a browser, and type http://localhost:5001
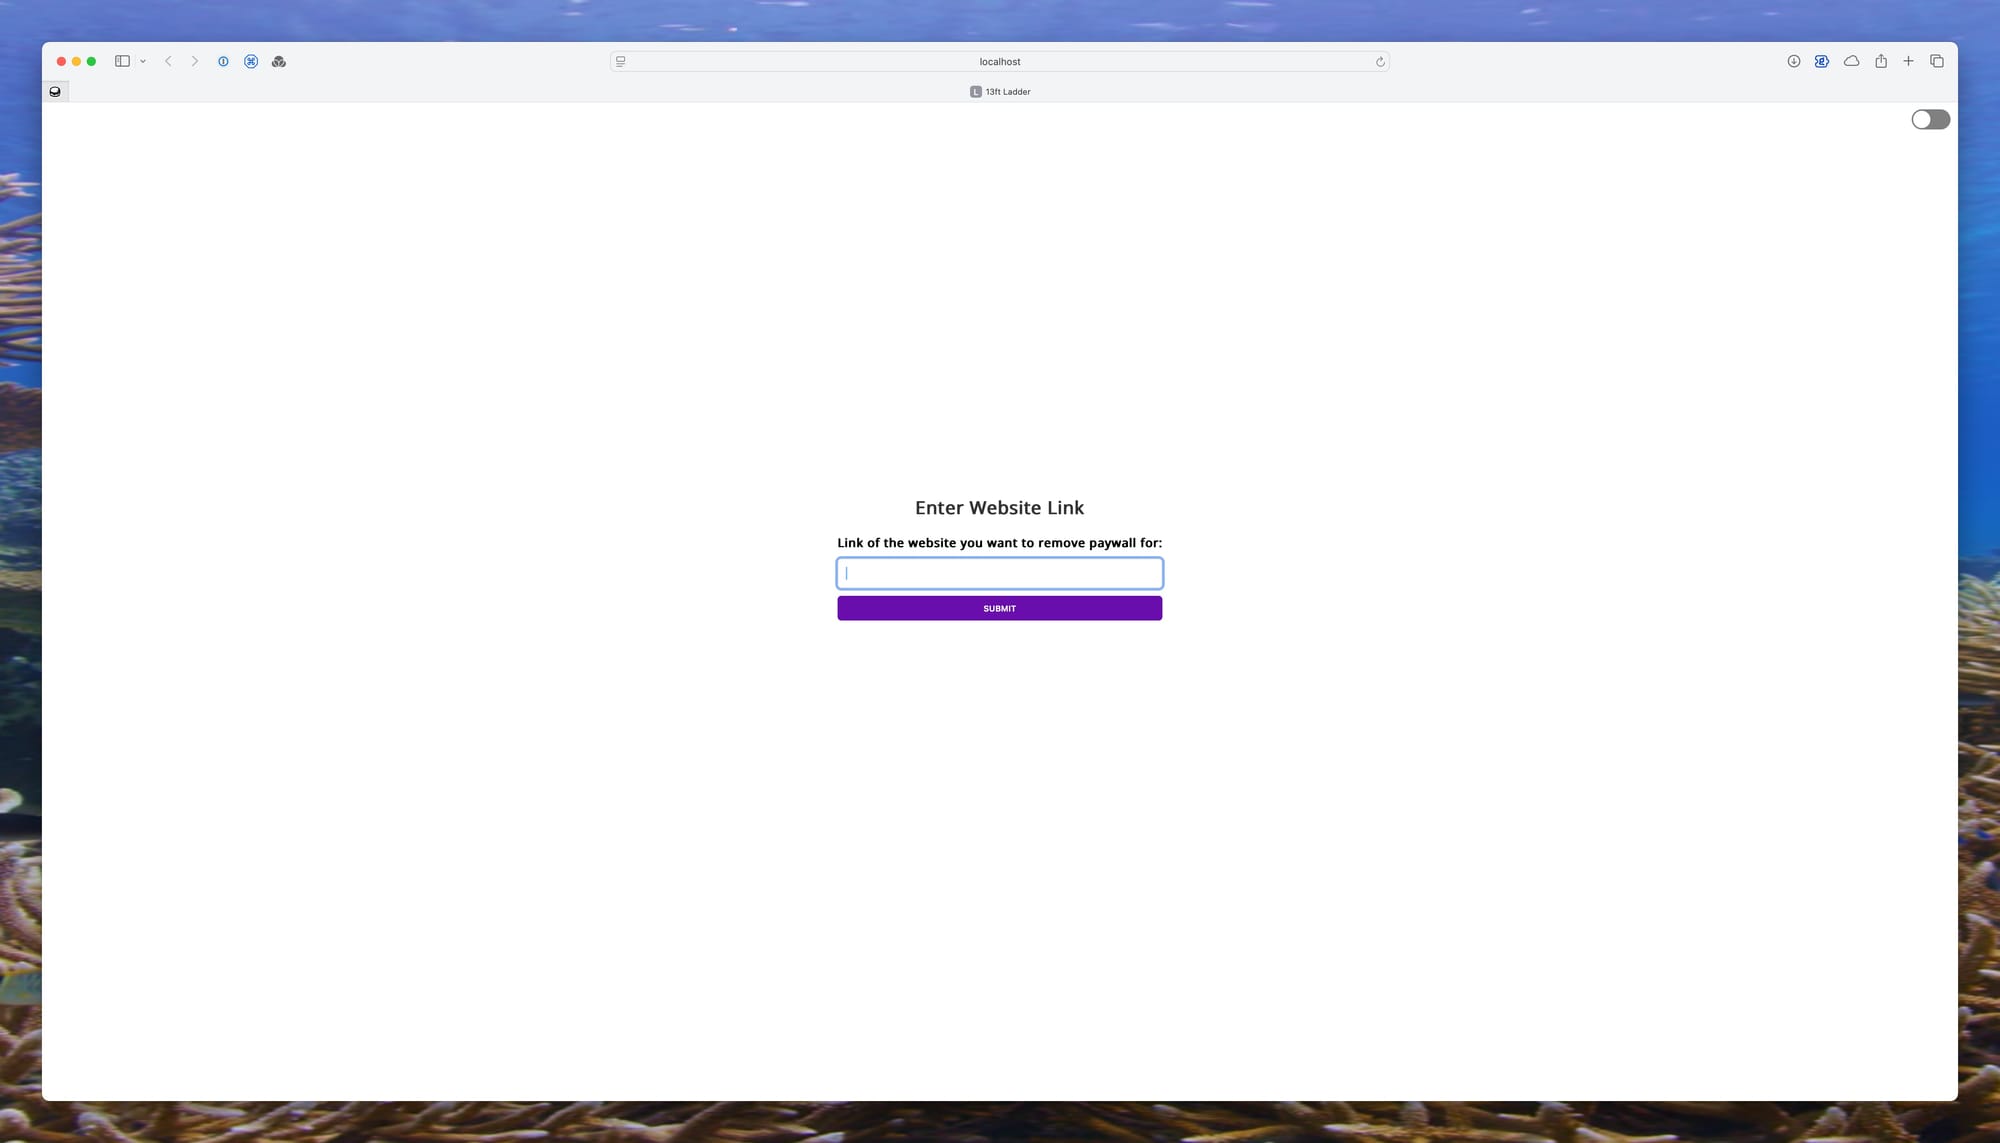
And there you have it! Yes. That's our friend from Part III, localhost. This particular image is for a piece of software called 13ft Ladder, and I'll let you figure out what it does. How cool is that? And we're only scratching the surface here. You can (pretty much) host everything you want this way, but that's no fun.
Let's recap! We've downloaded and installed Podman Desktop, pulled an image, and ran a container from that image. Neat! This image is very straightforward, and not a whole lot needs to be done in order to get it up and running. But we can do better than that. But, first... Let's take a page out of Drew Magary's book, and...
HALFTIME!
You've done a really great job. Give yourself some props, celebrate with a nice cup of anything you like, take a deep breath, and let's move on because we are going to the cloud, baby!
Before we do that, though, please allow me a brief sidebar: we are going to use AWS' free tier for this experiment. I don't like to nudge folks into that direction because the whole point is to achieve some degree of independence from big tech, but I would rather you learn how to deploy your own computing instances — even if that means using AWS — than not doing anything at all. So, yes: we're using AWS for now because it's easy and there's a free tier, and it's better to have something instead of nothing.
While we're on the subject, a lot of things have a free tier. Check out this nifty website for a good list, including cloud computing providers.
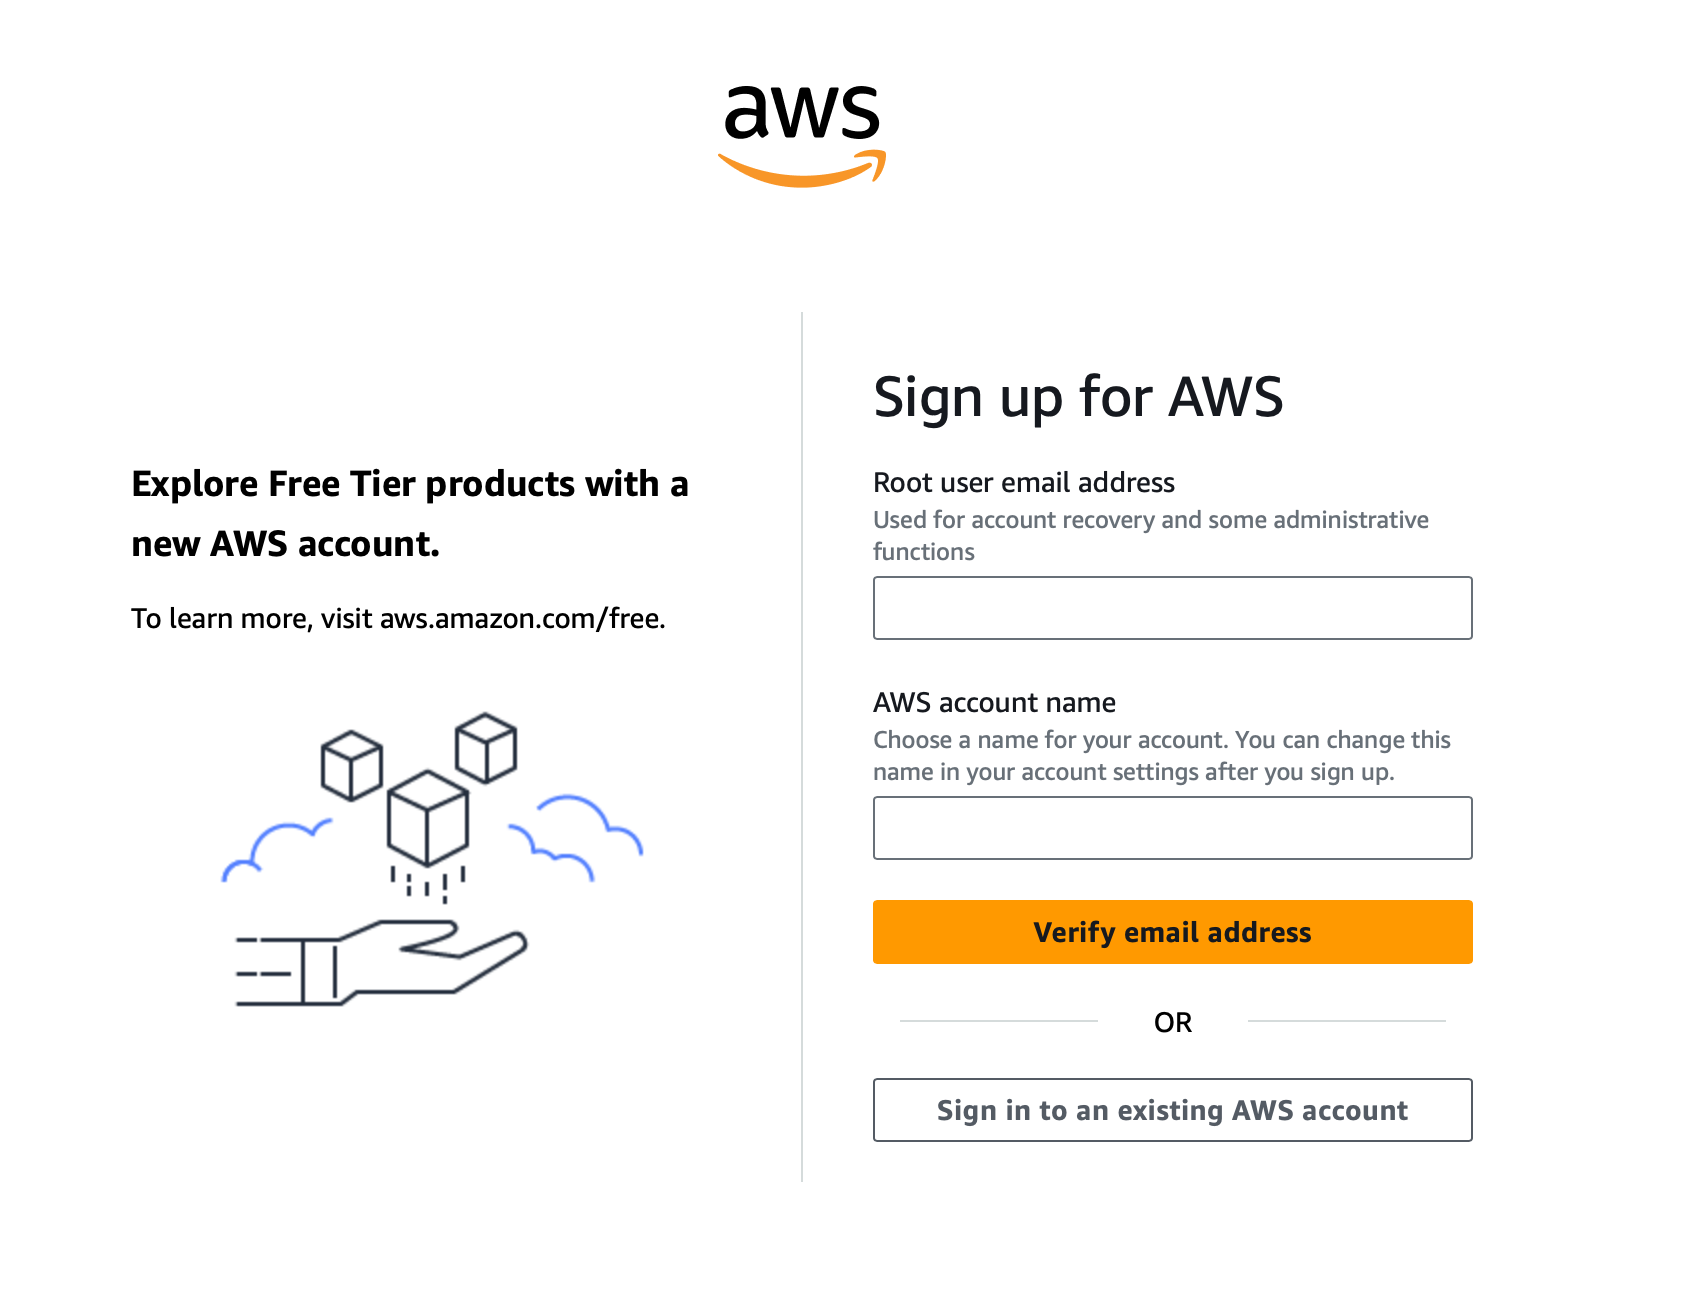
Go to the AWS sign up page, and create an account:
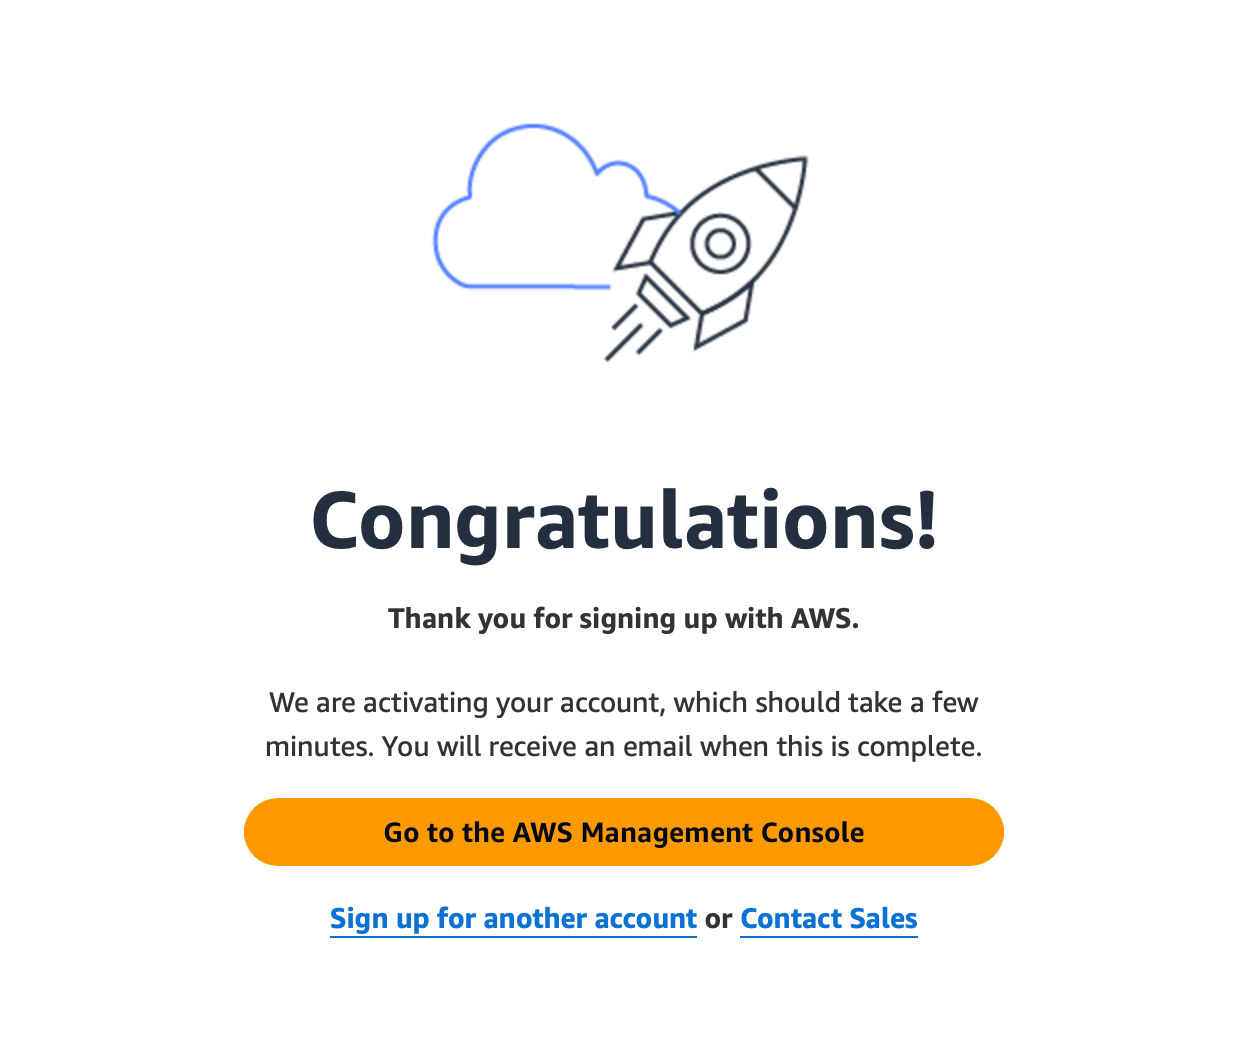
You will need to go through the whole rigmarole here, there's no way around it. AWS will ask a bunch of things, and it will ask you to provide a valid credit card. If you ever signed up for anything, you'll be fine. After it's all said and done, you should see something like this:
Wait for that email to arrive, and we're off to the races. You should see something like this after you click that "Go to the AWS Management Console":
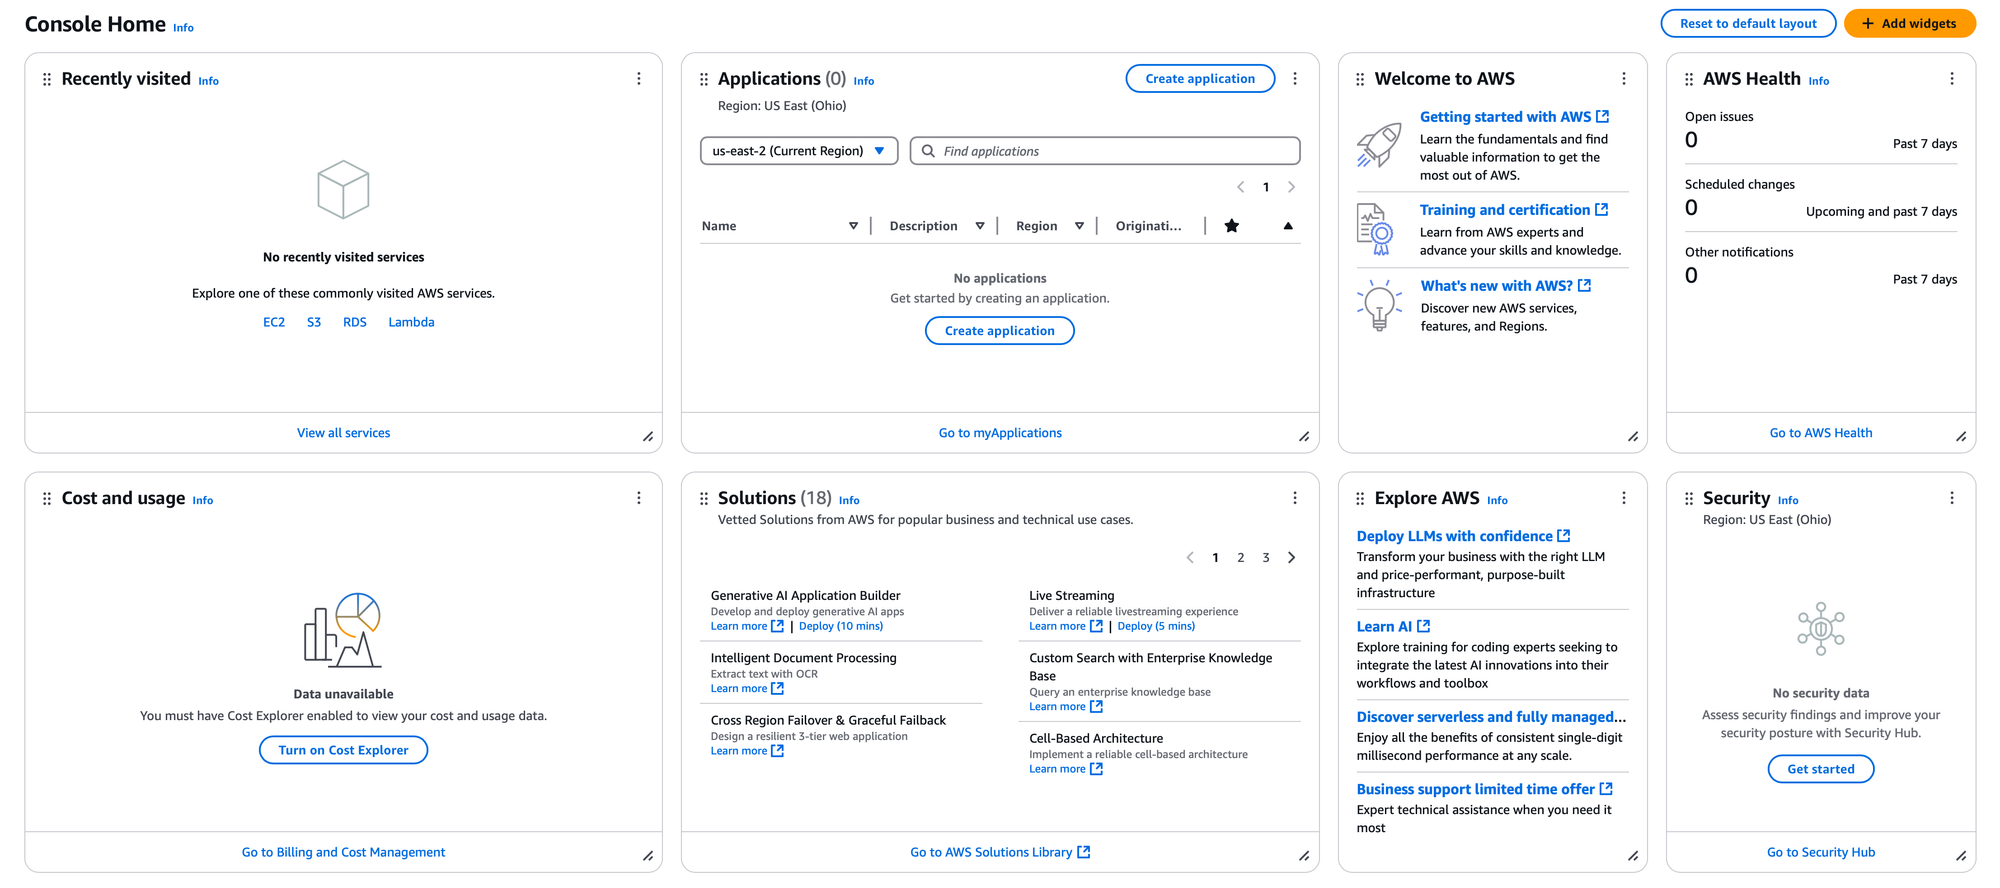
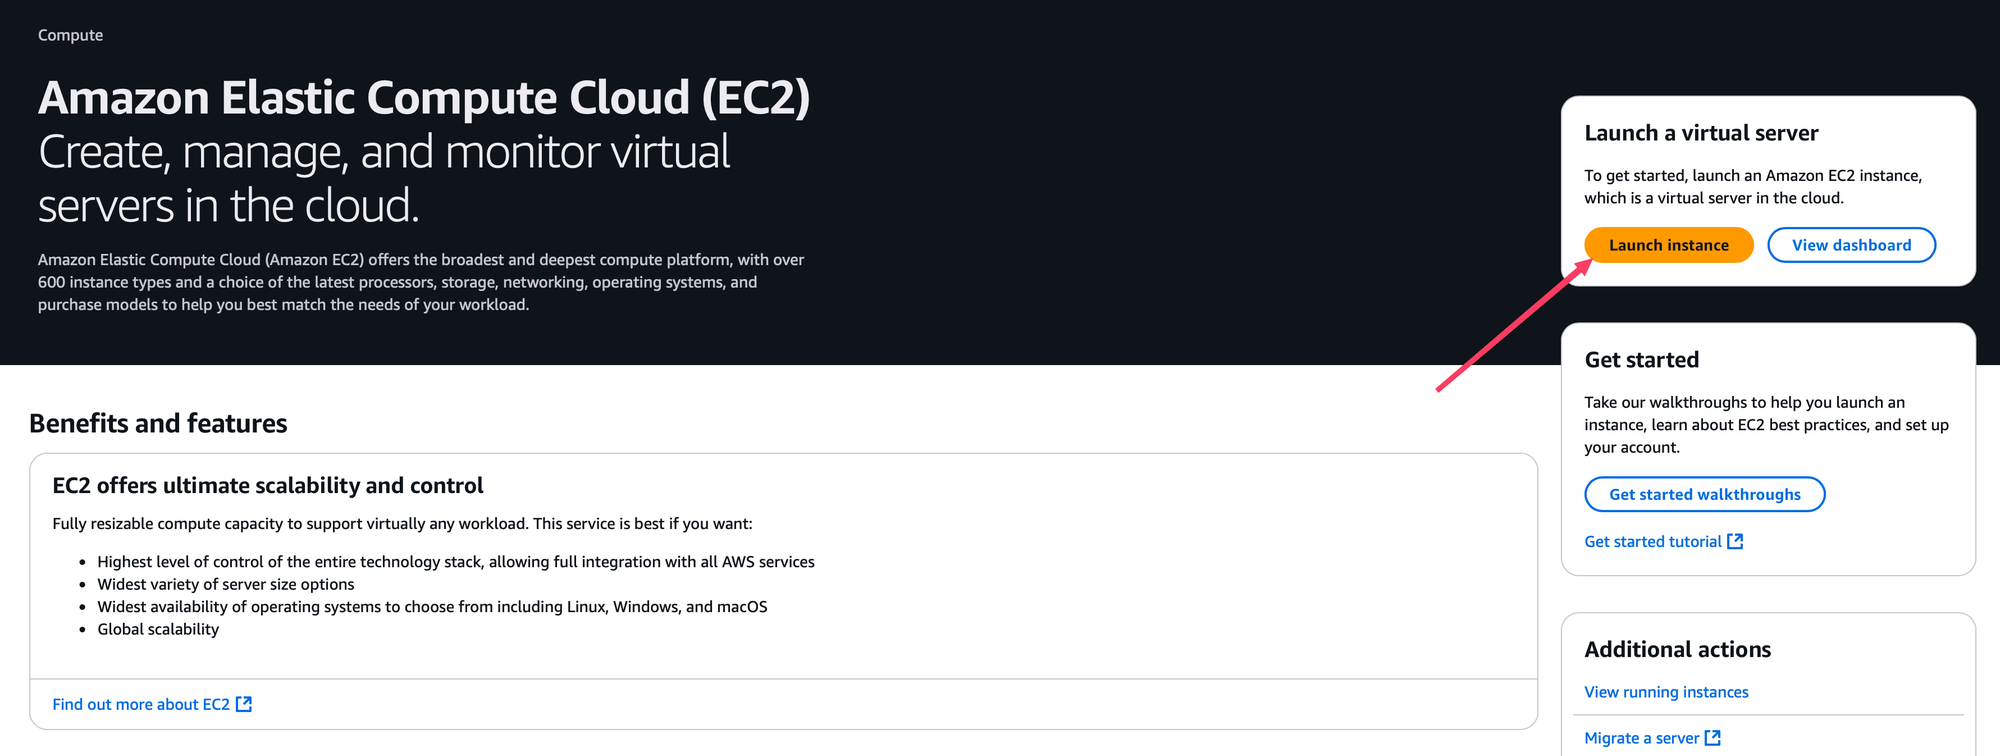
It's an overwhelming mess, for sure. But nothing you can't tackle. Click on that EC2 link under "Recently viewed", and let's launch a VM:
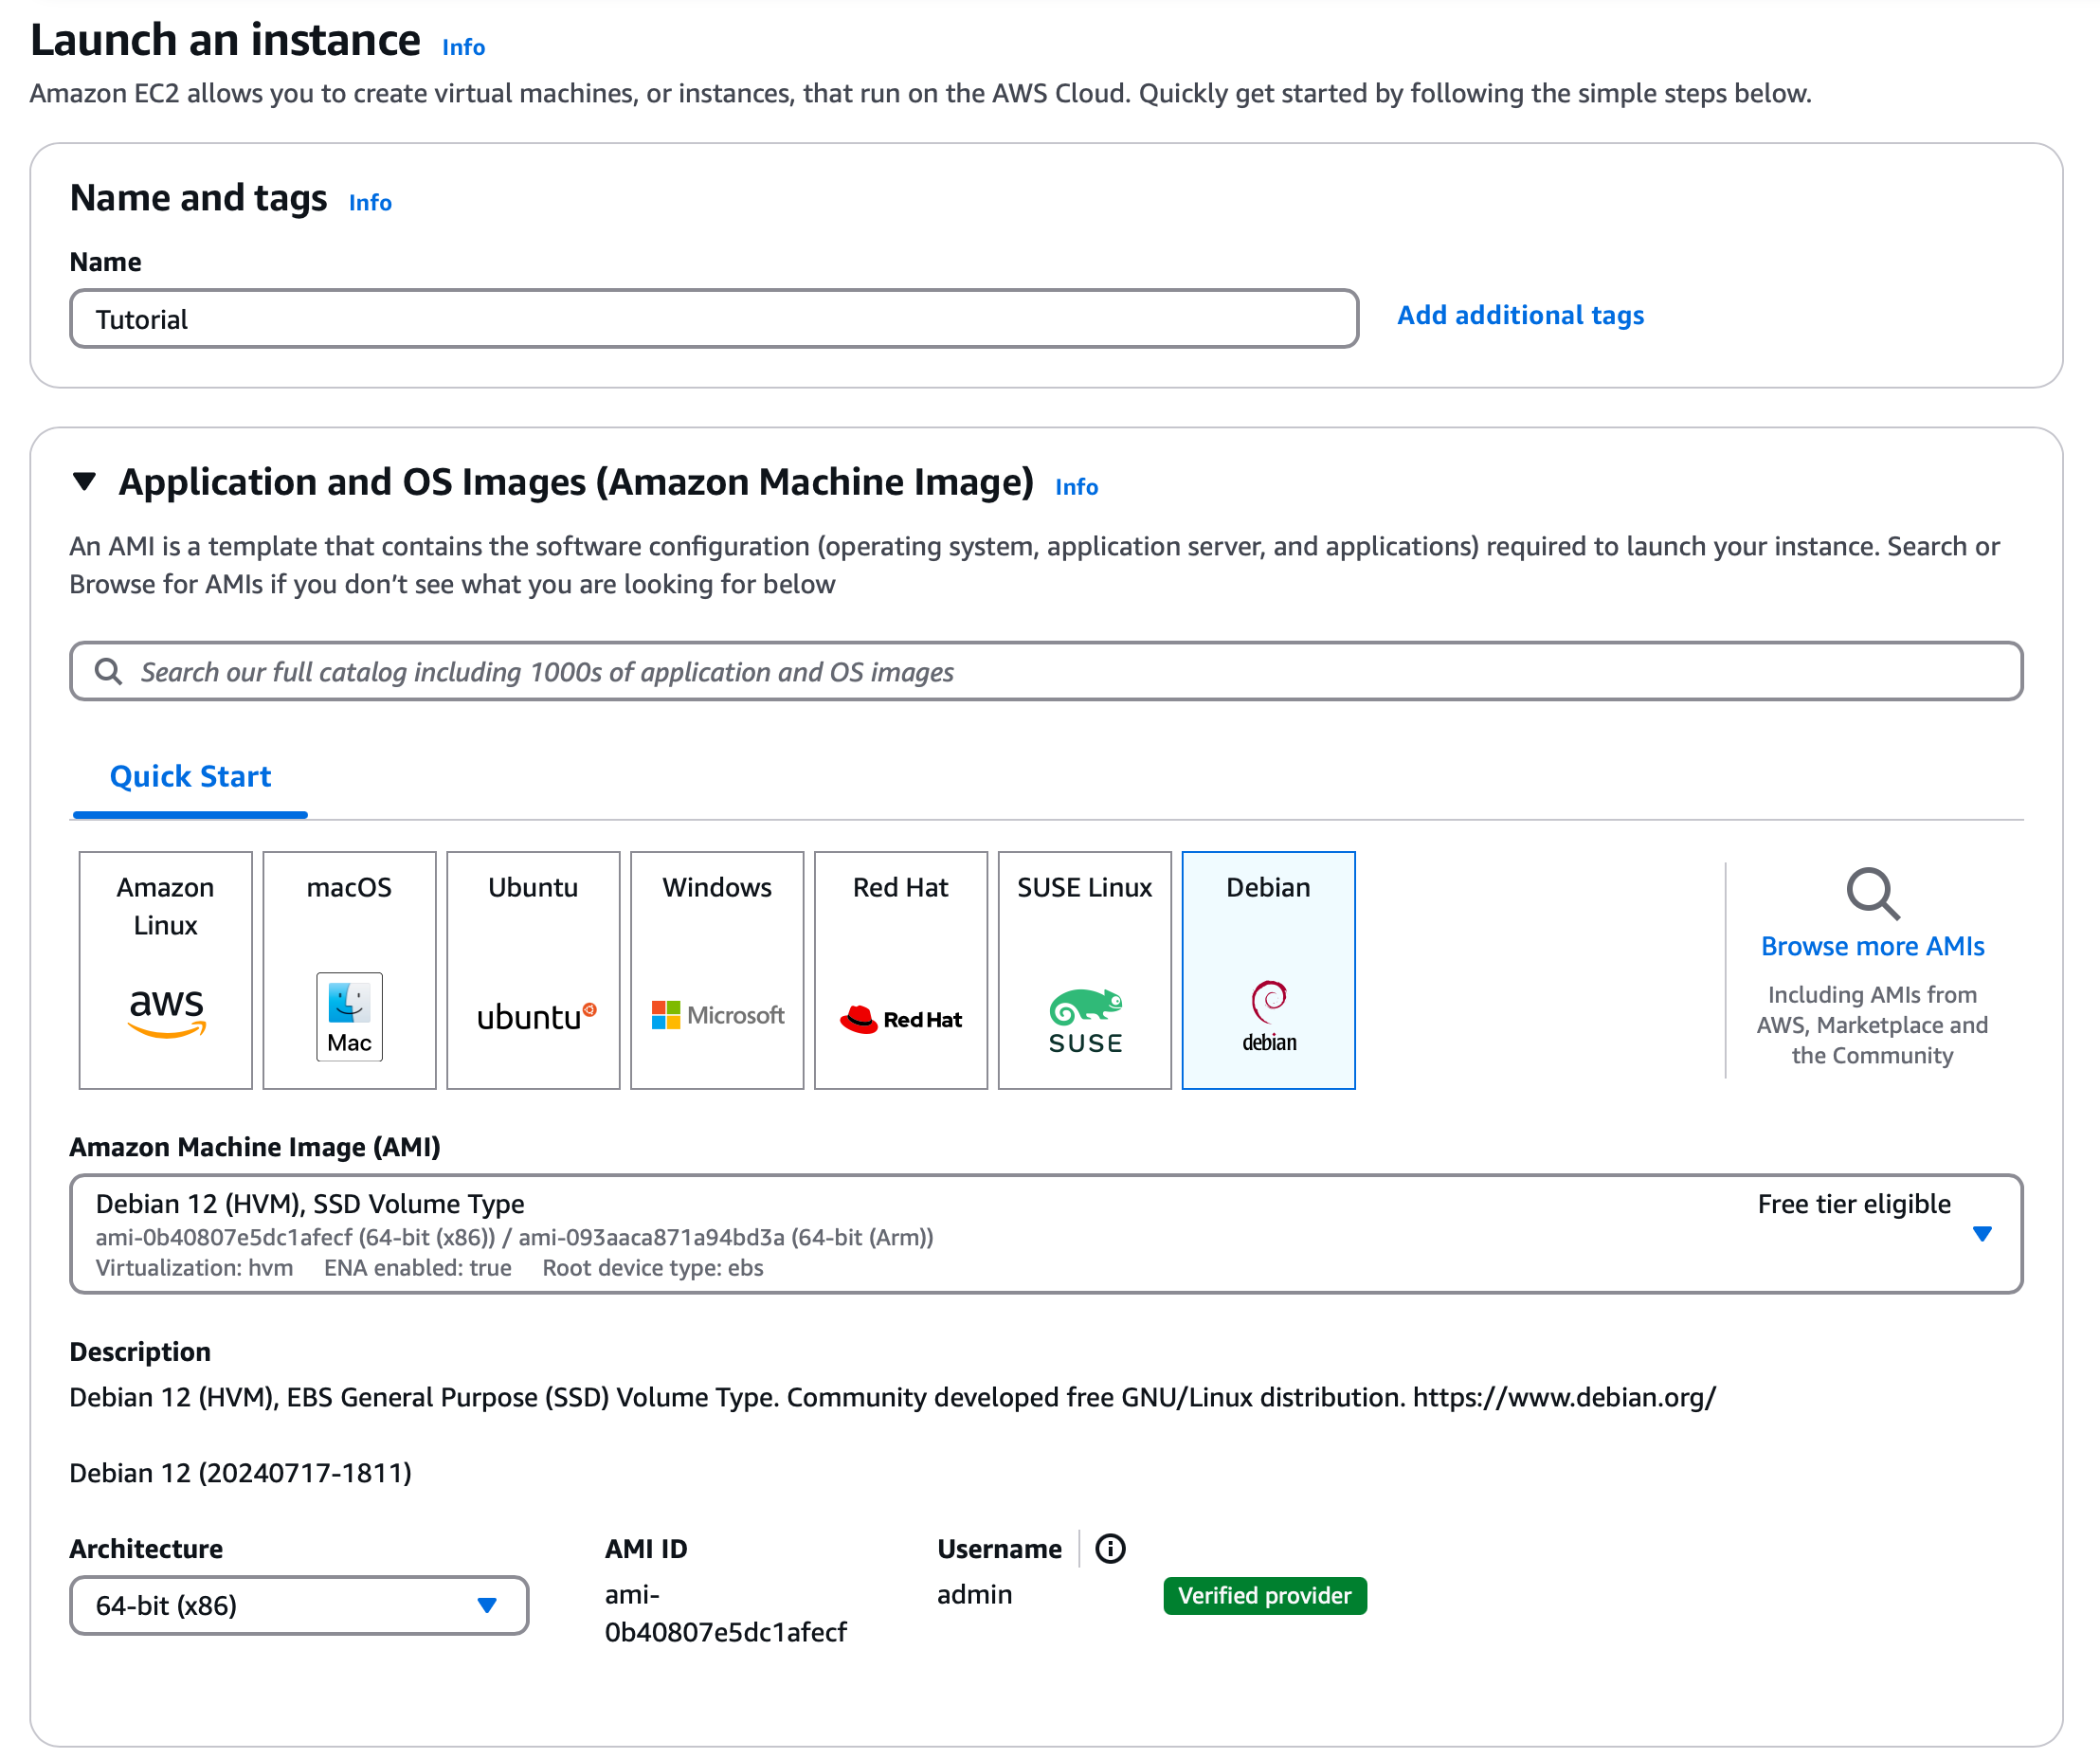
From there, we're going to give our instance a name, and select the operating system image. Give it any name you like, — we're calling this one Tutorial — and select Debian.
Everything else can stay the way it is. Scrolling down a little bit, we'll select the instance type, allow HTTP and HTTPS traffic, and create an ssh key pair. We're not using the ssh key pair that we created previously, so don't worry about that.
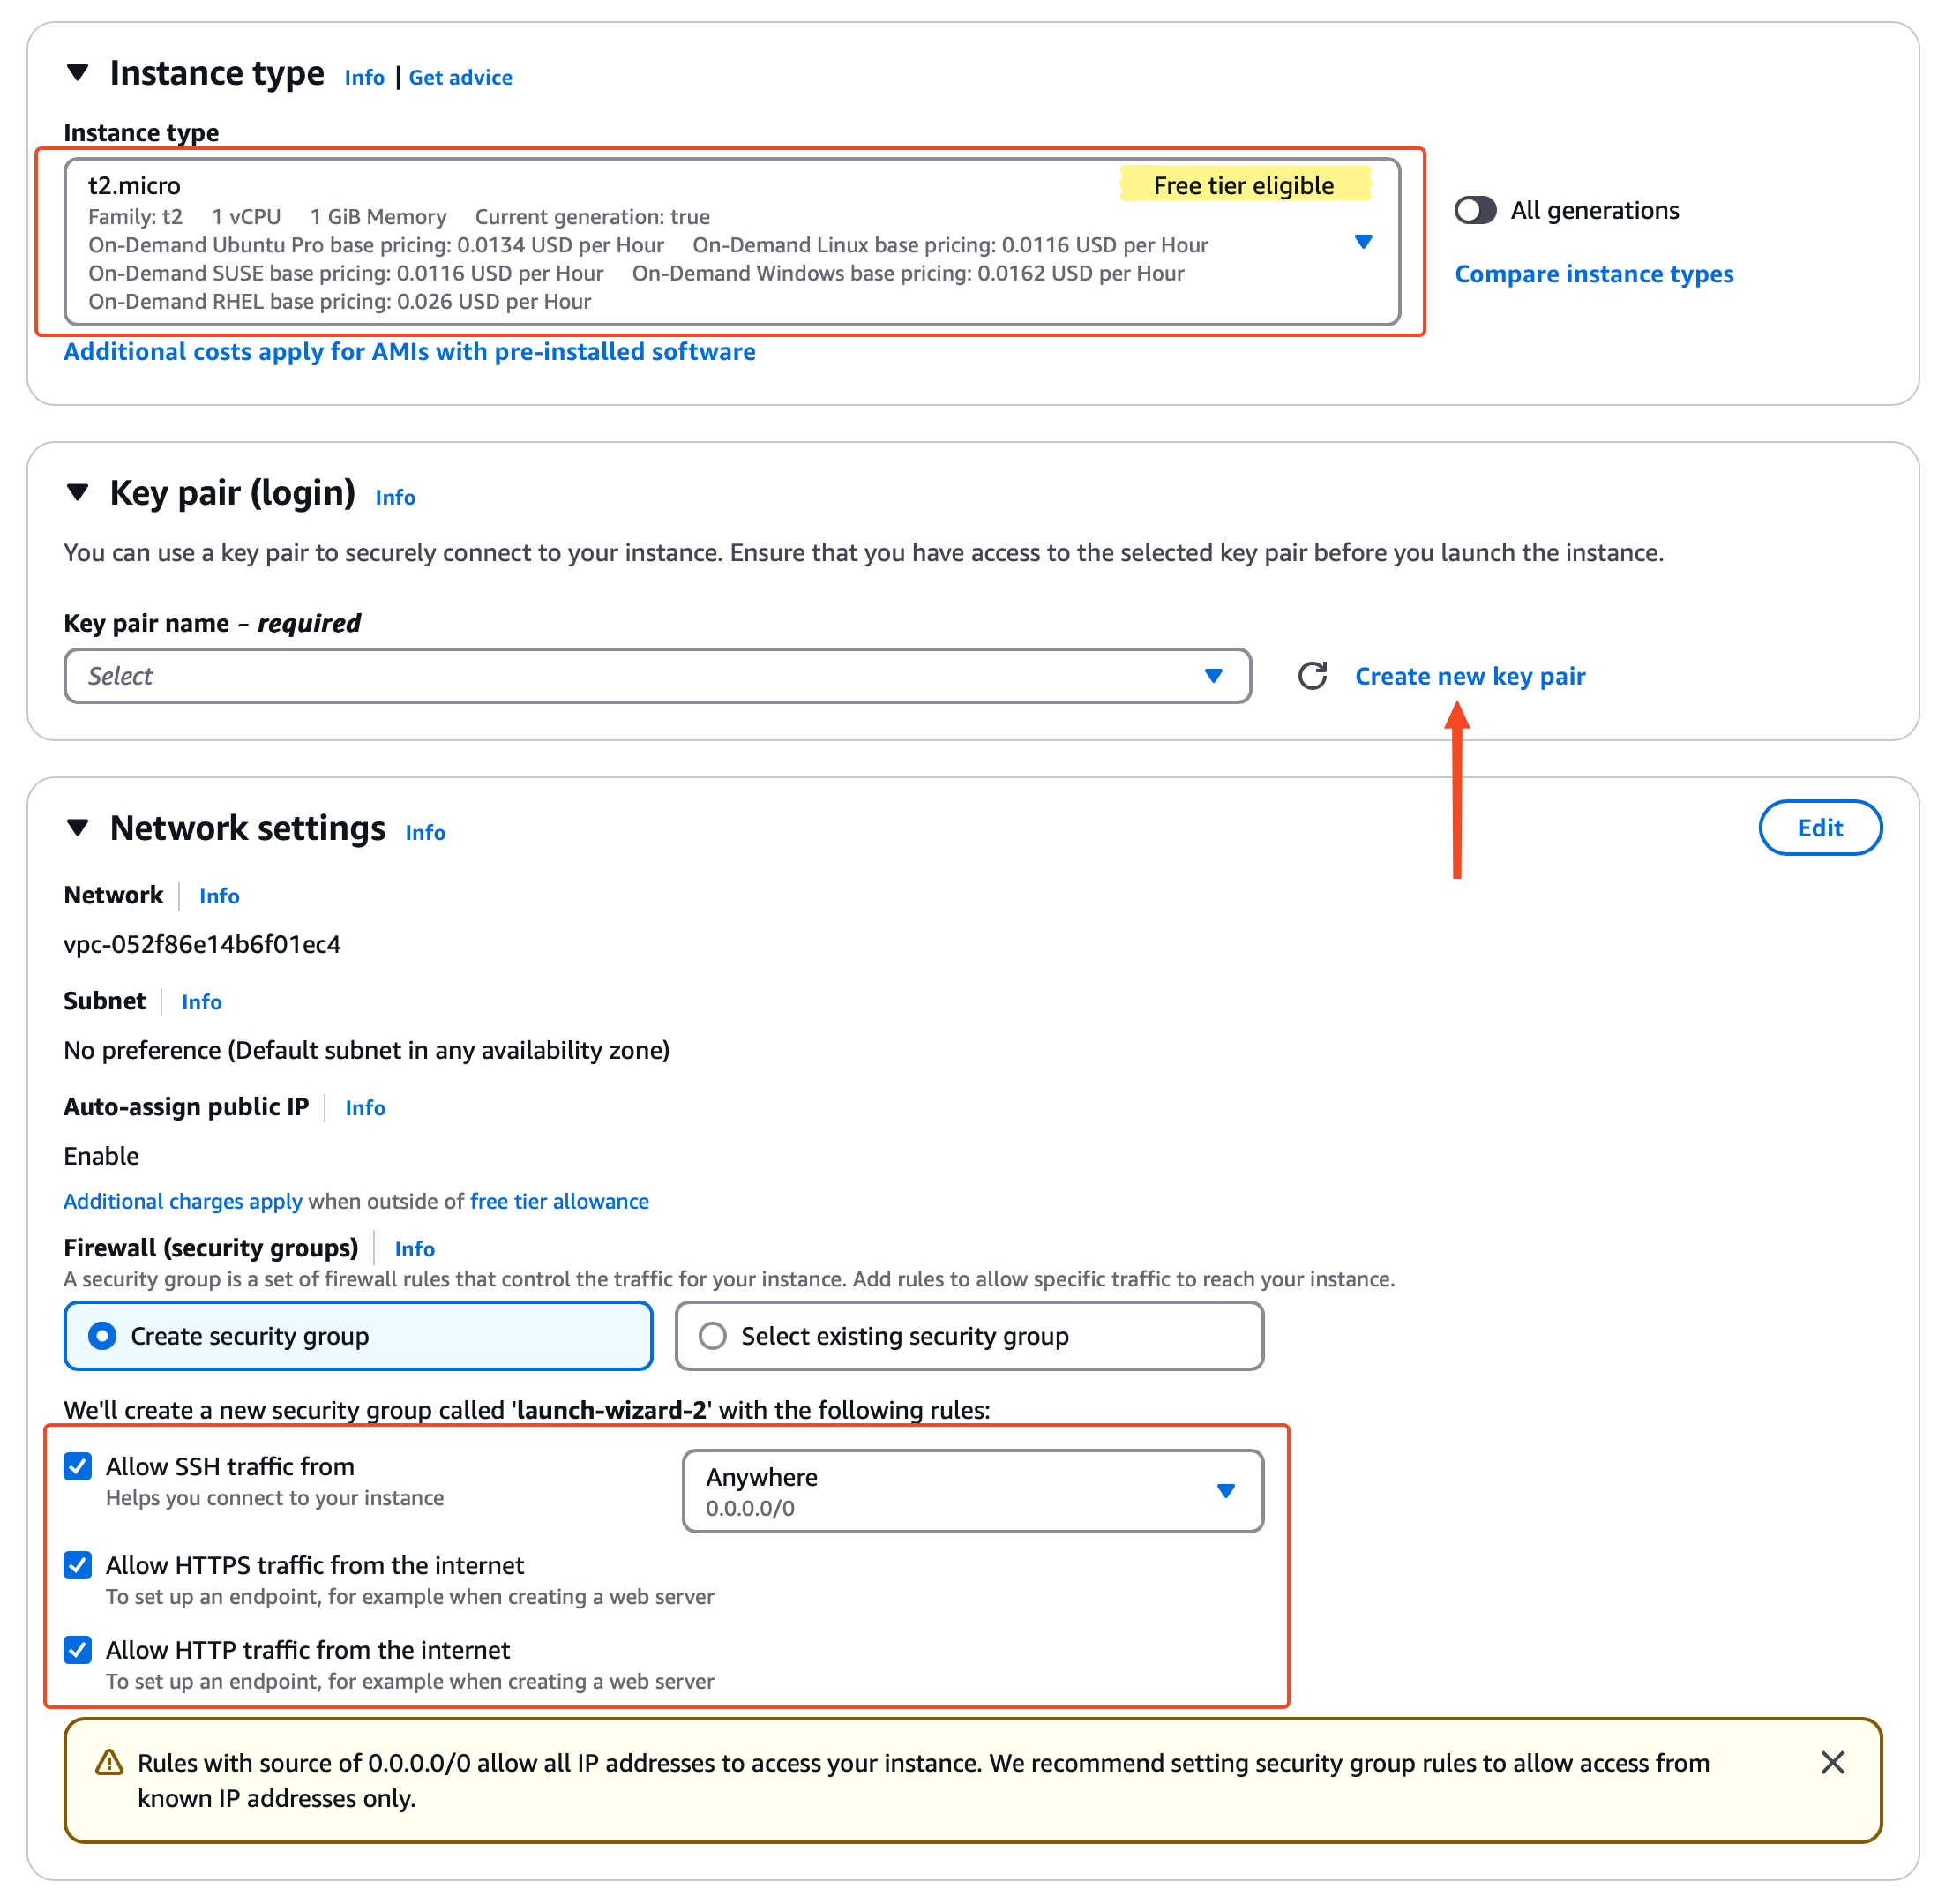
You want to make sure you're using Instance type of t2.micro (or t3.micro if and only if t2.micro is not available. Look for "Free tier eligible".), check the "Allow HTTPS traffic from the internet", check "Allow HTTP traffic from the internet", make sure "Allow SSH traffic from the internet" is also checked, and click on "Create new key pair".
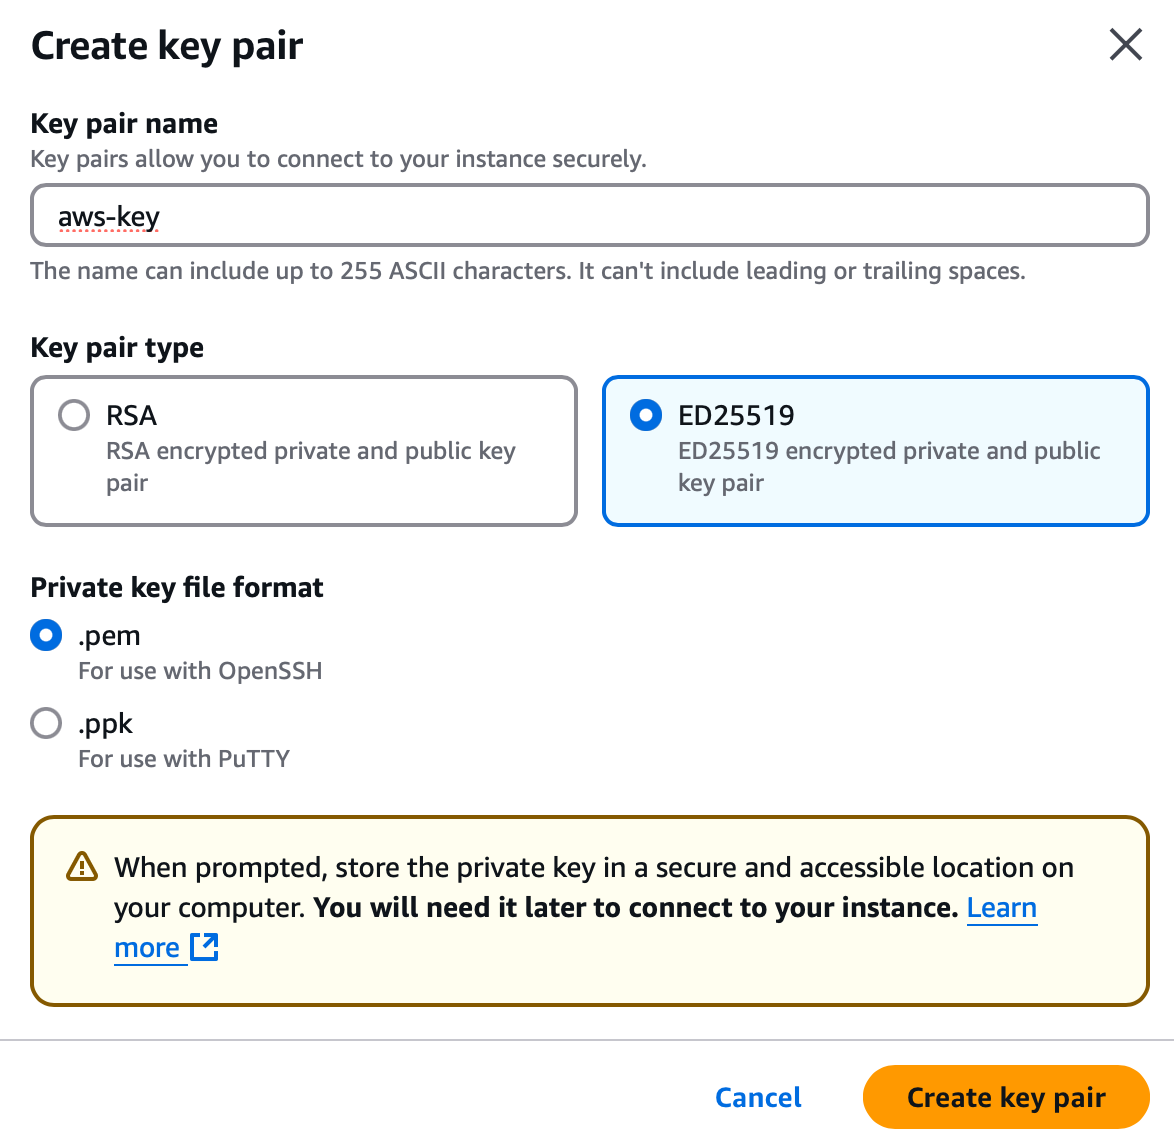
You will be greeted with the following screen:
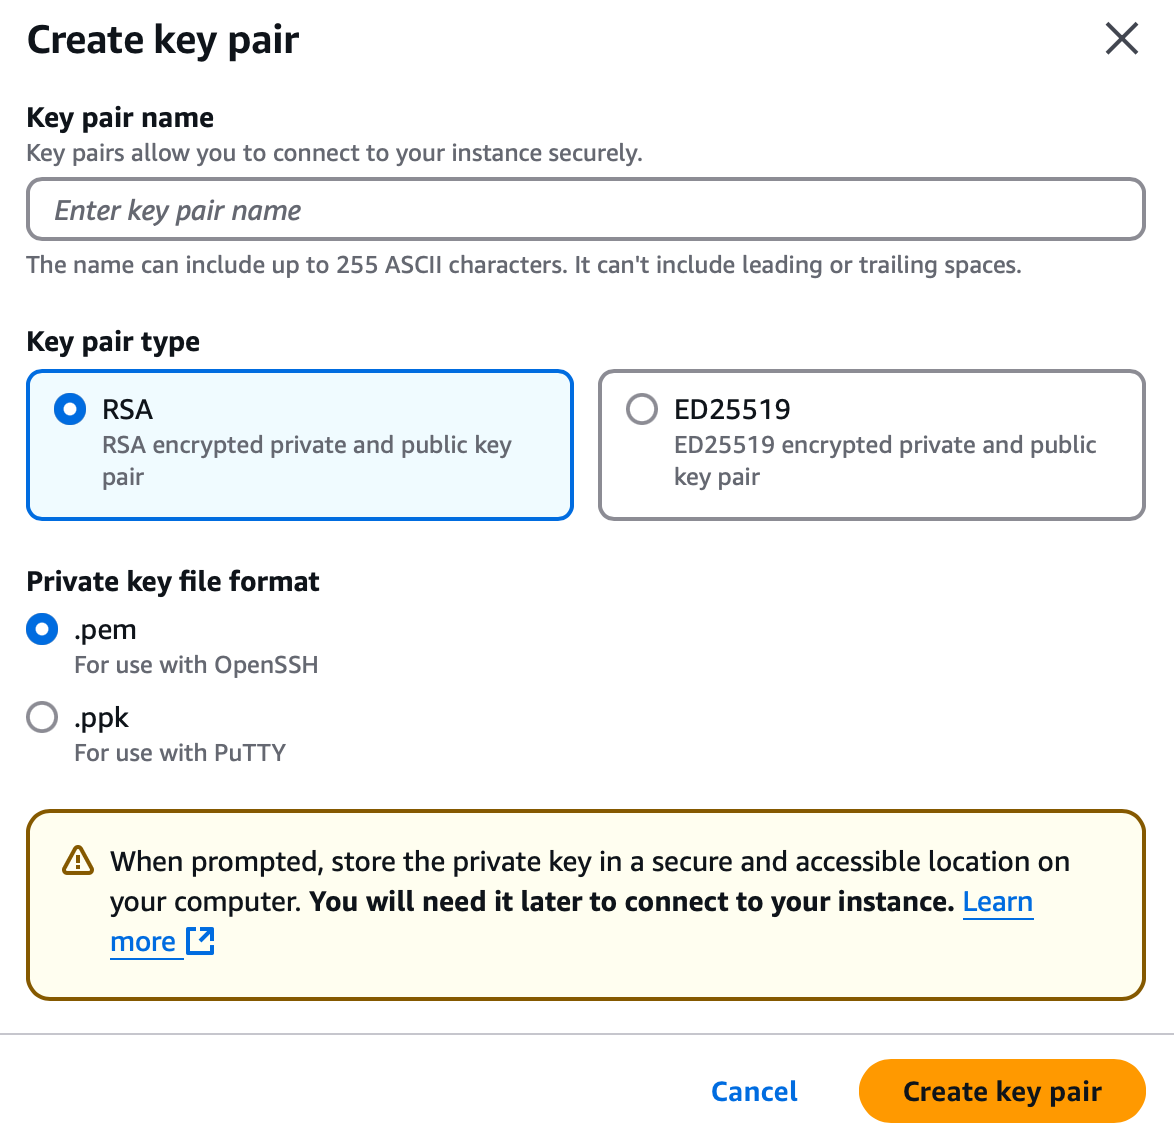
Give it a name, say, aws-key, change the key pair type to ED25519, and select .pem if you're using anything but PuTTY to ssh into your instance. If you are using PuTTY, follow the instructions here. Click the "Create key pair" button, and the .pem file will be downloaded to where your browser downloads things. If you gave your key the name aws-key as we did here, the downloaded file will be called aws-key.pem. Keep this file handy because this file is everything anyone needs to access your instance.
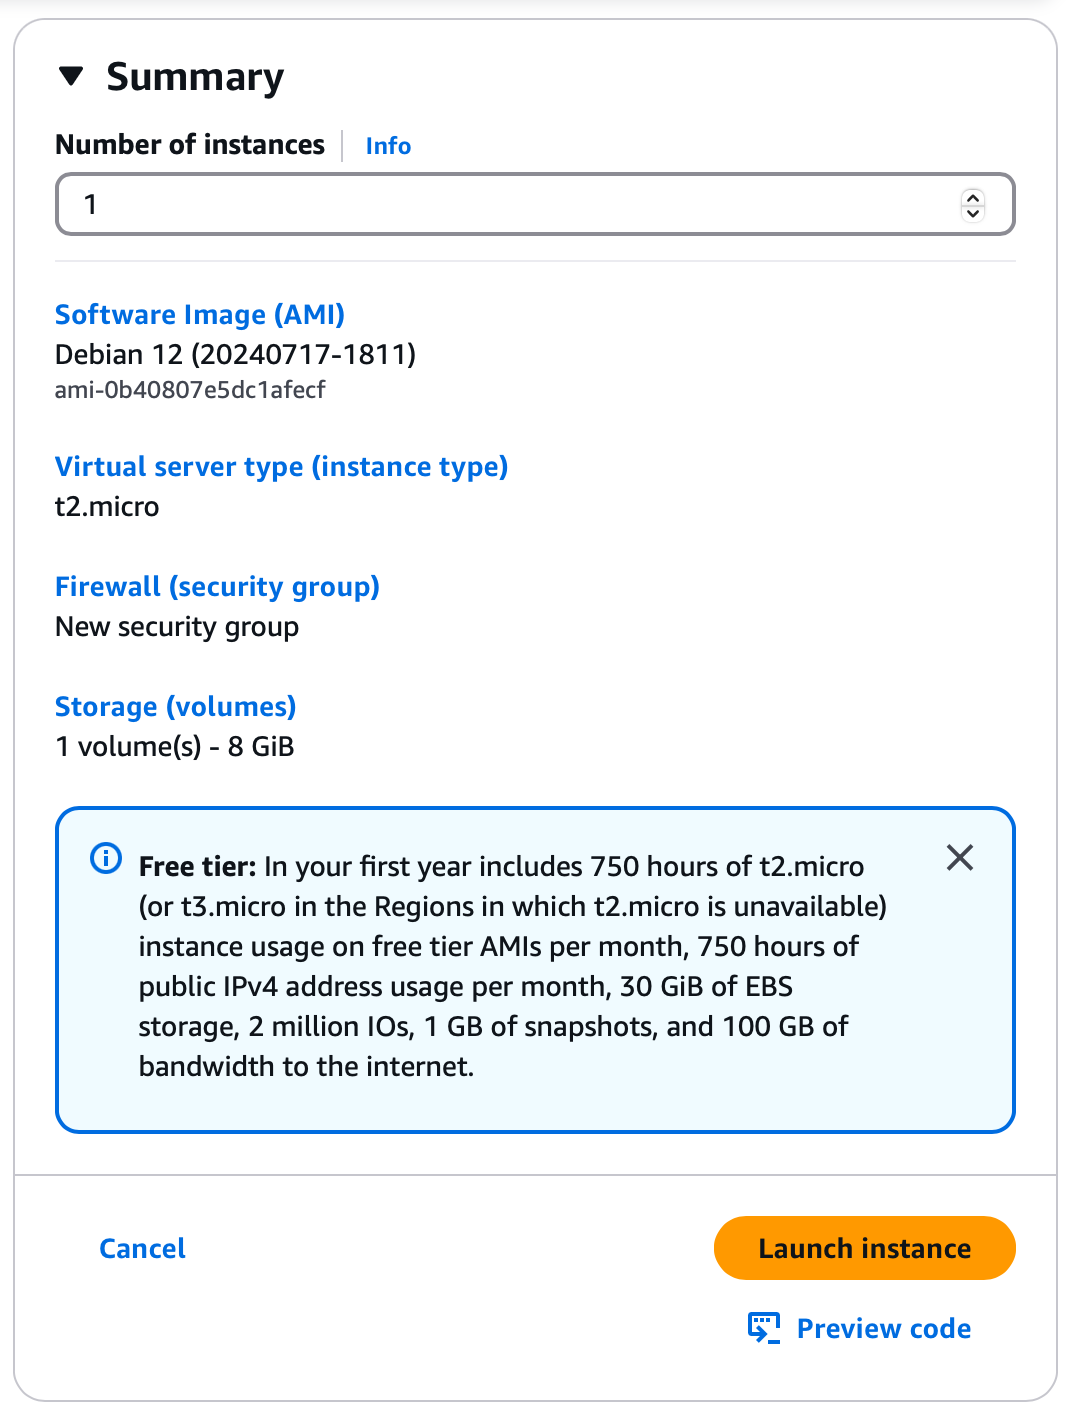
Leave everything else as is, and take a look at the summary. Should look something like this:
Hit that launch instance button, and wait for the instance to be deployed. When it's done, you should see this:

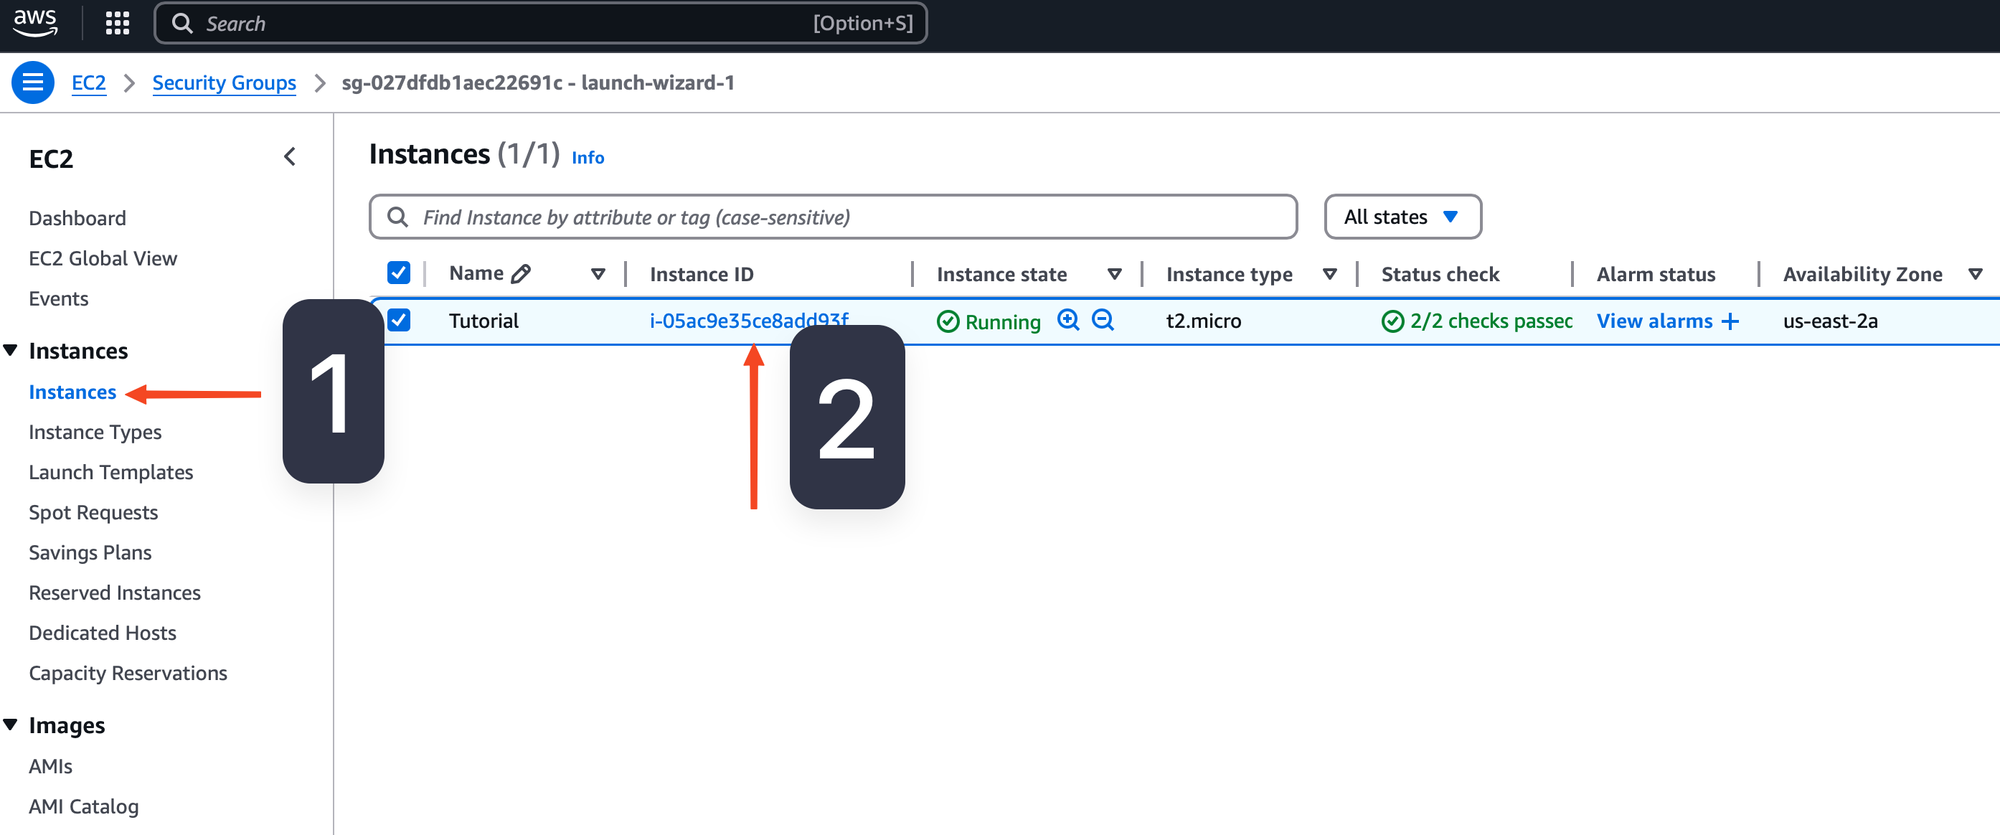
Very nice! Click that weird link between the parentheses — that's your instance ID. That link will take you to the Instances page where you will find your instance's IP address:

For me, the IP address is 18.227.XXX.XXX. I'm "redacting" it a little bit, but yours won't be redacted. Write it down, and open a terminal emulator.
.pem file is. For me, it was saved to the Downloads folder, so you'll see that my commands reference that path. Your .pem file might be in a different directory, so adjust accordingly. We're going to ssh into our brand new instance by typing the following command:
ssh admin@<IP> -i <path_to_your_pem_file>
Let's break it down a bit:
ssh is the command we want to run. Don't change.
admin is the default username for the instance. Don't change.
@<IP> is the IP address of your instance. Change this to the address under "Public IPv4 Address" you wrote down.
-i is a parameter that lets you specify an identity file. Don't change.
<path_to_your_pem_file> is, well, the path to your .pem file. Change this to the full path of the .pem file you downloaded.
In my case the full command would be ssh admin@18.227.XXX.XXX -i Downloads/my-aws-key.pem

Since this is the first time we're connecting to this instance, ssh doesn't know anything about it. It will ask you if you want to continue. Type yes and press enter.
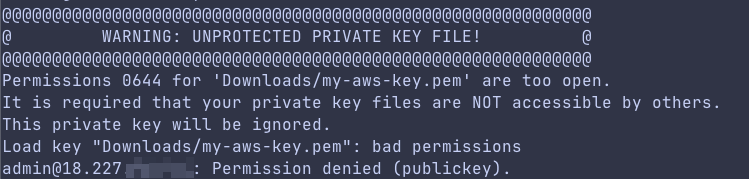
If you just download the .pem file and try to use it as is, chances are the file permissions are too open. Again, everything you need to connect to your instance is this one file. You don't even need a password. So, ssh wants to make sure this file is only accessible by you. Let's fix that:
Type chmod 400 <path_to_your_pem_file> and try again. For me, it's chmod 400 Downloads/my-aws-key.pem because my .pem file was saved to Downloads under the name my-aws-key.pem. Yours might be different. After that, try ssh admin@IP -i <path_to_your_pem_file> again (for me that's ssh admin@18.227.XXX.XXX -i Downloads/my-aws-key.pem)
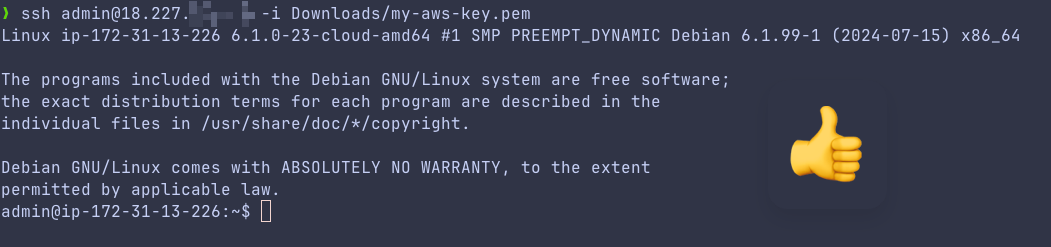
Damn! We made it! We ssh'd into our instance! Woohoo! Let's just do a quick system update before we move on. On the terminal, type the following:
sudo apt update and, after that, sudo apt upgrade. APT might ask you about modified configuration files, so just "Keep the local version currently installed", and wait for the command to finish running.
Jeez. All right! That was a lot, but we have a Linux server running on AWS! Honestly, this looks more complicated than it really is. It's just a matter of practice. All we've done was create a virtual machine from a Debian image, generate an ssh key, deploy the Debian virtual machine, and connect to it via ssh. Let's install Podman now. Pure Podman. No graphical user interface.
Go back to your ssh session, and type the following command:
sudo apt -y install podman and press enter. Wait for it to finish installing, and let's try and run that same 13ft. Ladder container. Type the following into your ssh session:
sudo podman run --name ladder -dt -p 80:5000/tcp ghcr.io/wasi-master/13ft:latest
If everything went according to plan, you can open a browser and go to http://<your_instance_IP>. In my particular case that's http://18.227.XXX.XXX, so change that to the IP address of your instance. Please note that we are using HTTP here, and not HTTPS. We'll fix that in a future episode. You should be greeted with a familiar screen:
Nice! Now we have 13ft. Ladder running on someone else's computer! What a job well done! We don't want this thing out in the open, though. Let us stop this instance for now. Go to your AWS dashboard, click "Instances" (number 1), then click on the instance ID (number 2):
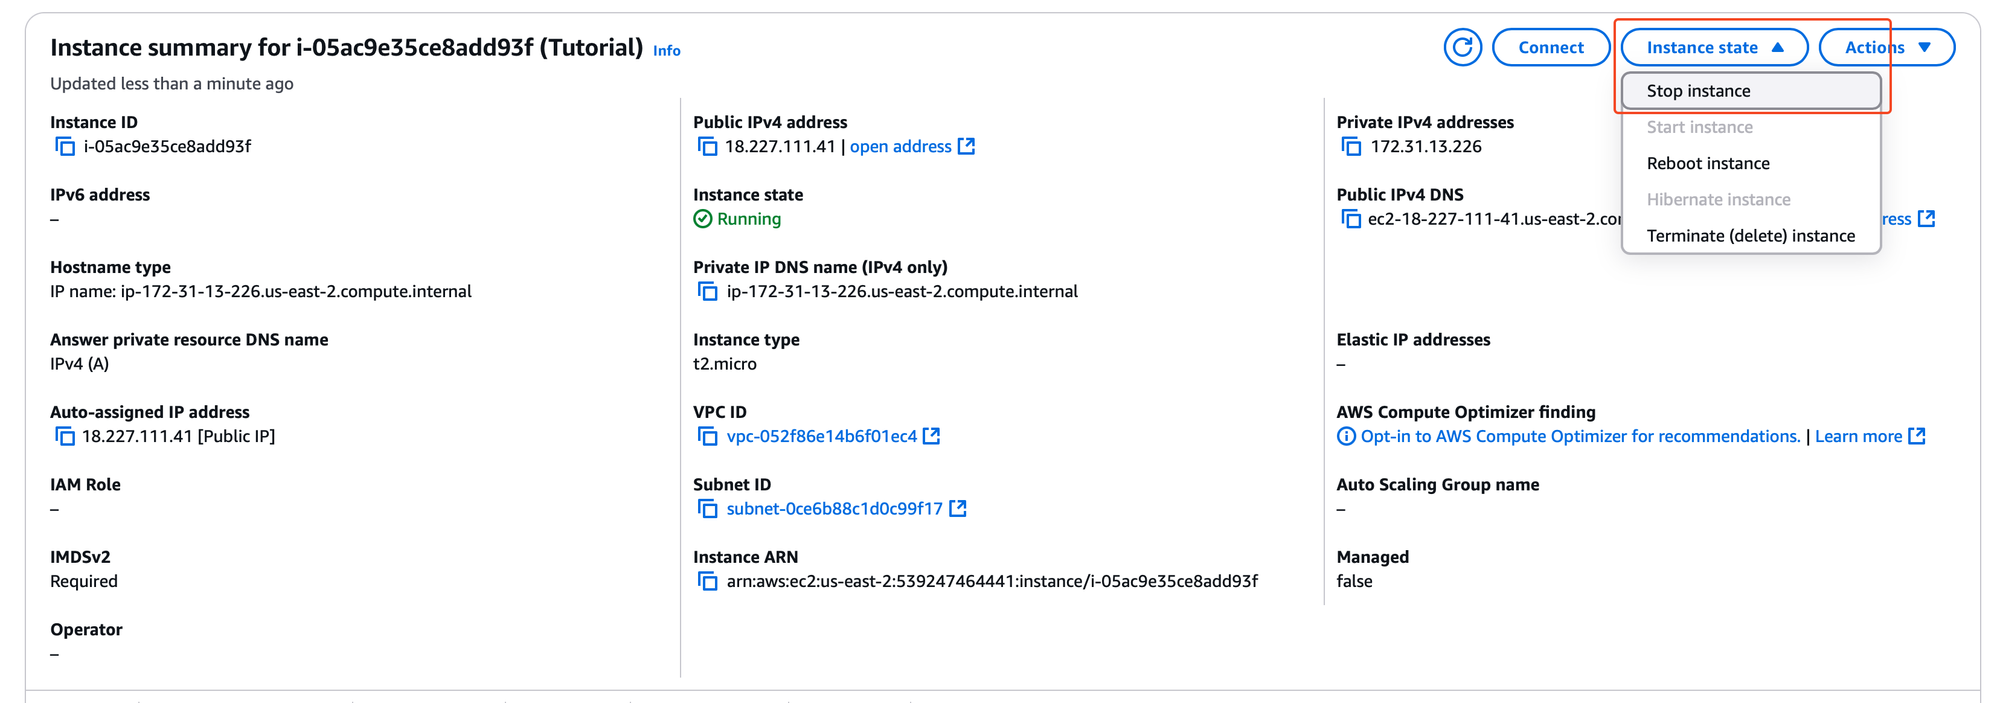
Next, click "Instance state" to expand the menu, and click "Stop instance":
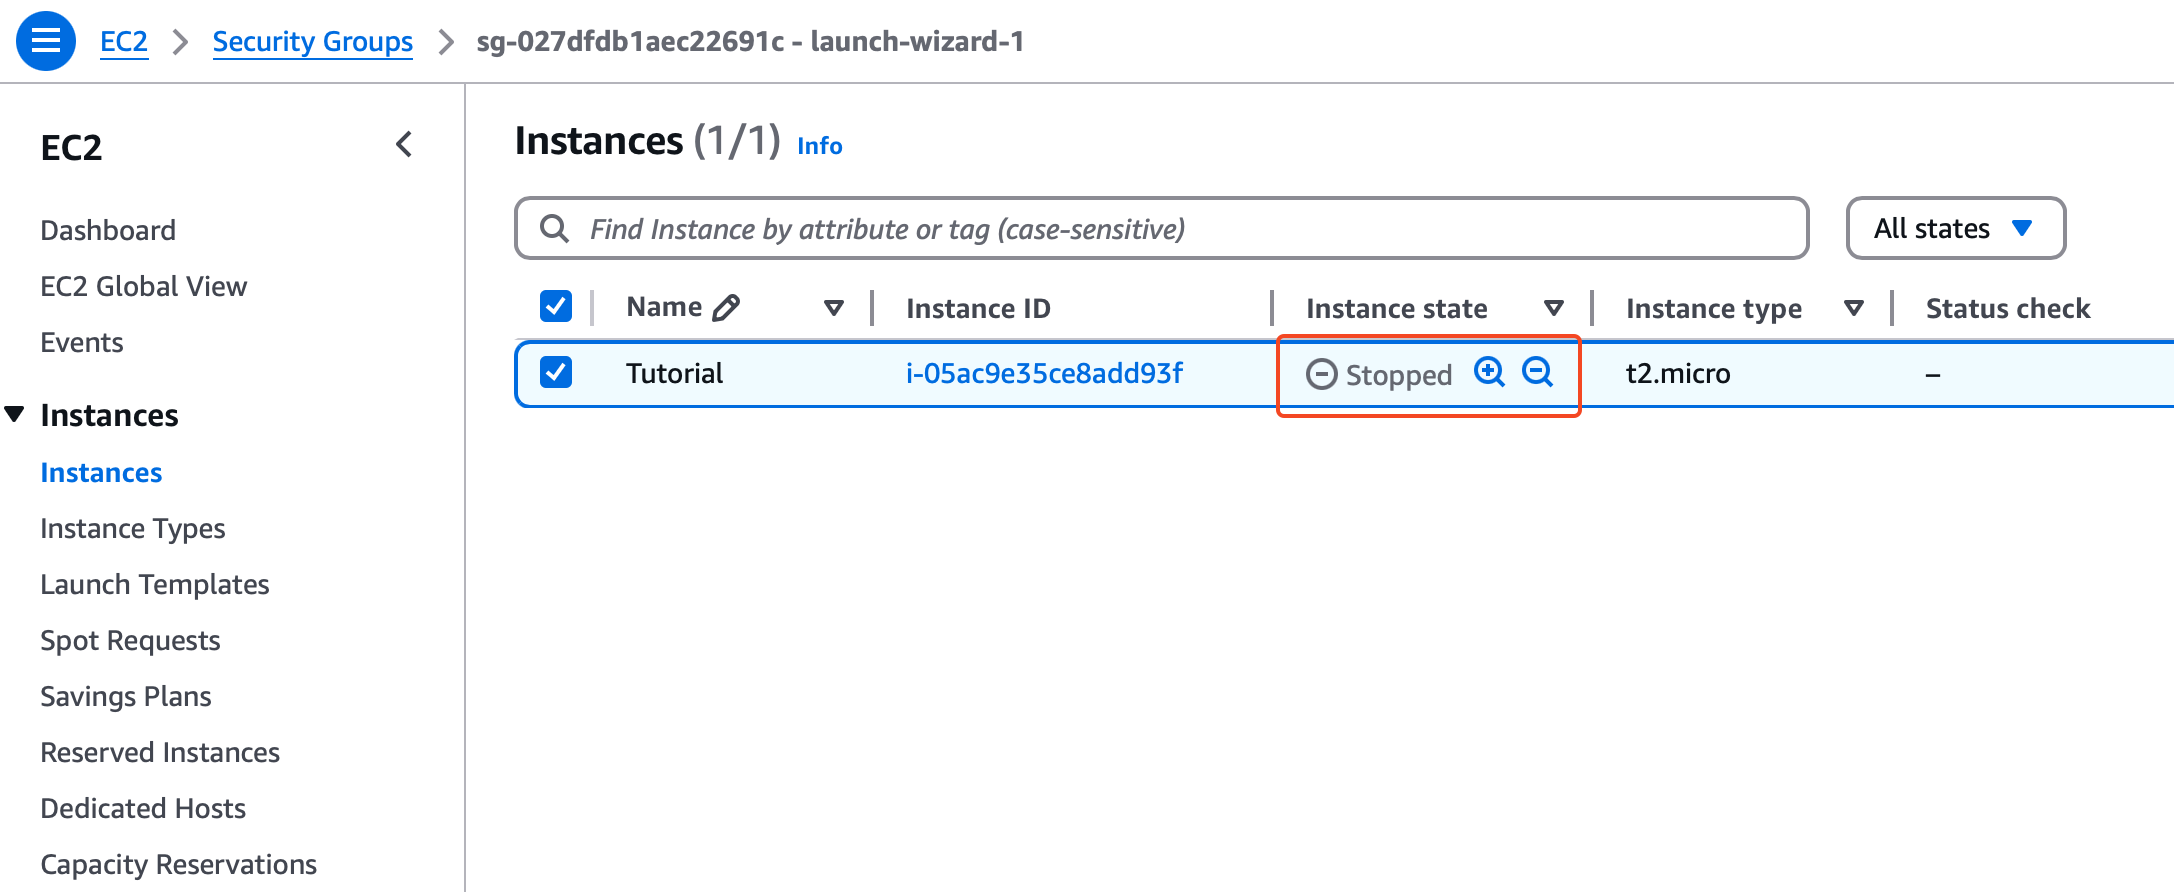
Wait a little bit, and make sure your instance is indeed stopped:
Dang. That was intense, but we did it! We got a container running on our local machine and on AWS! Frankly, that's some pretty advanced stuff. The vast majority of computer enjoyers will never do something like this. You are now part of the club. Welcome to the show! Next, we'll breathe life into that hardware we've got from part II.
Once again: if you're lost, join our Discord and we'll do our best to help you out. Found this useful? Consider becoming a paying member. Too broke? It's all good. The content is exactly the same, and we won't lock anything behind the paywall. You can also swing by our store and buy some merch. Thanks for reading, and for your continued support of....


