Host Your Stuff - Part I
This is part 1 of the 32x33 Institute's Host Your Stuff series. In this post, we figure out how to domain name.


Glad to see you've decided to at least consider setting up a home server and/or host some of your services! Welcome to the club, friend! This journey can be many things, including expensive, frustrating, unnerving, and annoying. But it's also fun, educational, fulfilling, and good for you.
The thing with hosting your own stuff at home or in someone else's computer is that you take back control. For better or worse. It is very empowering and liberating, but it's also something that demands attention and care, just like anything in life that's important. It's certainly more work than just signing up for a service provided by some corporation that wants to extract from you everything that can be monetized: your data, your attention, your wallet. But it's also extremely rewarding to see the thing you worked on come to life. And it's rewarding times ten to see people you like using it. It will piss you off sometimes, but the sense of accomplishment that comes with it is a high that you will hopefully keep chasing.
How do we start, though? Well, we start by building a foundation. As mentioned, we have two "tracks": the home servers and the cloud services. The former is about things you run at home that won't (at least for now) be accessible to the general public. It's for you and your household. The latter is stuff you host somewhere else (typically a virtual machine from a cloud provider) that may be accessible to the general public if you so choose.
Regardless of the track, and for various reasons, you want a domain name. Let's do that. You can probably get away without a domain name for your home server, but having one is a major quality of life improvement for reasons that will become obvious as we go (hint: it's better to type https://blog.cranky.industries than having to type https://192.168.1.23:3007/blog/admin only to get a certificate error from your browser).
Crankysec Industries's (that's the mega corporate overlord in charge of crankysec.com, 32x33, and sprawl.club) registrar of choice is Porkbun, so we'll use that as an example. If you have another preference, and know what to do, by all means do that. If you're unfamiliar, Porkbun is a fair option.
.ar. For that, you'll need to go to the people who are authorized to sell .ar domains in Argentina. Pick anything else from the, quite frankly, enormous list of options. Those are called top-level domains, by the way. Also known as TLDs. There's a lot of those.Pick one. Any one. A silly one. The cheapest. In our example, we'll go with the domain cranky.industries.

There's nothing here that requires a lot of hand-holding: find a domain name you like, add to cart, checkout, done. Porkbun will ask you to create an account, so do that, too.
When that's all done, you'll see a page like this with your brand new domain!
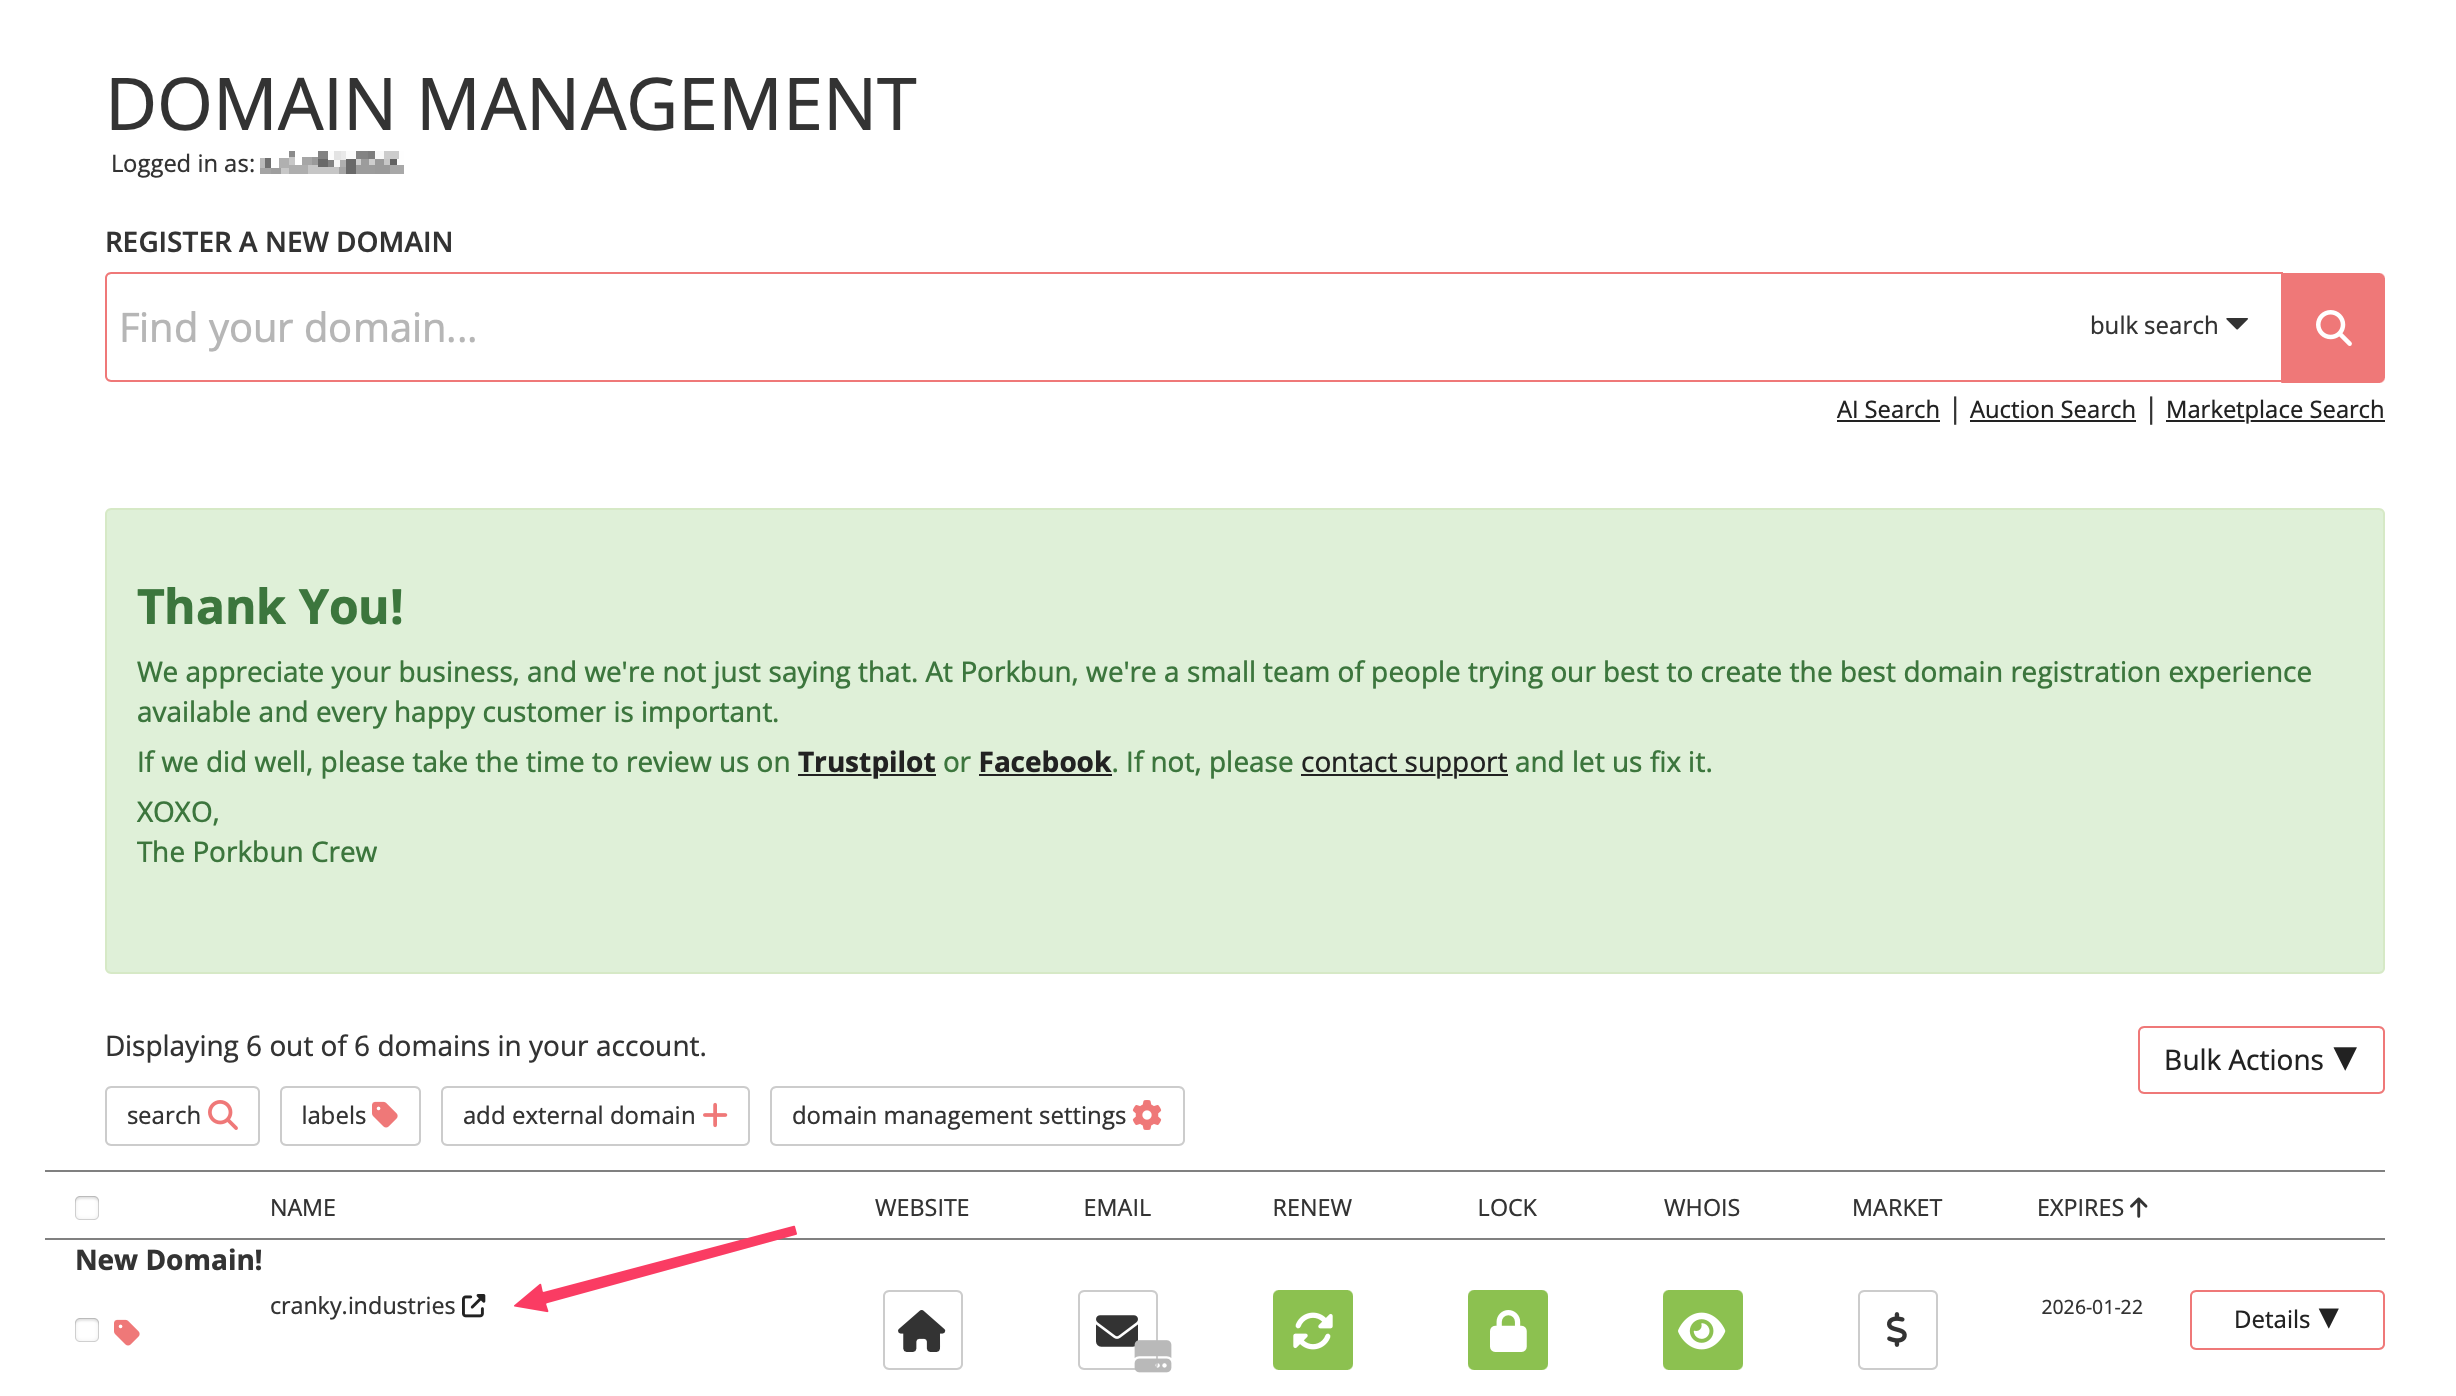
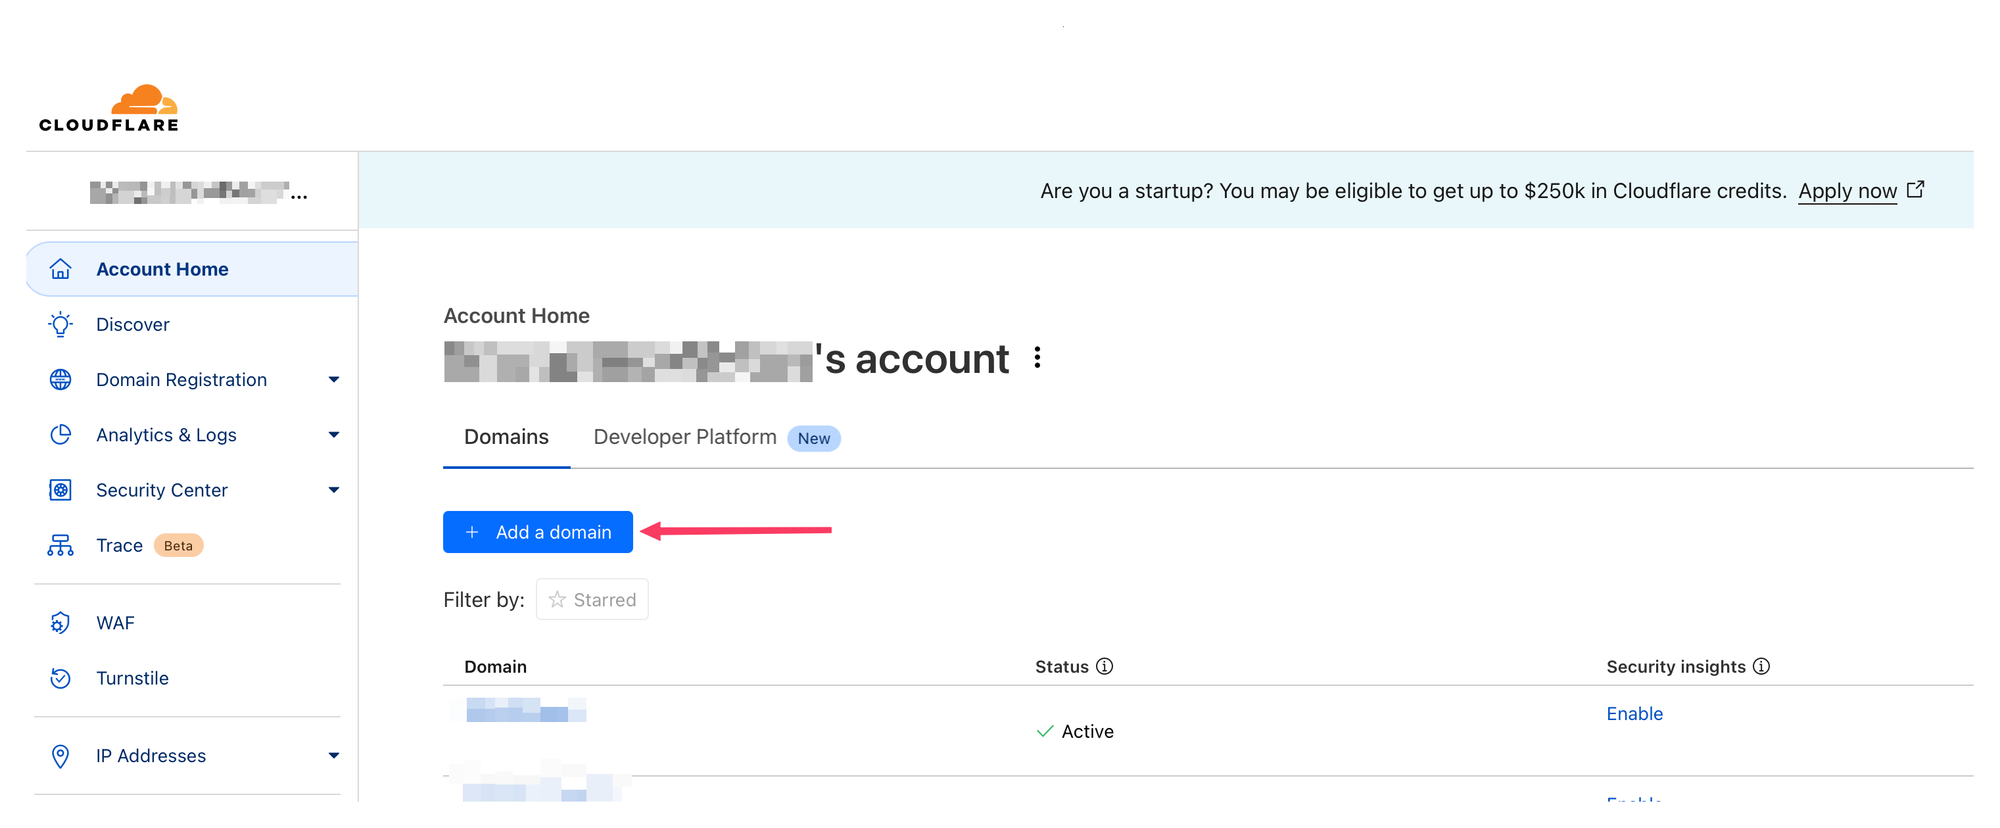
Look upon your works, ye mighty. Do not despair. We'll get back to this very shortly. That's because we need to change some stuff first. To do that, we'll turn to Cloudflare. Love it or hate it, using it for this particular purpose will make our lives easier. Head over there and sign up. Log in, and, from your "Account home" click "Add a domain".
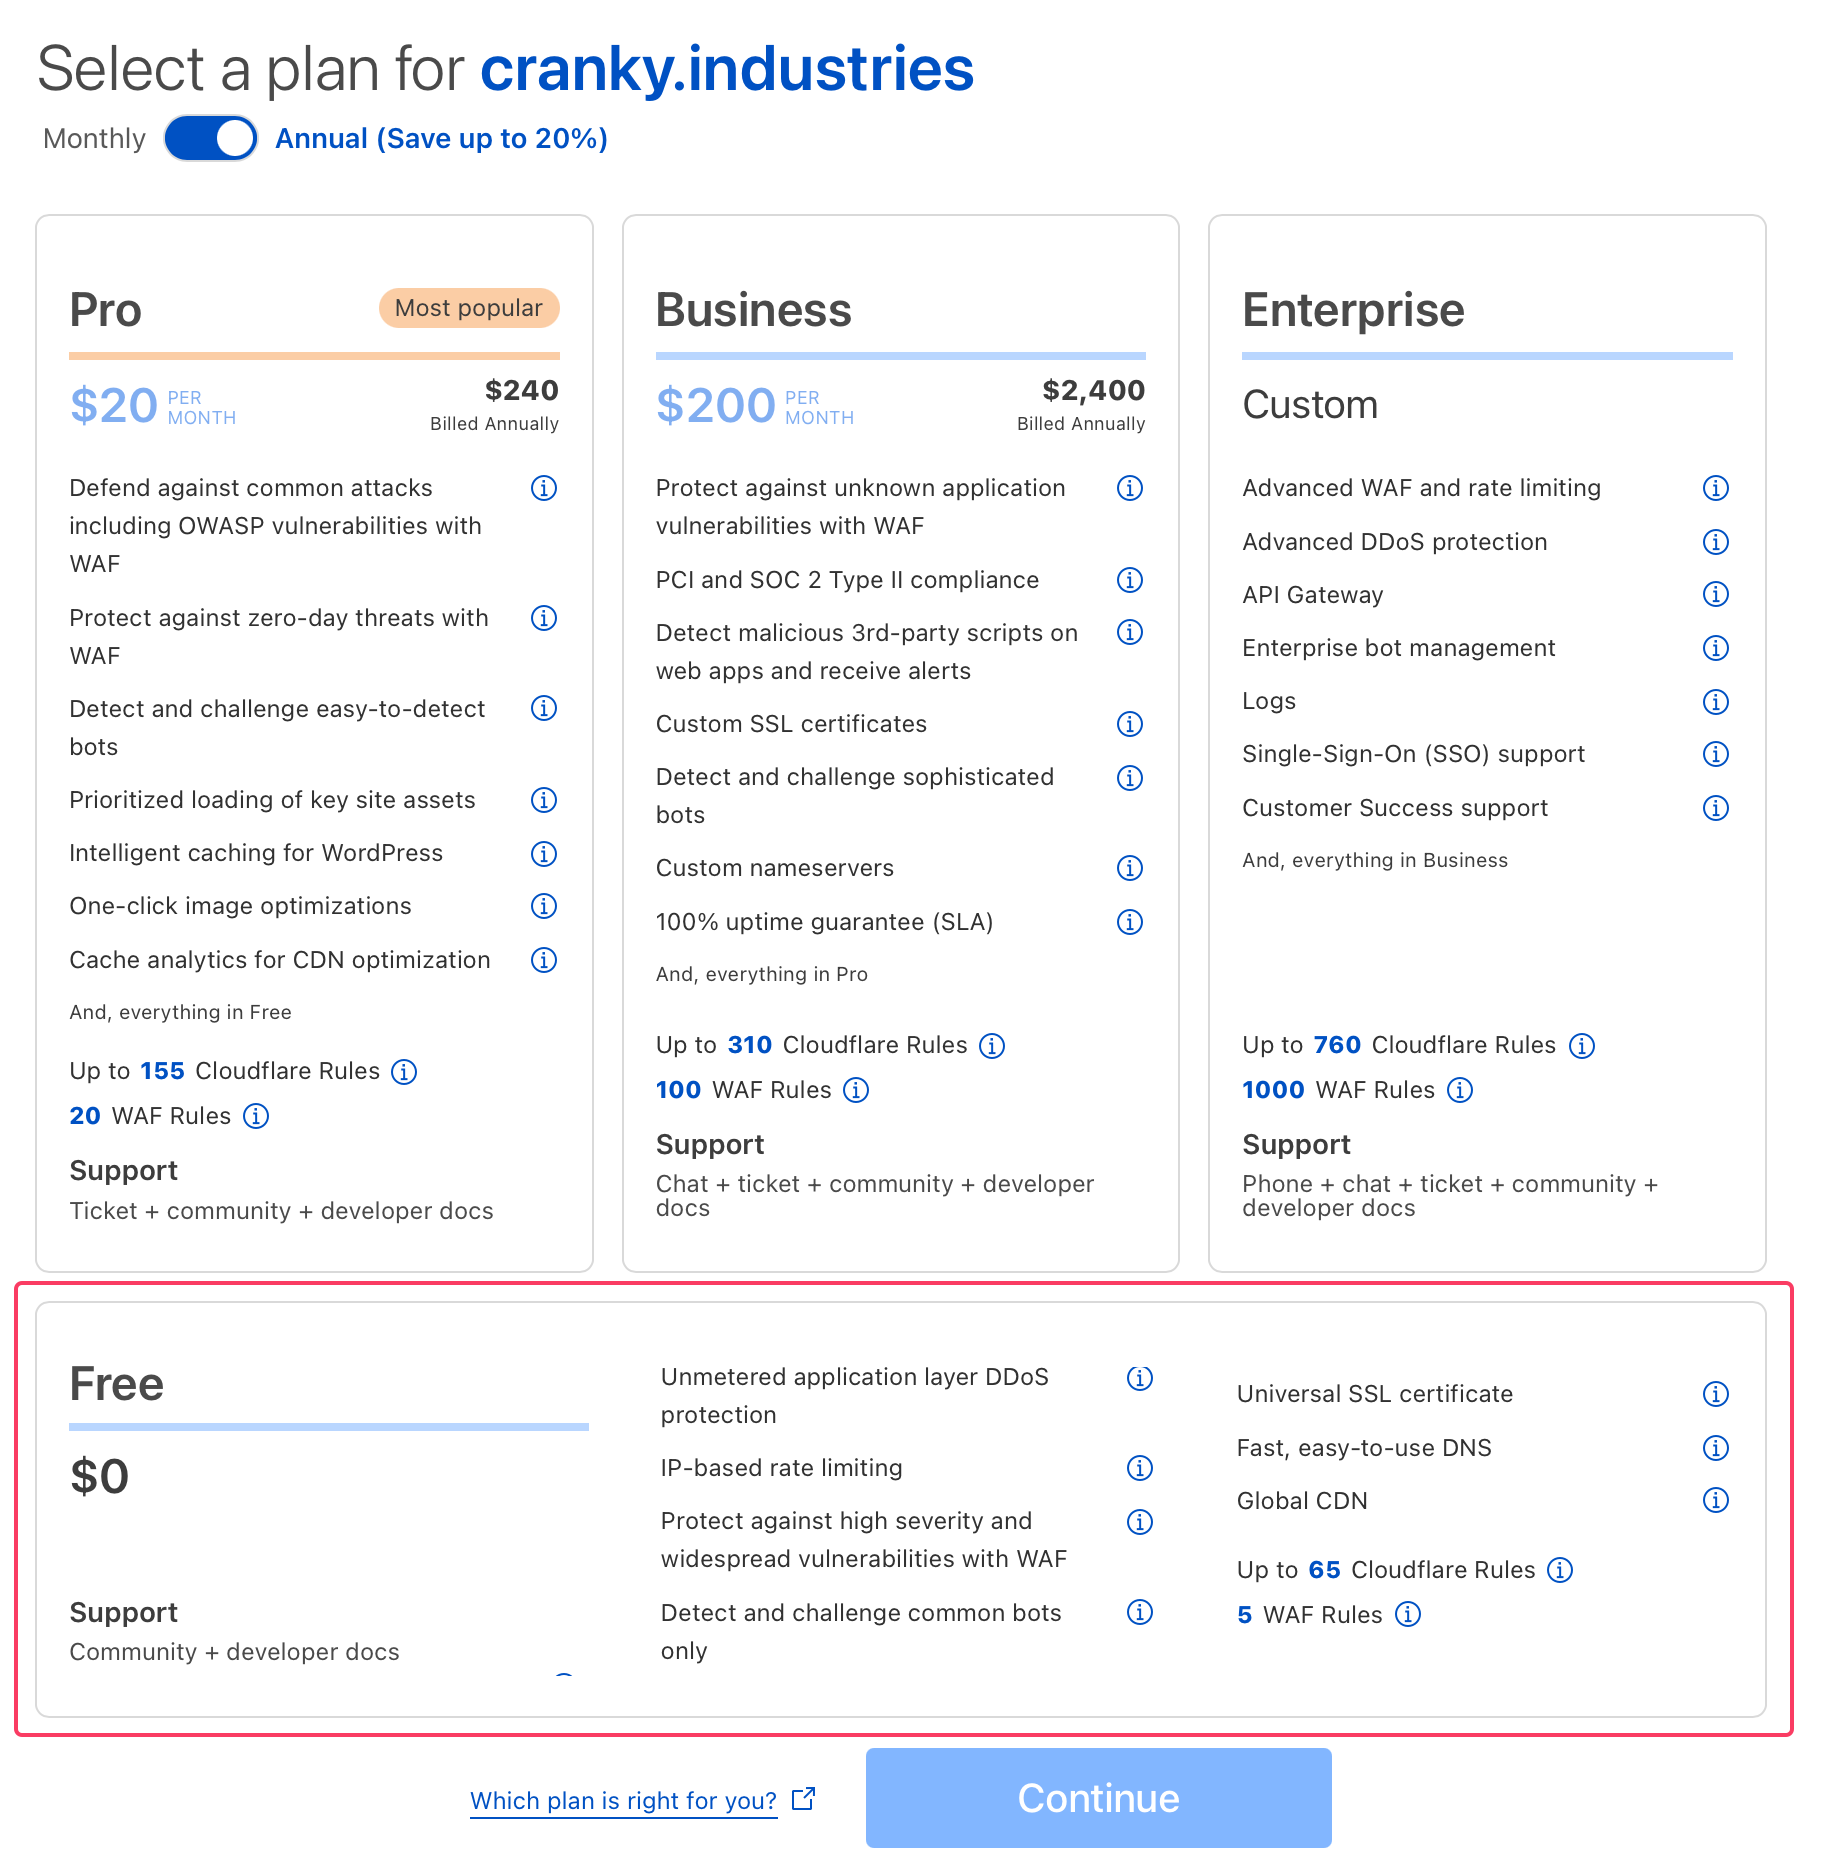
Enter your domain name, and select the "Quick scan for DNS records".
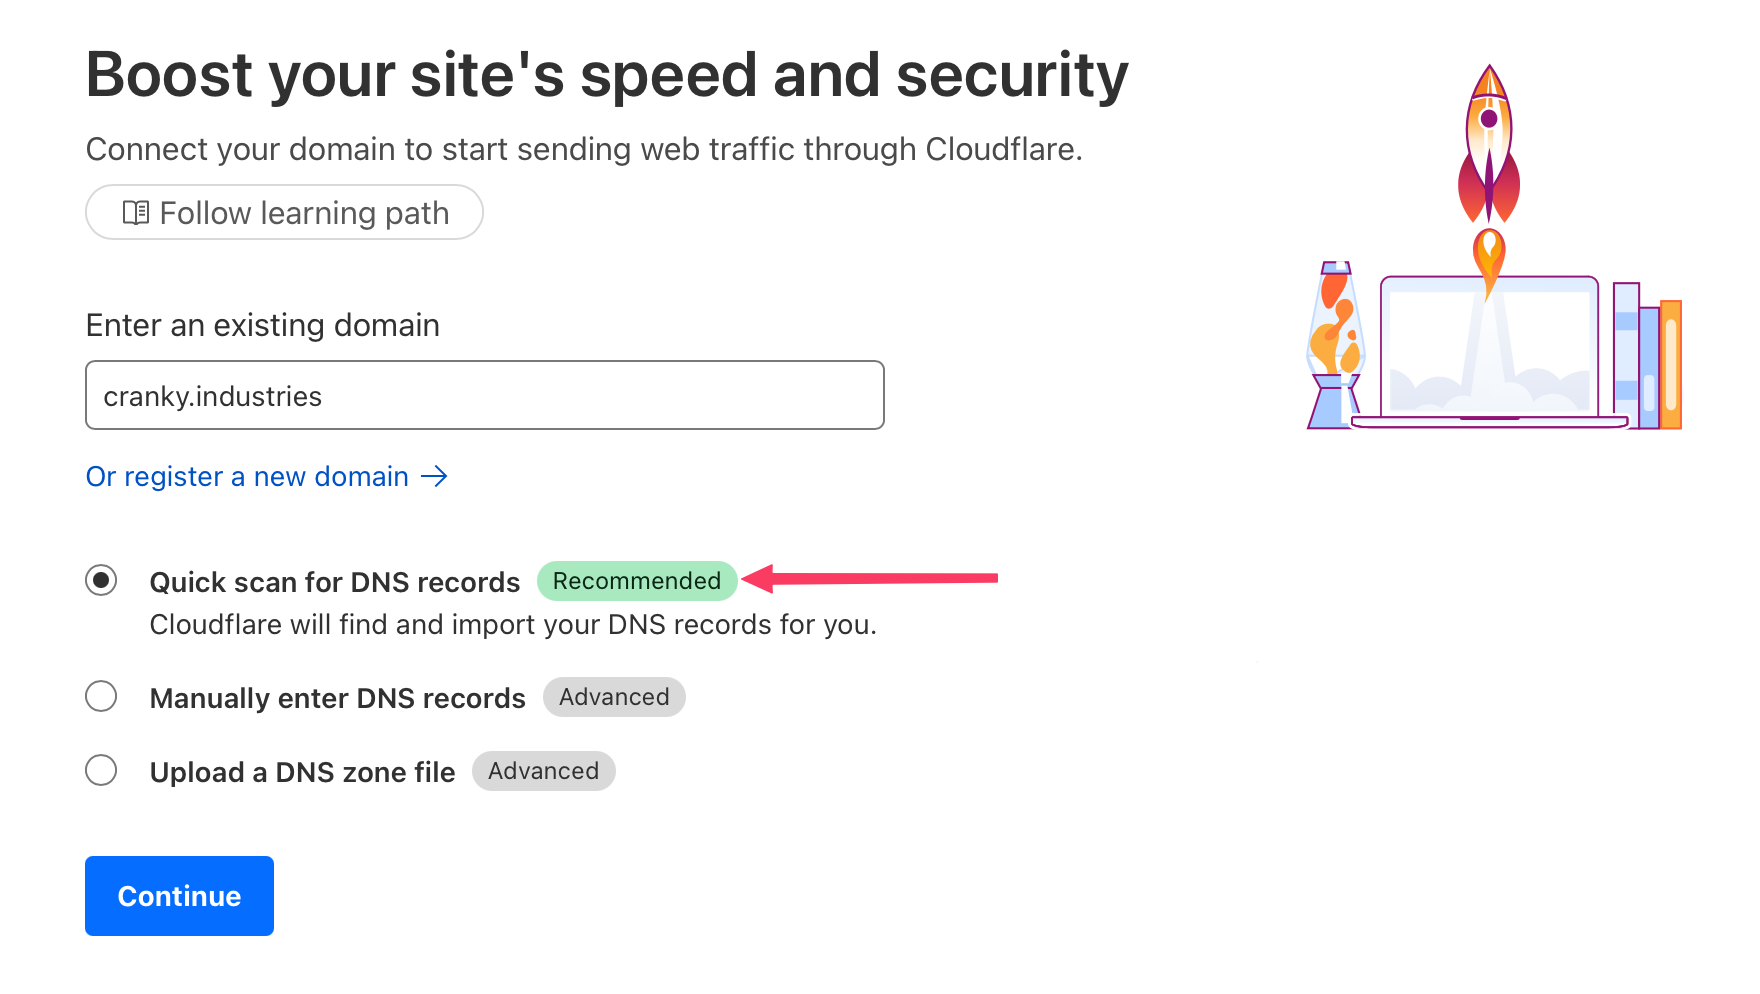
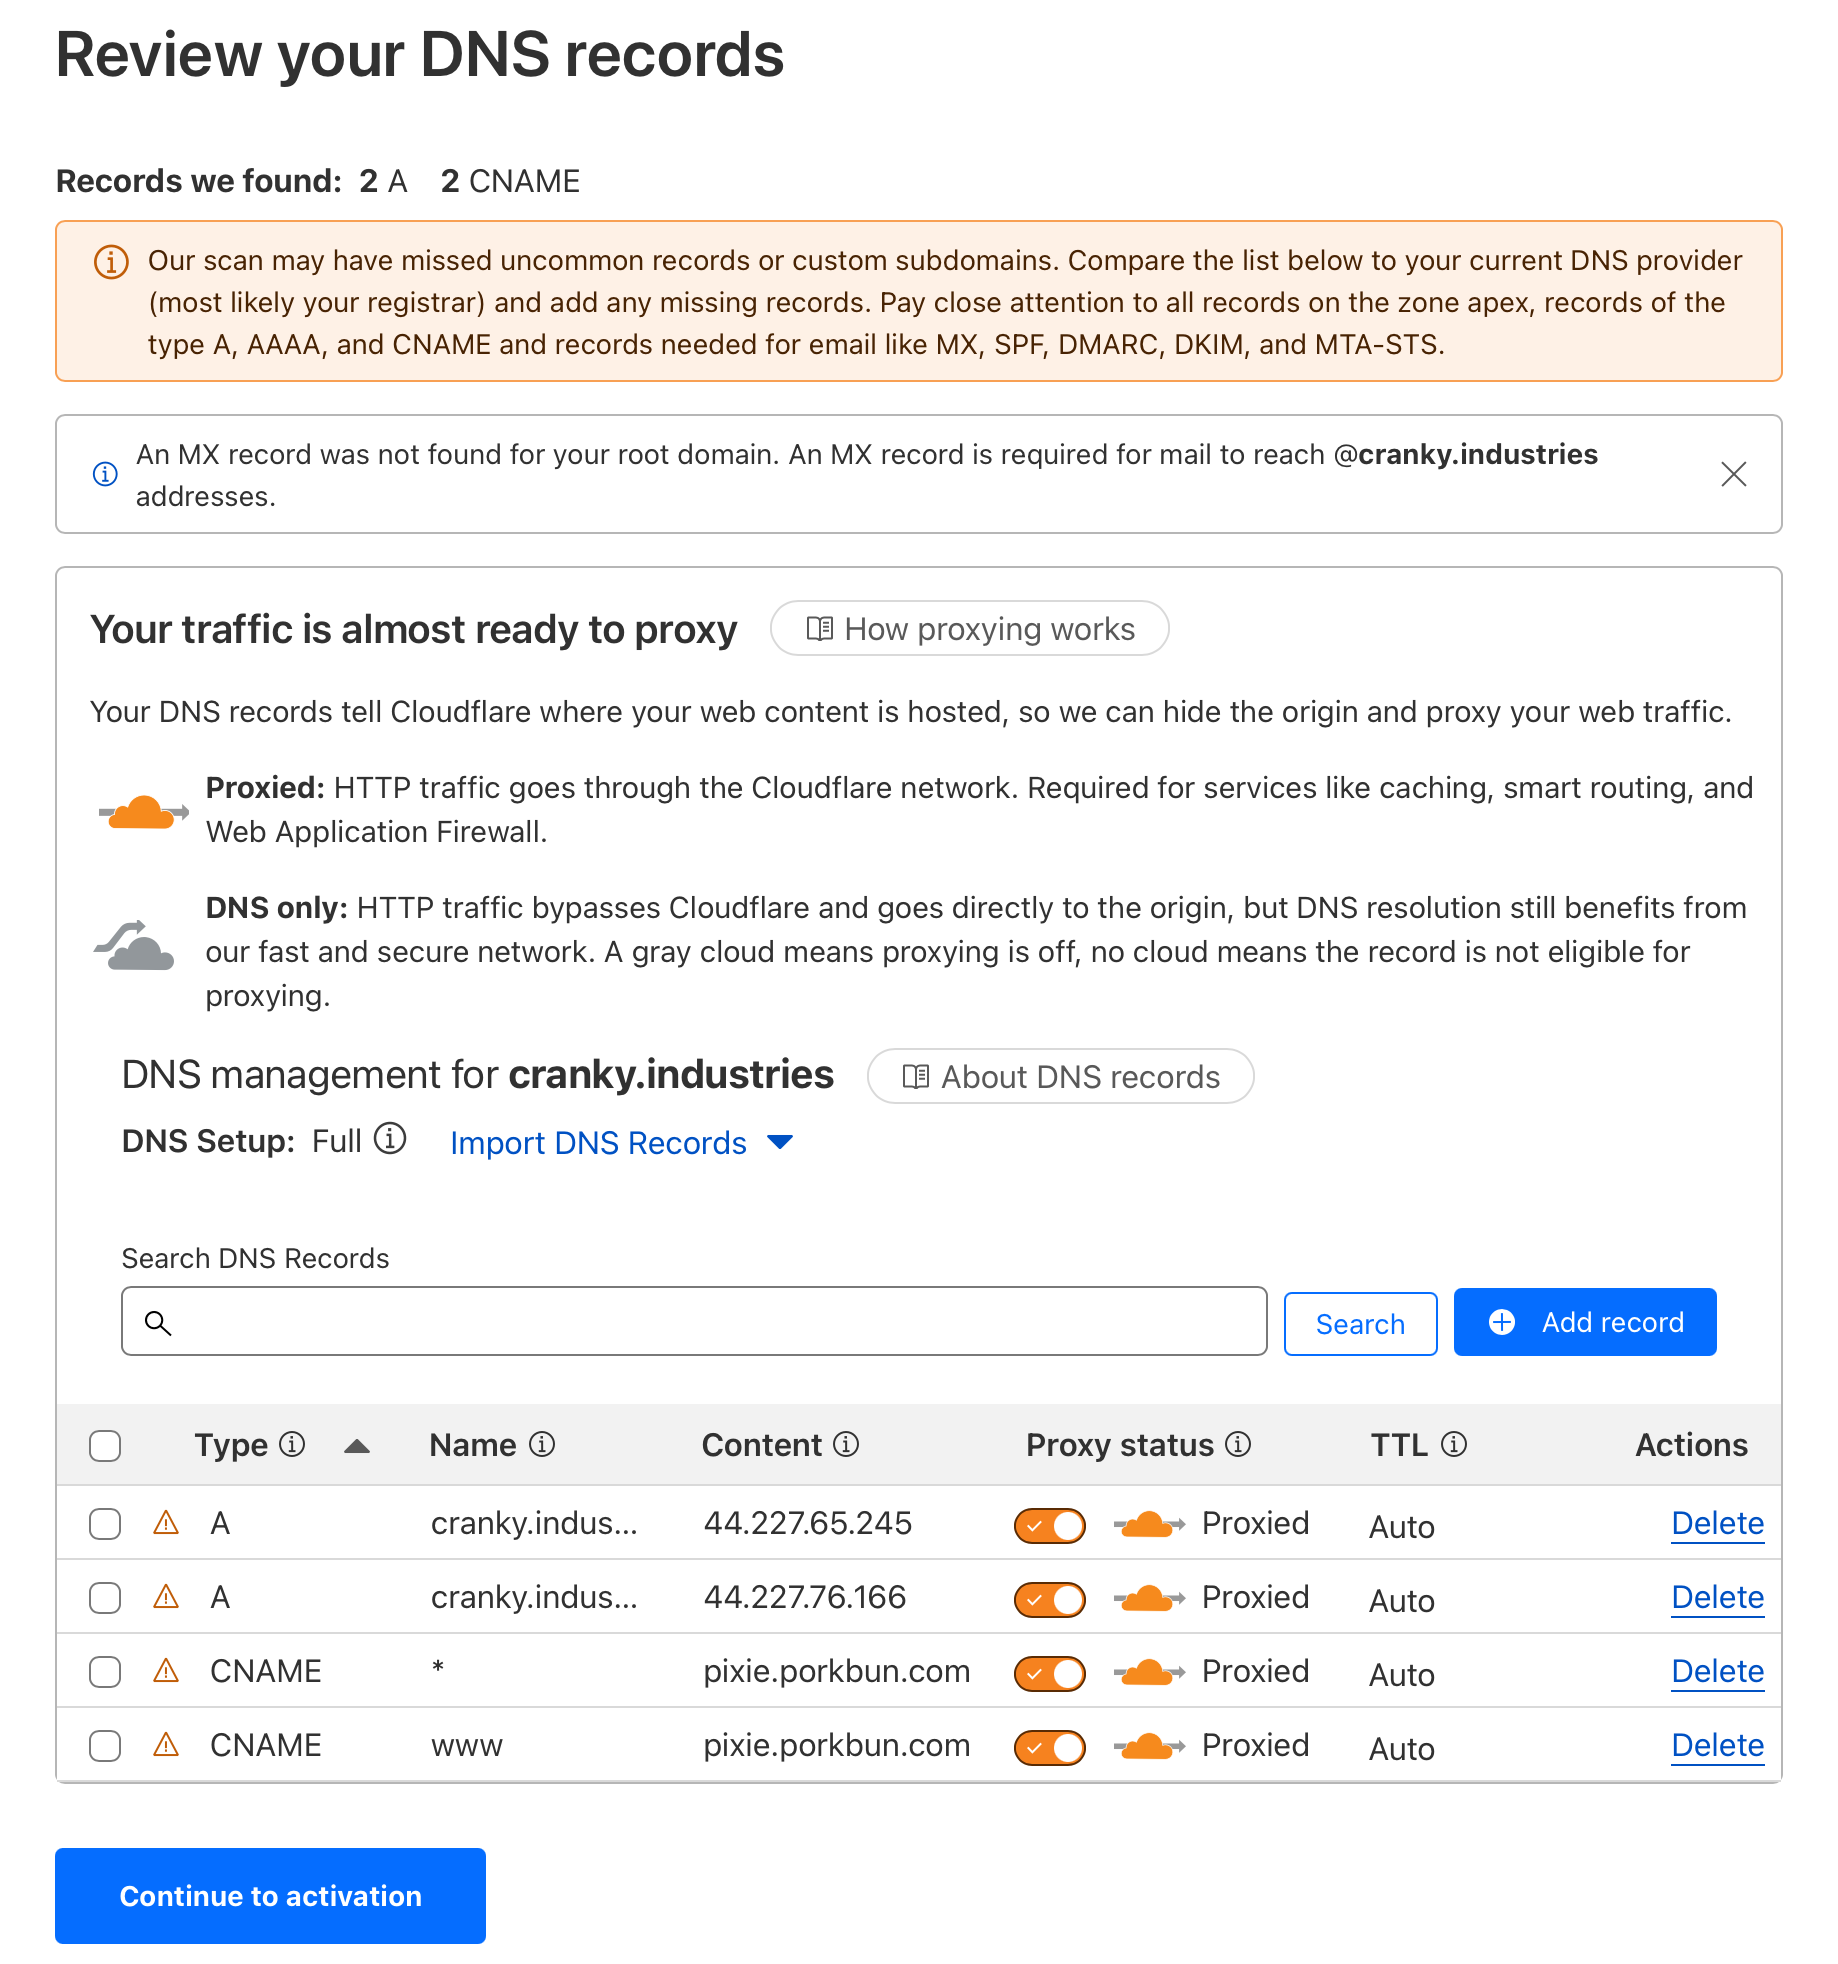
Select "Free" because we're on a budget here. Click "Continue", and you'll see that the current DNS configurations for your new domain are pointing to Porkbun. That's expected, but not what we want. We need to hand over control of the domain to Cloudflare.
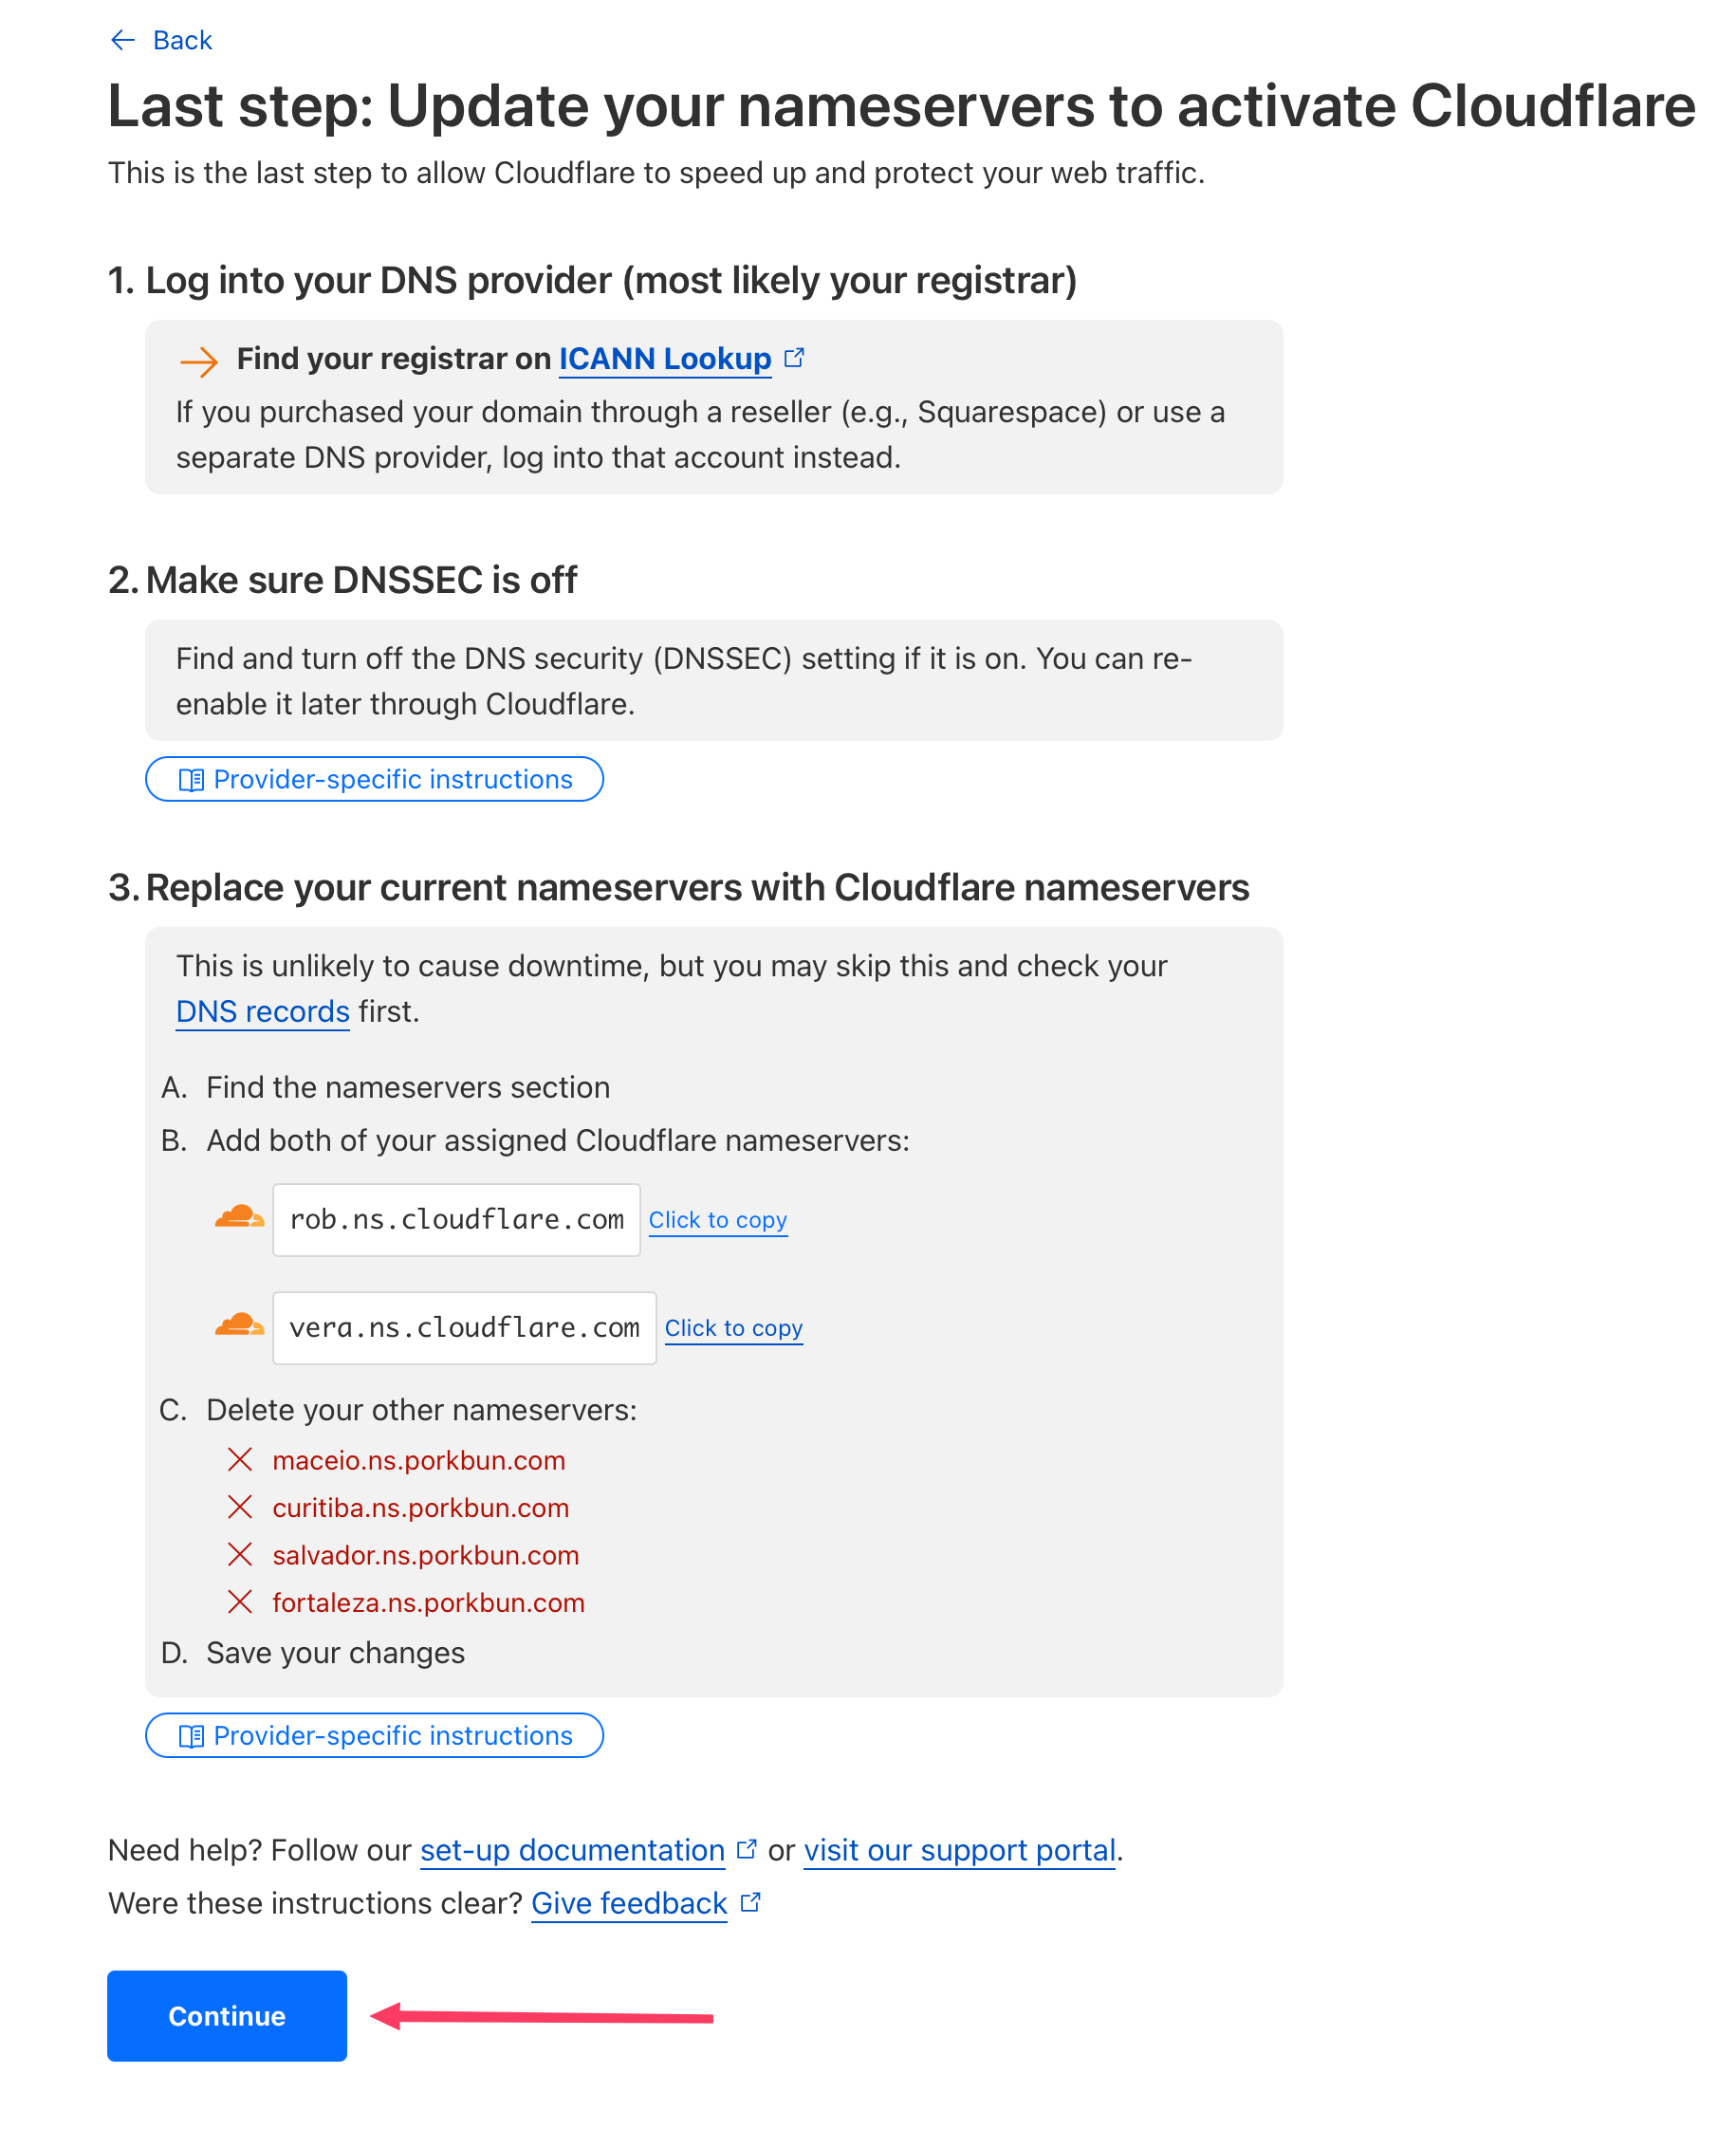
On this page, click on "Continue to activation", and Cloudflare will inform you what needs to be done. Keep this page open.
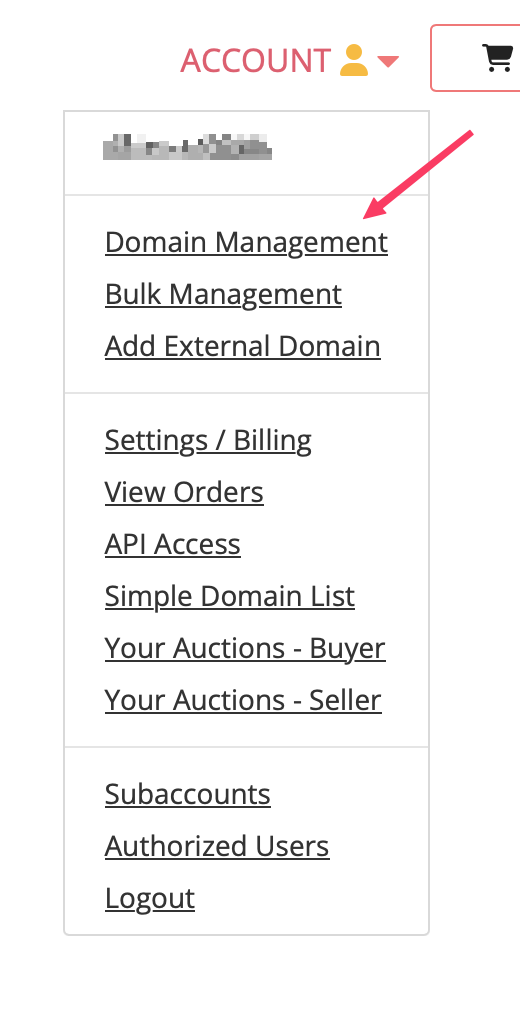
Go back to your Porkbun account, go to the domain management page (Account > Domain Management), and click "details"
From here, click on the little icon to the right of "Nameservers".
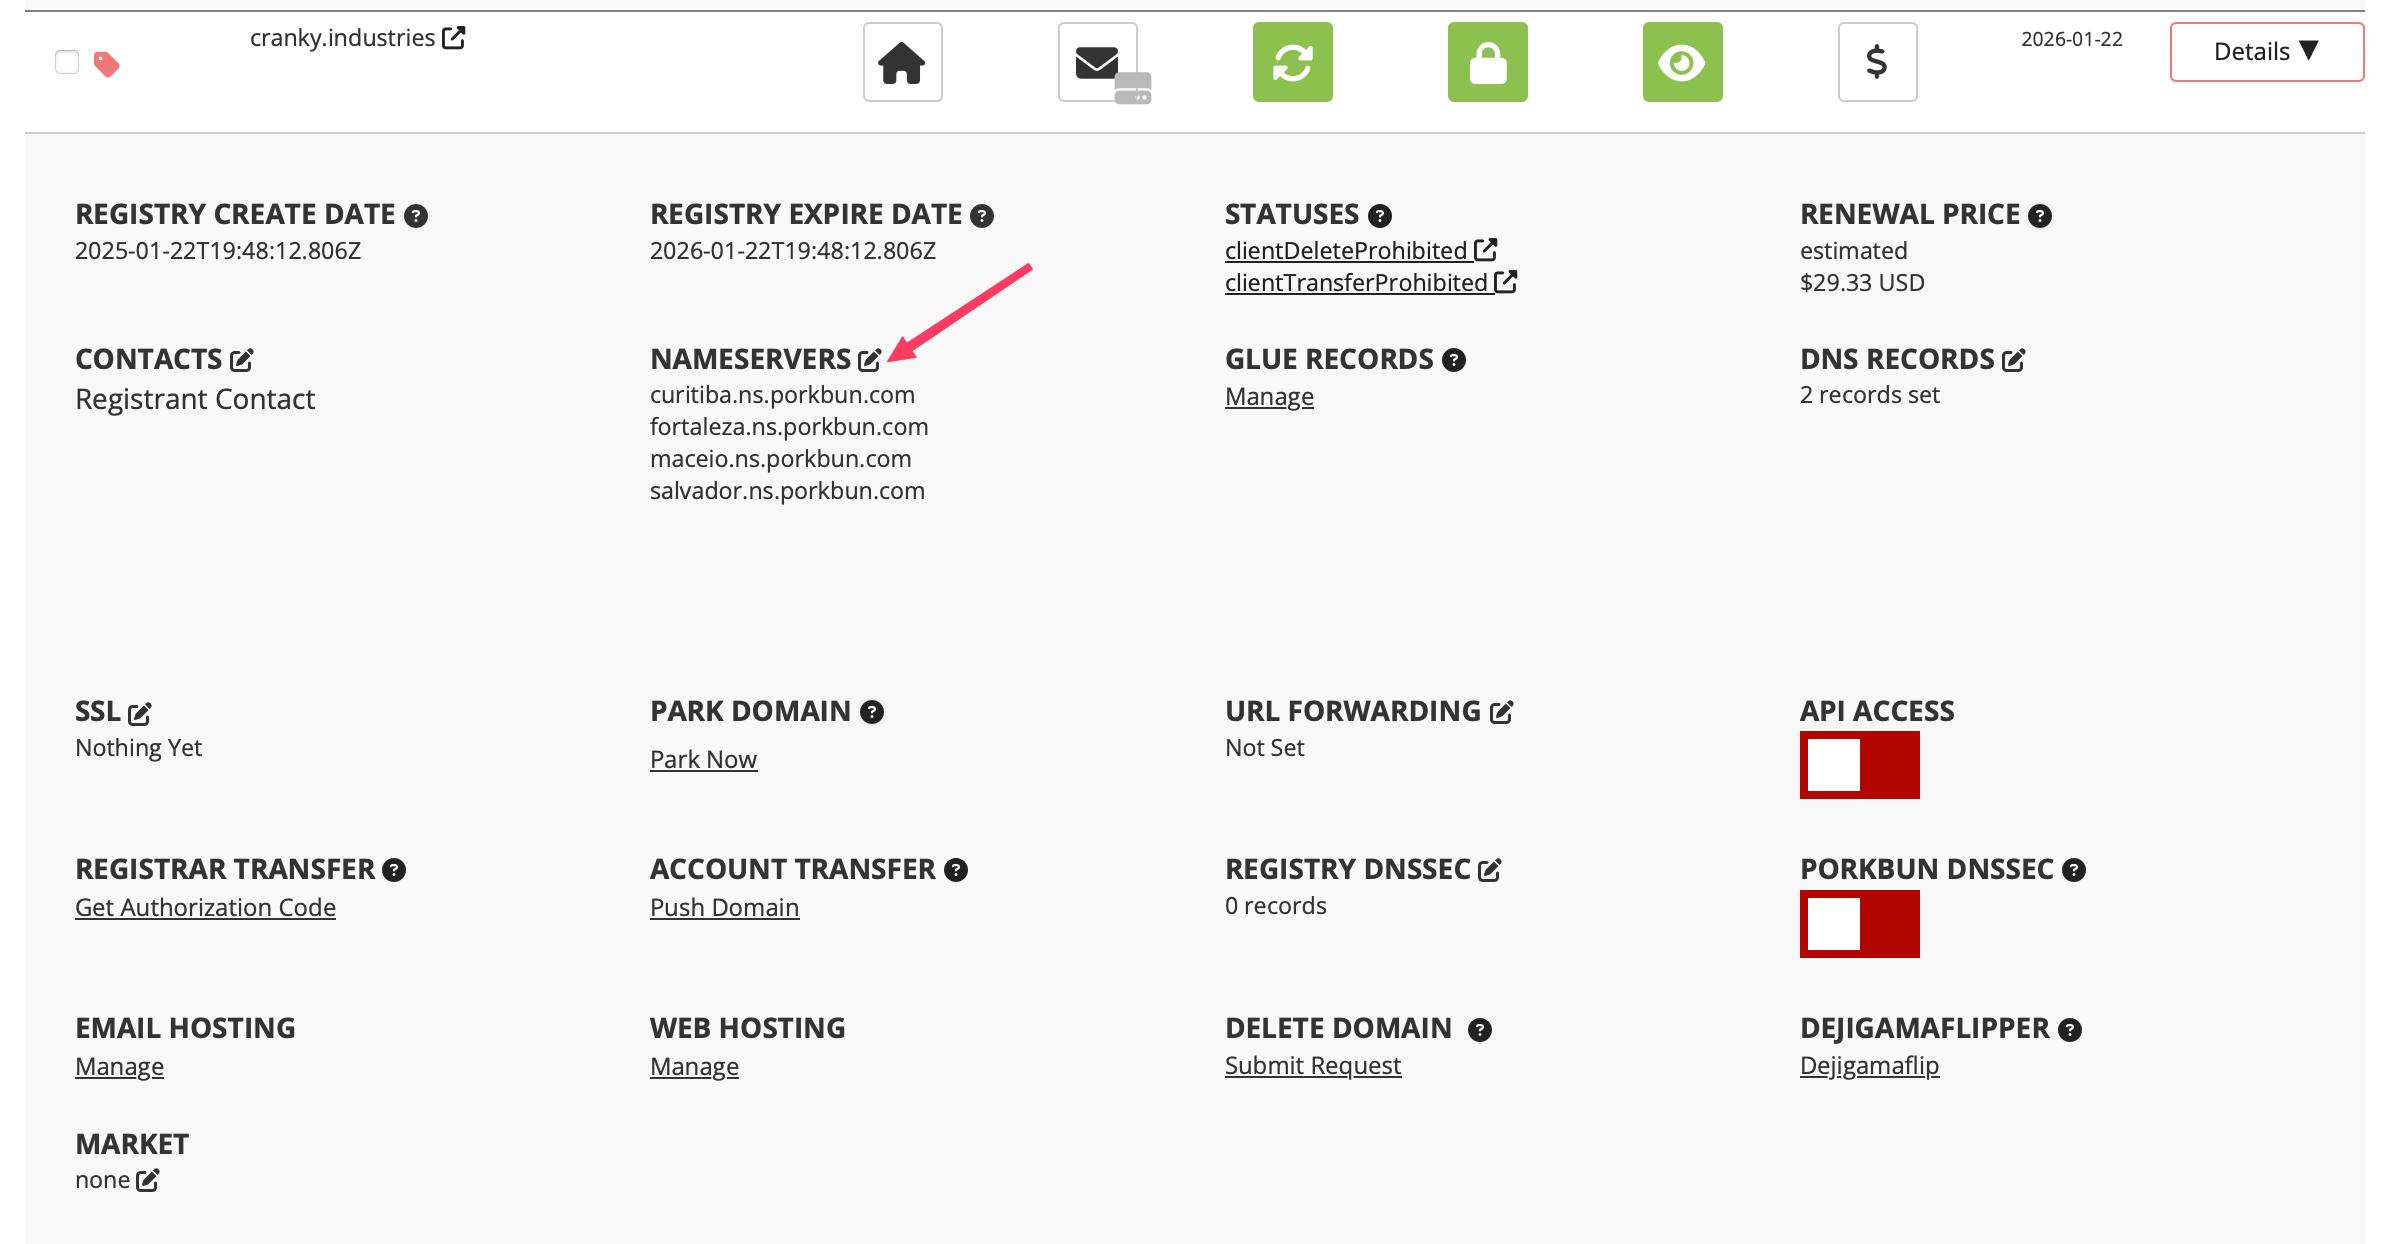
You should see something like this:
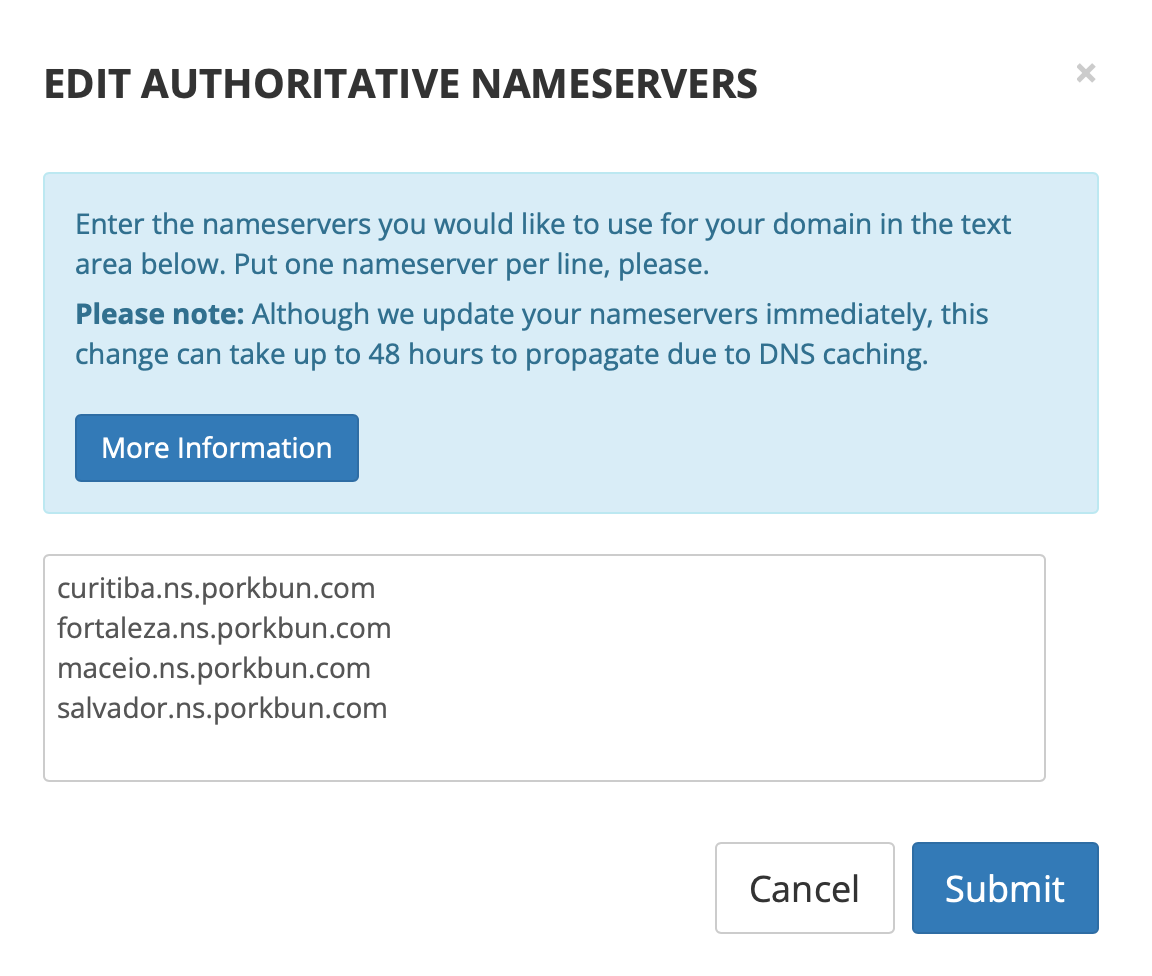
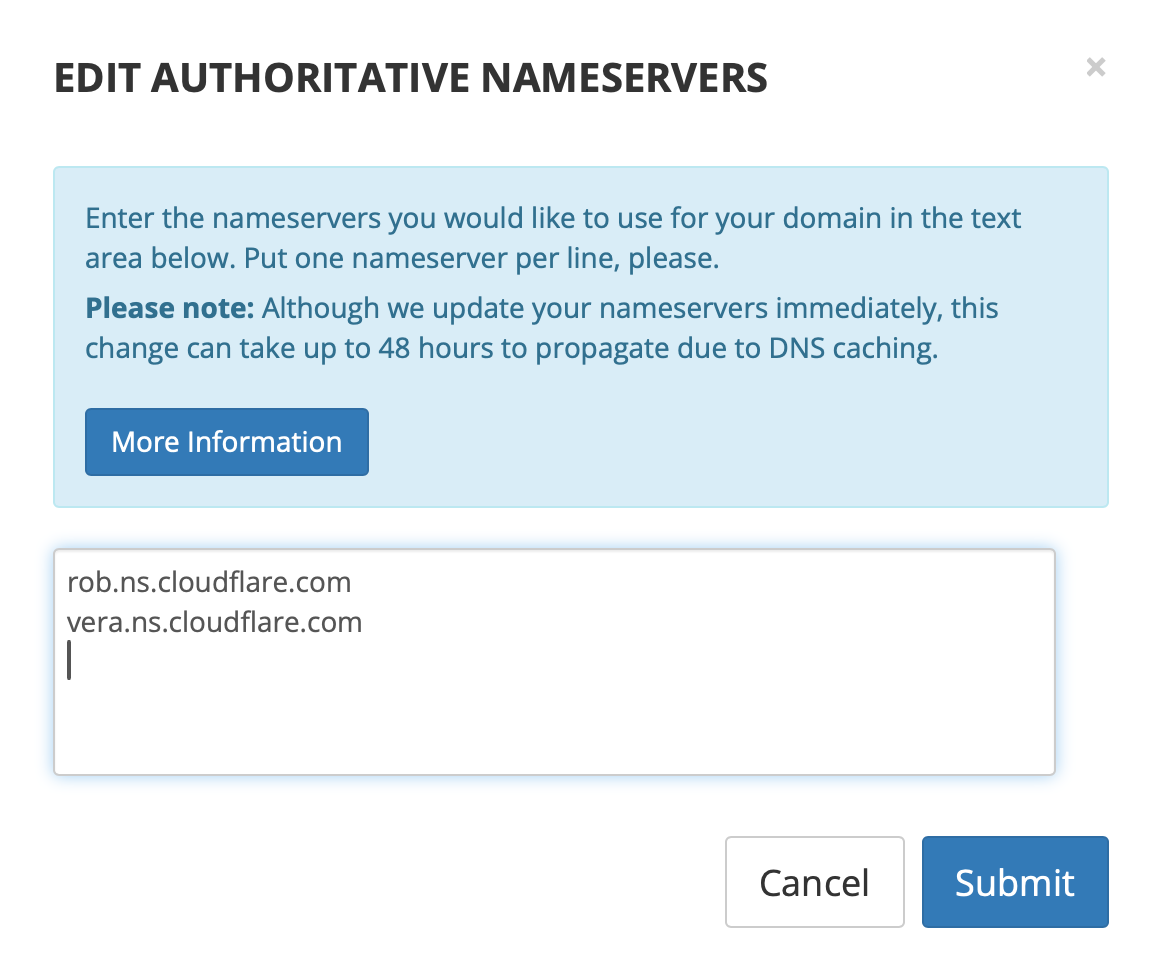
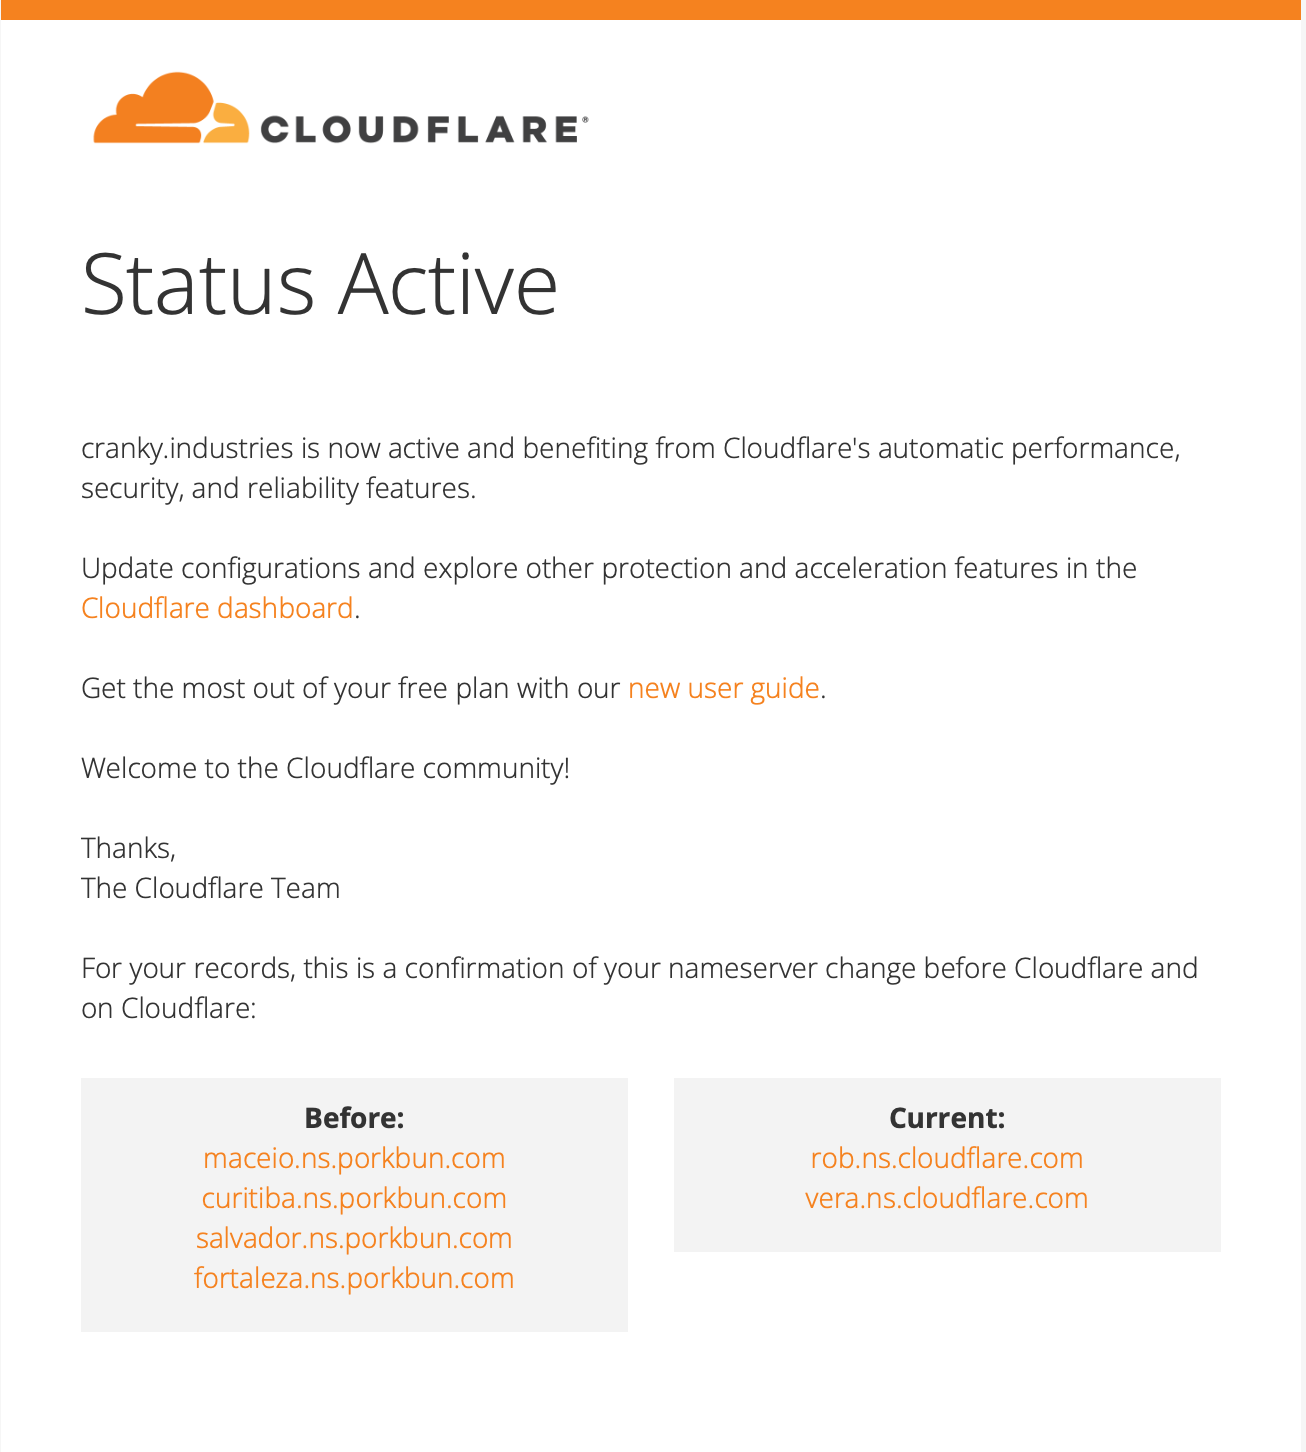
These are the Porkbun nameservers. Named after Brazilian cities, if you're curious. We want to replace those with Cloudflare's nameservers, effectively telling the internet that questions about our domain are to be answered by Cloudflare. Delete the default entries, enter rob.ns.cloudflare.com and vera.ns.cloudflare.com, hit Submit. It should look like this after the edits:
To recap, we need to delete:
maceio.ns.porkbun.comcuritiba.ns.porkbun.comsalvador.ns.porkbun.comfortaleza.ns.porkbun.com
And add:
rob.ns.cloudflare.comvera.ns.cloudflare.com
Head back the Cloudflare tab that you definitely kept open, and click "Continue".
Changing DNS records can take some time, but you can click on "Check nameservers now." Now we wait.
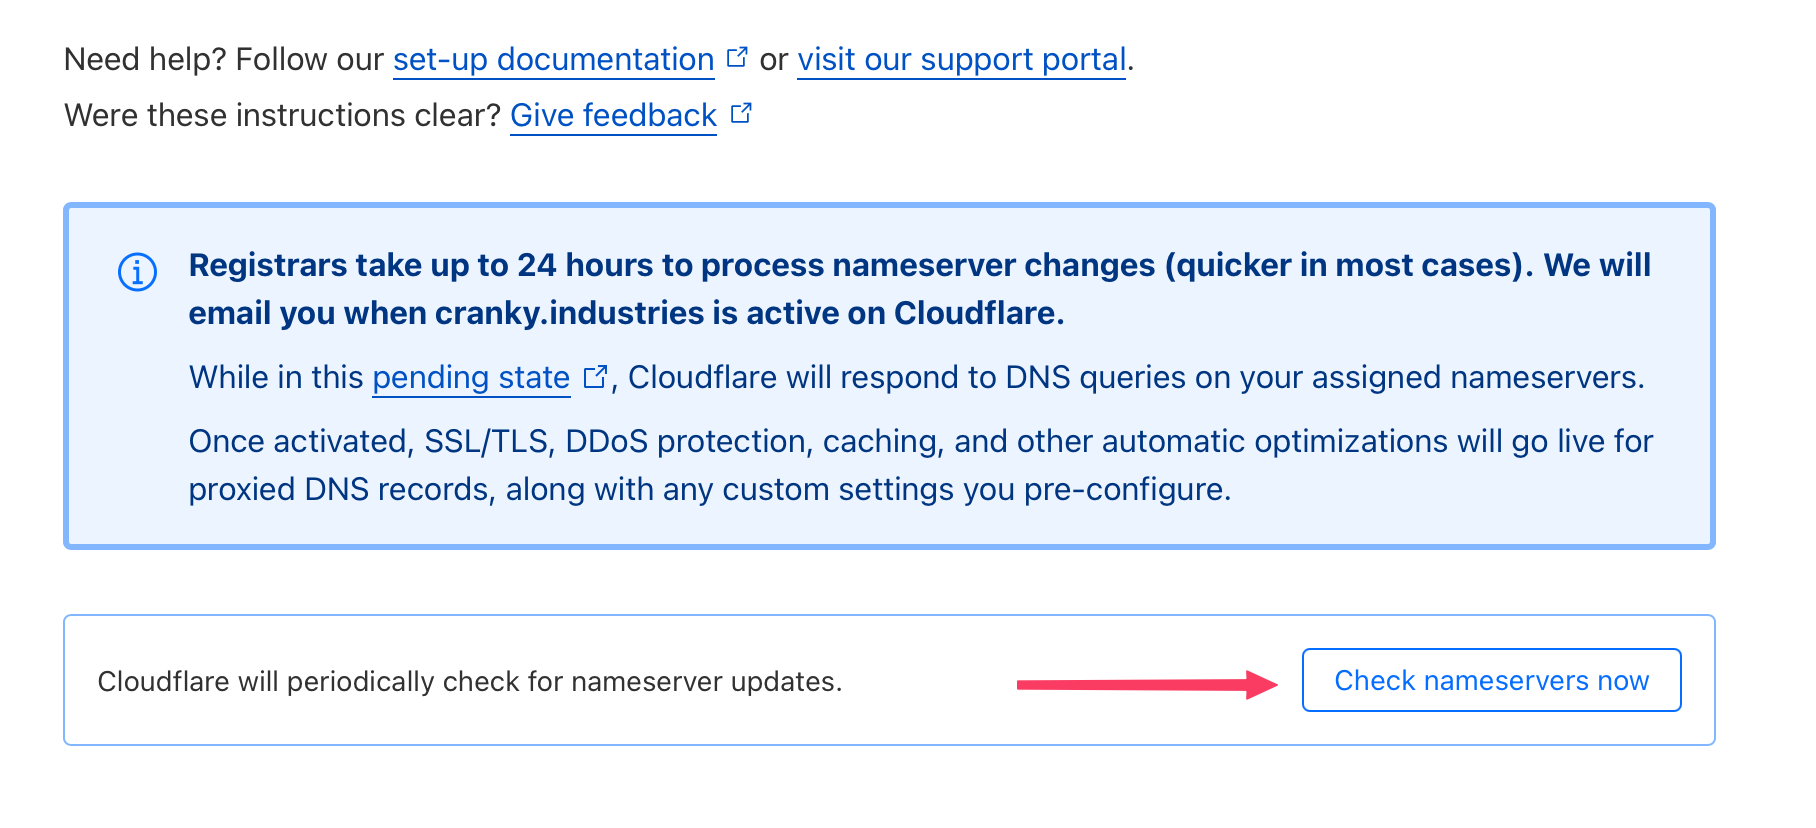
After a few minutes, you should receive an email from Cloudflare informing you that your domain is now managed by them, and that you're ready to roll.
Congratulations! You're one step closer to your home server and/or self-hosting empire. Truly, a job well done.
Stuck? Lost? Befuddled? Join our Discord server, and head to the self-hosting channel for help.
Next, we will find some computers to use. Stay tuned!


